Nutrition for Senior Rescue Dogs with No Teeth: A Complete Guide
Bringing a senior rescue dog into your home is a gift that unfolds with daily moments of companionship, trust, and shared adventures. For dogs who have lost their teeth, or were born without them, the challenge of eating can be daunting—far more than simply choosing a tasty treat. In their golden years, these dogs rely on foods that are easy to chew or swallow, nutritious, and aligned with any health conditions they may be developing. This guide provides practical, research-informed strategies to feed senior rescue dogs with no teeth so they can thrive, maintain muscle mass, stay hydrated, and enjoy meals again.
Understanding the Unique Needs of Edentulous Senior Dogs
When a dog has no teeth or has severely reduced dentition, the mouth is not the primary tool for breaking down food. Instead, chewing is replaced by more cautious licking or swallowing softer textures. The key is to supply foods that are radiantly palatable, nutritionally complete, and easy to digest. Senior dogs face natural shifts in metabolism: sometimes they need fewer calories to avoid weight gain, and other times they require extra protein to preserve lean muscle mass that supports mobility and overall function. Rescue dogs may carry additional health considerations—past neglect, uncertain medication histories, past injuries, or chronic pain—that can impact appetite and energy levels. The feeding plan you create should be gentle enough to protect their comfort while being robust enough to protect their health.
Calorie Needs, Body Condition, and Protein for Aging Ban-dogs
Energy requirements decline with age, but the need for high-quality protein generally stays important. Adequate protein helps preserve muscle, support immune function, and aid in recovery from illnesses or injuries. For dogs with no teeth, the way those calories are delivered matters as much as how many calories there are. Here are practical guidelines to consider:
- Evaluate body condition: Use a simple body condition scoring system. If ribs are easily felt with a light touch and the waist is visible, the dog may be underweight. If you cannot feel ribs and there is a round abdomen or obvious fat deposits, the dog may be overweight. Aim for a waistline that is discernible when viewed from above and a soft fat cover on the abdomen. Discuss weight targets with a veterinarian, especially if your rescue dog has or is at risk of obesity, diabetes, liver or kidney concerns.
- Protein quality and quantity: Choose high-quality animal proteins (e.g., chicken, turkey, beef, fish, eggs) to support lean body mass. In general, senior dogs benefit from diets with adequate protein to prevent muscle loss, but if there are kidney or liver concerns, a vet may recommend moderated protein intake or specific amino acid profiles. In many cases, 20–30% protein on a dry matter basis (DMB) is appropriate for senior, active dogs, but exact targets should be individualized.
- Fat and calories: Healthy fats, particularly omega-3 fatty acids, help with joint health, skin and coat quality, and anti-inflammatory support. Fat is a dense energy source; for senior dogs, balancing calories with reduced energy needs can prevent weight gain. Use fats from fish, flaxseed, or canola oil in moderation, and avoid highly processed fat sources with artificial additives.
- Carbohydrates and fiber: Edentulous dogs may benefit from modest amounts of easily digestible carbs and fiber that help maintain gut health and stool quality. Favor complex carbohydrates like oats or barley when they agree with the dog’s digestion, plus vegetables that are well-cooked and puree-friendly.
These are starting points. The best plan is a veterinary or veterinary-nurse-guided assessment of energy needs and nutrient targets, especially if your rescue dog has medical conditions such as kidney disease, heart disease, diabetes, or arthritis.
Texture, Hydration, and Feeding Practicalities
No teeth does not mean the end of enjoying meals. It means you’ll favor textures that slide easily, blend smoothly, or dissolve with a little moisture. Here are texture strategies that work well for edentulous senior dogs:
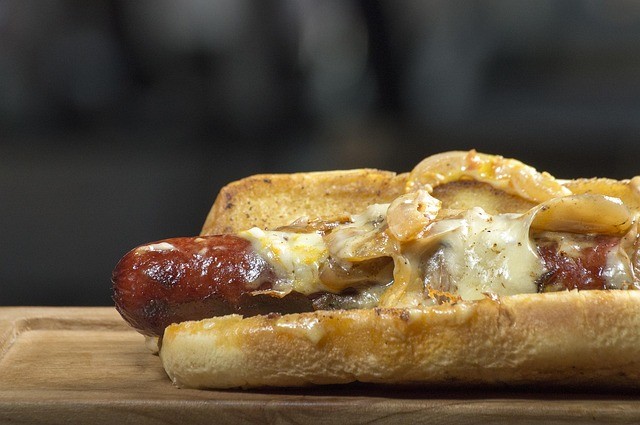
- Wet over dry: Canned/pouched diets or home-cooked meals with a moist texture are usually easier to consume than dry kibble. If your dog is accustomed to dry kibble, you can moisten it with warm water or broth to help it soften and become palatable.
- Purees and pâtés: Many senior dogs with no teeth do well on pâté-style foods or purees that mix meat, vegetables, and healthy fats into a smooth consistency.
- Grain-free or balanced grains: Some dogs tolerate pureed rice, oats, or barley. Always ensure any grains are fully cooked and well mashed or blended to a smooth texture to prevent choking and aid digestion.
- Hydration-first feeding: Because hydration is often a concern in older dogs, consider foods with high moisture content and offer water alongside meals. You can also mix in unsalted broth (low-sodium) or bone broth to increase moisture and entice appetite.
When transitioning to soft foods, ensure the texture is uniform to avoid “pockets” of food that could cause coughing or aspiration. If your dog coughs or gasps during meals, or you notice coughing after feeding, slow the pace, alter the texture further, or consult a veterinarian.
Commercial Diets vs. Home-Prepared Meals
There are advantages and caveats to both commercial diets and home-prepared meals for no-teeth senior dogs. Each option can be nutritionally complete if carefully chosen or prepared, but it’s essential to maintain a consistent nutritional profile and avoid potential hazards.
- Commercial diets: Look for products labeled for senior dogs, small breeds, or those that focus on gentle textures. Canned or stews labeled as “softened” or “easy chew” can be ideal. Check the label for complete and balanced nutrition according to AAFCO (Association of American Feed Control Officials). Avoid products with heavy fillers, artificial flavors, or excess sodium. Some dogs do well with hybrid feeding: a combination of a soft canned diet plus a small amount of softened kibble or a smooth puree to maintain variety and appetite.
- Home-prepared meals: Preparing meals at home allows you to control ingredients and texture. Celebrate safety by using high-quality proteins, cooked vegetables, and safe starches, then blend or mash to the desired consistency. Always ensure the diet is complete or supplements are added so your dog receives essential nutrients like calcium, phosphorus, vitamins, and trace minerals. If you’re new to home cooking for dogs, start with simple recipes and have them reviewed by a veterinary nutritionist to avoid nutritional gaps.
Common home-prepared meal concepts include gentle chicken-and-rice purées, salmon-and-sweet-potato blends, lean beef with pumpkin, or turkey with oats and vegetables. These should be adapted to meet your dog’s caloric needs and any medical conditions. A veterinary nutritionist or an experienced veterinary team member can help tailor recipes to your dog.
Safe, Salient Ingredients and Things to Avoid
Edentulous dogs can be sensitive to certain ingredients. Here are general guidelines for safe, dog-friendly components and ingredients to minimize or avoid:
- Protein sources: Lean meats (chicken, turkey, beef, lamb, fish) that are cooked and finely shredded or pureed are reliable options. Eggs (cooked) can be an excellent source of high-quality protein and easily incorporated into meals.
- Carbohydrates: Cooked, well-mashed rice, oats, barley, potatoes, and gentle vegetables like carrots, squash, and pumpkin can add energy and fiber when tolerated. Avoid raw fibrous vegetables that may be hard to chew or swallow in large pieces.
- Fats: Small amounts of healthy fats like olive oil, salmon oil, or flaxseed oil provide essential fatty acids; introduce gradually to avoid digestive upset.
- Hydration boosters: Water-rich foods (canned pumpkin with water, moist pâtés) or bone broth can improve hydration and palatability, but choose low-sodium options and avoid onion or garlic seasonings.
- Supplements: Omega-3 fatty acids (from fish oil or algae-based sources), glucosamine and chondroitin for joints, and vitamin E can be helpful, but discuss any supplements with your veterinarian to avoid interactions or overdosing.
Foods to avoid or minimize include onions, garlic, grapes/raisins, chocolate, caffeinated products, xylitol (toxic to dogs), and excessive salt. Always check whether a new ingredient is safe, especially if you are dealing with a dog that has health concerns. Some rescue dogs may have food allergies or intolerances that emerged after years of varied diets; monitor for signs of stomach upset, itching, or skin issues after introducing new foods.
Hydration: The Foundation of Comfort and Health
Hydration influences kidney function, digestion, skin health, and overall energy. No-teeth dogs may drink but still benefit from moisture-rich meals. Consider these hydration strategies:
- Offer fresh water at all times and place bowls in accessible areas. Some dogs drink more when water is offered in multiple locations.
- Mix a small amount of warm water or low-sodium broth into meals to create a soft, soupy consistency that is easy to swallow.
- Use pouches, stews, or gravies that contain a high moisture content to increase overall fluid intake.
Keeping hydration consistent supports kidney health, digestion, and energy. If you notice signs of dehydration such as dry gums, lethargy, sunken eyes, or skin that bounces back slowly when pinched, contact a veterinarian promptly.
Transitioning Your Rescue Dog: A Gentle Path to New Diets
Rescue dogs, by their nature, can be wary of new foods. A gradual transition minimizes stress and digestive upset. Here’s a practical transition plan you can adapt:
- Baseline period: For the first 3–5 days, continue the dog’s current diet while introducing a small proportion (about 10%) of the new texture or ingredient into meals. Observe for tolerance.
- Incremental increases: Over the next 7–14 days, gradually increase the new food portion to about 50% by day 14, ensuring the remainder is the original diet to prevent gastrointestinal upset.
- Full switch: By day 14–21, your dog should be comfortably consuming the new texture completely. If any signs of intolerance appear—vomiting, diarrhea, decreased appetite—slow the transition and consult your veterinarian.
Patience is essential. Some dogs may adjust within a week; others take longer. Pair transition with a consistent feeding schedule, a calm feeding environment, and plenty of affection to ease anxiety and build trust around meals.
Sample Meal Plans and Practical Recipes
Below are example meal ideas that you can adapt to your dog’s preferences and medical needs. Always ensure the meals are complete and balanced for your dog’s life stage, size, and health. If you’re unsure, consult with a veterinary nutritionist who can tailor recipes to your dog’s exact requirements.
- : Slow-cooked chicken breast pureed with cooked rice, carrots, and a little chicken broth until very smooth. Finish with a drizzle of olive oil for healthy fats.
- : Cooked salmon mashed with mashed pumpkin, a little cooked oats, and water or low-sodium fish broth. Blend to a smooth consistency.
- : Ground beef cooked until tender with mashed sweet potato and a small amount of shredded zucchini. Add water or broth to reach a soft, spoonable texture.
- : Scrambled egg mixed with mashed peas or steamed carrots, a pinch of turmeric or parsley for flavor, and some oats blended to a paste.
These recipes are presented as ideas rather than definitive plans. The key is to maintain balance: include lean protein, gentle carbohydrates, healthy fats, and moisture. If you’re comfortable with home cooking, your options expand; if not, a high-quality soft canned diet or a donor-friendly pouch diet may be the best fit.
Supplements: Do They Help, and When?
Supplements can support senior dogs with no teeth, but they are not a substitute for a complete and balanced diet. Consider discussing the following with your veterinarian:
- : Helpful for joint health and coat quality; sources include fish oil or algal oil. Start with a low dose and increase gradually while monitoring stool consistency.
- Glucosamine and chondroitin: Often recommended for joint support in aging dogs. Look for reputable products formulated for dogs and follow label directions or your vet’s guidance.
- Probiotics and fiber: Support gut health, especially in dogs with sensitive digestion or after antibiotic use.
- Vitamin and mineral supplementation: Not usually required if you feed complete diets, but your vet may recommend specific vitamins if your dog has deficiencies or a special condition.
Be cautious with supplements; misdosing or unnecessary supplementation can cause problems. Always check with a vet before starting new products.
Oral Health, Weight, and Mobility: A Holistic View
Even with no teeth, dental health remains important. Soft tissues in the mouth can suffer from irritation or disease, and reduced oral pain improves appetite. Regular veterinary dental checkups, even if the dog is edentulous, can help identify issues such as gum irritation, oral ulcers, or infections that might affect swallowing or comfort during meals.
Weight management is a common challenge in older, rescue dogs. Inactivity, chronic pain, or hypothyroidism can all influence weight. A well-balanced, moisture-rich diet supports both energy and comfort. If your dog becomes suddenly more lethargic or changes in weight are noted, contact your veterinarian. Underlying health issues can progress quickly in senior dogs.
Mobility support, like appropriate exercise, is an important complement to nutrition. Gentle, regular activity helps preserve muscle mass and joint health, which in turn helps your dog stay comfortable during and after meals.
Feeding Etiquette and Environment for an Anxious or Rescue Dog
Rescued dogs may have anxiety or associations with harsh feeding environments from their past. Consider these tips to create a calm, predictable feeding routine:
- Feed at the same times each day in a quiet space; avoid loud disturbances during meals.
- Offer soft, easily accessible bowls. A raised feeder can reduce strain on the neck for some dogs, making swallowing easier.
- Keep meals short and positive; use gentle voice cues and provide praise or a favorite chew or treat after meals to reinforce a positive association with eating.
- Monitor for signs of stress around mealtime, such as tail-tucking, trembling, or avoidance, and adjust the routine accordingly.
Working with Your Veterinarian and Veterinary Nutritionist
The foundation of a sound nutrition plan for a senior rescue dog with no teeth is professional guidance. Schedule a comprehensive veterinary exam to check for chronic diseases, dental status, and overall organ function. Blood work can reveal subtle kidney or liver concerns that might influence diet choices. A veterinary nutritionist can help you design a home-cooked plan that ensures all essential nutrients are present and correctly balanced, or help you pick commercially available options that fit your dog’s texture requirements and medical needs.
As a guardian for a rescue dog, you may be learning as you go. Regular monitoring of weight, body condition, appetite, stool quality, and coat condition provides invaluable feedback. If your dog’s needs change—weight loss or gain, a new diagnosis, or the emergence of a medical condition—adjust the feeding plan promptly in consultation with your veterinary team.
Common Mistakes to Avoid
Even well-intentioned guardians can fall into traps that undermine nutrition in edentulous seniors. Here are a few to watch for:
- Relying on dry kibble alone: Without teeth, many dogs cannot manage dry kibble. If you are determined to feed kibble, ensure it is thoroughly moistened and served in a texture your dog can swallow safely.
- Skipping hydration: Not offering enough moisture can lead to constipation or dehydration; prioritize water and moisture-rich meals.
- Over- or under-supplementing: Supplements should be used under veterinary guidance. Overuse can cause imbalances or interactions with medications.
- Inconsistent feeding schedules: Sudden changes in meal timing or portion sizes can lead to stress and appetite fluctuations. Maintain a predictable routine.
Closing Thoughts: Compassion, Consistency, and Care
Nutrition for senior rescue dogs with no teeth is not about a single miracle food. It is about melding palatability, moisture, energy balance, and nutrient adequacy into a plan that respects the dog’s past while nourishing their present. Your senior rescue dog deserves meals that are gentle on the mouth, enjoyable to eat, and scientifically aligned with their health needs. By combining soft textures, hydration-forward meals, enriched proteins and fats, and the guidance of a veterinary team, you can help your toothless companion maintain vitality, warmth, and spirit in their golden years.
Remember: every dog is an individual. The best nutrition plan is one that reflects your dog’s preferences, medical conditions, activity level, and living situation. With patience, compassion, and professional support, you can ensure your senior rescue dog with no teeth enjoys food again and continues to share many more cherished moments with you.


[…] Which foreign pets are legal in Washington State? […]