Can Cats have Chicken noodle Soup?

Can Cats have Chicken noodle Soup?

Quick Answer: Cats shouldn’t eat chicken noodle soup — it’s typically high in sodium and often contains onion or garlic, both toxic to cats, and the noodles offer little nutritional value.

Key Takeaways

  • Onion and garlic, common in soup, can cause toxic hemolytic anemia in cats.
  • Store-bought and homemade soups are usually too high in sodium for cats.
  • Noodles provide carbs but little of what a cat actually needs nutritionally.
  • Plain, unseasoned cooked chicken is a much safer occasional treat.
  • Watch for vomiting, lethargy, or pale gums if soup was ingested, and call your vet.

Why Trust This Guide?

This guide is researched and written by the Pets Store Home editorial team, drawing on general veterinary and animal-care information. It’s intended as general information; consult your veterinarian for advice specific to your pet.

Can cats eat chicken noodle soup? Understanding the ingredients

Cats have specific dietary needs quite different from humans, and their systems are only sometimes equipped to handle certain ingredients commonly found in human foods, including chicken noodle soup. While a small taste of plain cooked chicken might be safe for cats in moderation, it’s important to understand that many chicken noodle soup components could be problematic. Let’s break down the ingredients:

Chicken: Plain, cooked chicken without seasoning or sauces can be safe for cats in small amounts as an occasional treat. It’s a protein source essential to a cat’s diet.

Noodles/Pasta: Noodles and pasta are primarily made from grains, which are not a natural part of a cat’s diet. Cats are obligate carnivores, requiring a diet primarily composed of animal-based proteins. Grains like those in pasta don’t provide the nutrients that cats need.

Broth/Soup Base: Most chicken noodle soups contain broth, which can be high in sodium. Cats with lower salt tolerance and excessive sodium intake can lead to health problems, including kidney issues.

Vegetables: Many chicken noodle soups contain carrots, celery, and onions. Onions are toxic to cats and should be avoided completely. Even the other vegetables might need help to be digestible for cats.

Seasonings/Spices: Chicken noodle soup is often seasoned with various spices and herbs that could harm cats. Cats have more sensitive palates; certain seasonings can be toxic or cause digestive upset.

Dairy: Some soups might contain dairy products like milk or cream. Many adult cats are lactose intolerant, which means they lack the enzyme to digest lactose properly. This can lead to digestive discomfort.

While plain, unseasoned cooked chicken might be safe for cats in moderation, it’s best to avoid feeding them chicken noodle soup. Cats have specific nutritional requirements, and their diet should primarily consist of high-quality commercial cat food formulated to meet their needs. If you want to provide your cat with treats, choosing cat-specific treats designed to be safe and nutritious for them is a good idea. Always consult your veterinarian before introducing new foods to your cat’s diet.

Examining the components of chicken noodle soup

Certainly, let’s examine the components of a typical chicken noodle soup and discuss how each component might affect cats:

Chicken: Plain, cooked chicken without seasoning or sauces can be safe for cats in small amounts as an occasional treat. It provides a source of protein, which is important for cats.

Noodles/Pasta: Noodles and pasta are made from grains, which are not a natural part of a cat’s diet. Cats are obligate carnivores and require animal-based proteins. Grains like those in pasta don’t provide the necessary nutrients for cats.

Broth/Soup Base: The broth in chicken noodle soup can be high in sodium. Cats have a lower tolerance for salt, and excessive sodium intake can lead to health issues, including kidney problems. The high sodium content is a concern.

Vegetables: Many chicken noodle soups contain carrots, celery, and onions. Onions are toxic to cats and should be avoided completely. Even other vegetables might not be easily digestible for cats and might not contribute to their nutritional needs.

Seasonings/Spices: Chicken noodle soup is often seasoned with various spices and herbs. Cats have sensitive palates; some seasonings can be toxic or cause digestive upset.

Dairy: Some soups might contain dairy products like milk or cream. Many adult cats are lactose intolerant, lacking the enzyme to digest lactose properly. This can lead to digestive discomfort and upset.

Fat Content: Some chicken noodle soups can have a relatively high-fat content. While cats need fats in their diet, excessive fat intake can lead to obesity and other health problems.

Additives and Preservatives: Processed soups often contain additives, preservatives, and artificial ingredients that might not be suitable for a cat’s digestive system.


In summary, while plain, unseasoned cooked chicken might be safe for cats in moderation, most of the other components of chicken noodle soup are not well-suited to a cat’s dietary needs. Cats have specific nutritional requirements, and their diet should consist of high-quality cat food formulated to meet those needs. 

Identifying potential harmful ingredients for cats

Identifying potential harmful ingredients for cats is crucial to ensure their well-being. Cats have specific dietary requirements, and certain safe substances for humans or other animals can be toxic or harmful to them. Here’s a list of ingredients that are commonly found in human foods and should be avoided in a cat’s diet:

Onions and Garlic contain compounds that can damage a cat’s red blood cells and lead to anemia. Even small amounts can be dangerous.

Grapes and Raisins: These can cause cat kidney failure, leading to serious health issues.

Chocolate: Chocolate contains theobromine, which is toxic to cats and can lead to symptoms ranging from vomiting to seizures and even death.

Caffeine: Found in coffee, tea, energy drinks, and some medications, caffeine can cause heart palpitations, restlessness, and other health problems in cats.

Alcohol: Alcohol consumption can cause severe neurological and digestive issues in cats and can be fatal.

Dairy: Many adult cats are lactose intolerant and cannot properly digest lactose, leading to digestive upset.

Bones: Cooked bones can splinter and cause choking hazards or internal damage to a cat’s digestive tract.

Fatty Foods: High-fat foods can lead to pancreatitis and obesity in cats.

Artificial Sweeteners: Xylitol, commonly found in sugar-free products, can lead to hypoglycemia and liver failure in cats.

High Sodium Foods: Cats are sensitive to salt, and foods high in sodium can lead to kidney and heart issues.

Raw Fish: Raw fish can contain thiaminease enzymes that destroy thiamine (Vitamin B1), leading to neurological issues.

Raw Eggs: Raw eggs can contain bacteria like Salmonella and E. coli, potentially causing foodborne illnesses.

Highly Processed Foods: Foods might contain additives, preservatives, and artificial ingredients that can harm cats.

Medications: Many human medications are toxic to cats, so never give your cat medication without consulting a veterinarian.

Plants: Some plants, like lilies, poinsettias, and certain types of ivy, are toxic to cats if ingested.

Nuts: Some nuts, like walnuts and macadamia nuts, can be toxic to cats.

High-Fiber Foods: Cats are obligate carnivores and cannot digest fiber, so high-fiber foods can cause digestive issues.

Sugary Foods: Cats don’t require sugar and can develop health issues if fed sugary foods.

Eating balanced and nutritionally complete cat food that meets their needs is always recommended. If you want to introduce new foods or treats to your cat’s diet, it’s best to consult a veterinarian to ensure their safety and well-being. If you suspect your cat has ingested something harmful, immediately contact your veterinarian or an emergency animal hospital.


The benefits of chicken for cats

Chicken can be a beneficial addition to a cat’s diet when offered safely and appropriately. Here are some of the benefits of chicken for cats:

High-Quality Protein: Chicken is a great source of high-quality animal-based protein essential for a cat’s overall health. Cats are obligate carnivores, requiring animal protein to meet their nutritional needs.

Amino Acids: Chicken provides essential amino acids contributing to muscle development, tissue repair, and overall growth in cats.

Taste and Palatability: Cats often find chicken appealing due to its taste and texture, making it a popular choice for cat food and treats.

Low Carbohydrates: Chicken is naturally low in carbohydrates, which is ideal for cats since they cannot digest and process carbs.

Nutrient Content: Chicken contains important nutrients like vitamins B6 and B12, niacin, and phosphorus, which support a cat’s overall health and well-being.

Digestibility: Cooked, boneless, and skinless chicken is generally easy for cats to digest, which can be especially beneficial for cats with sensitive stomachs.

Weight Management: Lean chicken can be a good option for cats on a weight management plan due to its lower fat content than other meats.

Variety: Offering chicken as part of a varied diet can help prevent food boredom and ensure your cat receives a range of nutrients.

Homemade Treats: For pet owners who prefer to make cat treats at home, plain, cooked chicken can be a safe and simple option.

When feeding chicken to your cat, it’s important to follow these guidelines:

Cooked and Boneless: Always feed your cat cooked chicken that is boneless. Cooked bones can splinter and cause choking hazards or internal damage.

Unseasoned: Ensure the chicken is plain and free from seasonings, spices, or additives. Cats have sensitive palates, and some seasonings can be toxic.

Moderation: While chicken can benefit a cat’s diet, it should not replace a nutritionally complete and balanced cat food. Moderation is key.

Consult a Veterinarian: Before making any significant changes to your cat’s diet, it’s recommended to consult your veterinarian. They can provide guidance based on your cat’s individual health needs.

Remember that every cat is unique, and dietary needs can vary. While chicken can offer several benefits, it’s just one part of your feline companion’s well-rounded and balanced diet.

Nutritional value of chicken for feline health

Chicken is a valuable source of nutrition for feline health, offering essential nutrients that support various aspects of their well-being. Here’s a breakdown of the nutritional value of chicken for cats:

High-Quality Protein: Chicken is rich in high-quality animal-based protein, which is crucial for cats. Protein is necessary to maintain lean muscle mass, support kittens’ growth, and ensure overall health.

Amino Acids: Chicken provides essential amino acids that cats need for various bodily functions, including tissue repair, enzyme production, and immune system support.

Vitamins: Chicken contains B vitamins (B6, B12, niacin), which are important for energy metabolism, skin health, and nervous system function.

Minerals: Chicken is a source of minerals like phosphorus, which is essential for bone health, as well as selenium, which has antioxidant properties.

Low Carbohydrates: Cats are obligate carnivores and cannot digest carbohydrates. Chicken is low in carbohydrates, aligning well with a cat’s dietary needs.

Fats: While chicken contains fats, they are an energy source and essential fatty acids that support skin and coat health and various body functions.

Taurine: Taurine is an essential amino acid for cats found in animal tissues, including chicken. It is necessary for heart health, vision, and overall well-being.

Moisture: Wet cat food, often containing chicken, contributes to a cat’s hydration needs, which is important for kidney function and urinary tract health.

Palatability: Many cats find chicken palatable, making it a popular choice in commercial cat foods and treats.

Weight Management: Lean chicken can be a suitable option for cats on weight management diets due to its lower fat content.

Sensitive Stomachs: Plain, cooked chicken can be gentle on sensitive stomachs and is often recommended for cats with digestive issues.

It’s important to note that while chicken offers numerous benefits, it should be part of a balanced and complete diet for cats. Commercial cat foods are formulated to meet feline nutritional requirements and often include chicken or other high-quality protein sources. If you’re considering incorporating chicken into your cat’s diet, follow these guidelines:

Feed cooked, boneless, and skinless chicken.

Avoid seasonings, spices, and additives.

Offer chicken in moderation and as a complement to balanced cat food.

Consult your veterinarian before making any significant dietary changes for your cat.

Ensuring your cat’s nutritional needs are met involves providing a well-rounded diet that meets its specific requirements.

How chicken can be incorporated into a cat’s diet

Chicken can be incorporated into a cat’s diet in various ways, but it’s important to do so safely and in moderation. Here are some guidelines on how to include chicken in your cat’s diet:

Cooked and Boneless: Always feed cooked boneless chicken free from the skin. Cooked bones can splinter and cause choking hazards or internal damage.

Plain and Unseasoned: Ensure the chicken is plain and free from seasonings, spices, or additives. Cats have sensitive palates, and some seasonings can be toxic.

Moderation: Chicken should not replace a nutritionally complete and balanced cat food. It should be considered as a treat or supplement. Aim to make chicken only a small portion of your cat’s overall diet.

Proper Cooking: Cook the chicken thoroughly to ensure it’s safe for your cat to eat. Avoid using oils, fats, and seasonings during the cooking process.

Cut into Small Pieces: Cut the chicken into small, bite-sized pieces that are easy for your cat to chew and swallow.

Treats: Use small pieces of cooked chicken as treats for training or as rewards for good behavior.

Mix with Cat Food: You can mix a small amount of cooked, plain chicken into your cat’s regular cat food to enhance the flavor and provide some variety.

Homemade Cat Food: If you’re considering making your cat food, consult a veterinarian or a veterinary nutritionist to ensure the homemade diet is properly balanced and meets your cat’s nutritional needs.

Meal Toppers: Use a small amount of cooked chicken as a meal topper, sprinkling it over your cat’s regular food to make it more enticing.

Special Occasions: Offer plain cooked chicken as a special treat on birthdays or as a reward for veterinary visits.

Remember that every cat is unique, and dietary needs can vary. While plain cooked chicken can offer some benefits, it’s important to prioritize a nutritionally complete and balanced cat food as the main source of your cat’s diet. Before making significant changes to your cat’s diet, consult your veterinarian to ensure you provide the best possible nutrition for your feline friend.

The risks of feeding chicken noodle soup to cats

Feeding chicken noodle soup to cats can pose several risks and potential health issues due to the ingredients commonly found in the soup. Cats have specific dietary requirements that differ from humans, and some components of chicken noodle soup can harm them. Here are the risks of feeding chicken noodle soup to cats:

Sodium Content: Chicken noodle soup often contains high levels of sodium. Cats are sensitive to salt, and excessive sodium intake can lead to kidney and heart problems.

Onions and Garlic: Many soups include onions and garlic for flavor, but these ingredients are toxic to cats and can lead to gastrointestinal upset, anemia, and other health issues.

Noodles/Pasta: Cats are obligate carnivores, which means their diets should be primarily composed of animal-based protein. Grains like those in noodles or pasta are not a natural part of their diet and don’t provide the essential nutrients cats need.

Vegetables: Chicken noodle soup often contains vegetables like carrots and celery. While some vegetables are safe for cats in small amounts, others might be difficult for them to digest or may not contribute significantly to their nutritional needs.

Seasonings/Spices: Many soups contain seasonings and spices that can harm cats, causing digestive upset or even toxicity.

Dairy: Some soups include dairy products like cream. Most adult cats are lactose intolerant, and dairy can lead to digestive discomfort.

Processed Ingredients: Processed soups might contain additives, preservatives, and artificial ingredients unsuitable for a cat’s digestive system.

Unbalanced Nutrition: Feeding chicken noodle soup could lead to an unbalanced diet for your cat, as it needs more essential nutrients formulated cat foods provide.

Potential Allergies: Cats can have allergies to certain ingredients, and introducing new foods can trigger allergic reactions.

In summary, chicken noodle soup is not an appropriate food for cats due to the various risks it poses. Choosing cat-specific treats or foods formulated to meet their nutritional needs is better if you want to provide your cat with a special treat or supplement their diet. Always consult your veterinarian before introducing new foods to your cat’s diet to ensure their health and safety.

High sodium content and its impact on feline health

High sodium content in a cat’s diet can significantly impact feline health. Cats are more sensitive to sodium (salt) than humans, and excessive sodium intake can lead to various health problems. Here’s how high sodium content can affect feline health:

Kidney Health: High sodium intake can stress a cat’s kidneys. Cats are prone to kidney issues, and excessive sodium can contribute to developing or exacerbating kidney problems, including kidney disease.

Blood Pressure: Excessive sodium consumption can lead to high blood pressure (hypertension) in cats. Hypertension can cause damage to various organs, including the eyes, heart, and kidneys.

Dehydration: Sodium can affect fluid balance in the body. High sodium intake can increase thirst and urination, potentially leading to dehydration.

Cardiac Health: Excess sodium intake can strain the cardiovascular system, leading to heart problems in cats, especially those predisposed to heart issues.

Urinary Health: Sodium can influence urine pH and concentration. High sodium levels in the diet can contribute to urinary issues, including forming urinary crystals and stones.

Appetite and Palatability: Cats may prefer salty foods, leading them to consume more sodium-rich foods and potentially ignore their balanced cat food. This can lead to nutritional imbalances.

Digestive Upset: High sodium intake can cause digestive upset, including vomiting and diarrhea, impacting a cat’s overall well-being.

Thirst and Urination: Cats on high-sodium diets may drink more water and urinate more frequently, increasing litter box maintenance and potentially stressing the urinary system.

To prevent these negative health effects, providing cats with a balanced and nutritionally complete diet that meets their specific dietary requirements is crucial. Commercial cat foods are formulated to provide the right amount of essential nutrients, including sodium, for feline health. When considering feeding your cat any human food or treats, it’s important to check the nutritional content, including sodium levels, and consult your veterinarian to ensure it’s safe and appropriate.

Suppose your cat has specific health issues like kidney disease or hypertension. Your veterinarian might recommend a specialized diet with controlled sodium levels to manage the condition and support your cat’s well-being.

Potential allergens in the soup

Chicken noodle soup can contain several potential allergens that might harm cats. Cats can develop allergies or sensitivities to certain ingredients, leading to various health issues. Here are some potential allergens commonly found in chicken noodle soup:

Chicken: While chicken is generally well-tolerated by most cats, some cats can develop allergies to poultry proteins. Signs of a chicken allergy can include digestive upset, skin itching, scratching, and gastrointestinal issues.

Wheat: Chicken noodle soup often contains wheat-based noodles or pasta. Wheat is a common cat allergen, and wheat allergies can lead to digestive issues, skin problems, and discomfort.

Onions and Garlic: Many soups contain onions and garlic for flavor, but both are toxic to cats and can cause various health issues, including digestive upset, anemia, and other serious conditions.

Other Vegetables: Carrots, celery, and other vegetables commonly found in chicken noodle soup might cause allergic reactions or digestive problems in some cats.

Seasonings/Spices: Soup spices can be allergenic or cause digestive upset in cats.

Dairy: Some soups might contain dairy products like cream. Most adult cats are lactose intolerant, and dairy can lead to digestive discomfort and other issues.

It’s important to note that cats can develop allergies to any ingredient, even those not listed here. If you suspect that your cat has developed an allergy or sensitivity to a certain food, it’s best to consult your veterinarian. They can help diagnose the issue, recommend appropriate dietary changes, and guide managing your cat’s health.

When introducing any new foods or treats to your cat’s diet, including human foods like chicken noodle soup, always do so under the guidance of your veterinarian. Monitoring your cat’s reactions to new foods and watching for signs of allergies or sensitivities is essential to ensure their well-being.

Alternative options for cat-friendly chicken soup


If you’re interested in offering your cat a cat-friendly version of chicken soup, there are some simple and safe alternatives you can consider. These options can be prepared at home to ensure the ingredients suit your cat’s dietary needs. Here are a couple of ideas:


Chicken Broth for Cats:


Ingredients:


Cooked chicken (boneless and skinless)

Water

Instructions:


Boil boneless and skinless chicken in water until fully cooked.

Remove the chicken from the water and set it aside for your cat.

Allow the chicken broth to cool.

Offer the cooled chicken broth to your cat in a shallow dish. If desired, you can mix in a small amount of the cooked chicken pieces.

This simple chicken broth can be soothing and hydrating for cats, especially if they need extra fluids. It avoids potentially harmful ingredients like onions, garlic, and excessive sodium.

Homemade Chicken Cat Food:


Make homemade cat food using safe and appropriate ingredients to offer a more substantial chicken-based meal. Here’s a basic recipe:


Ingredients:


Cooked chicken (boneless and skinless)

Cooked and plain white rice

Cooked and pureed carrots (in small amounts)

Water or low-sodium chicken broth

Instructions:


Cook boneless and skinless chicken thoroughly.

Cook white rice separately.

Puree cooked carrots (if using) in small amounts.

Mix the cooked chicken, rice, and pureed carrots with water or low-sodium chicken broth to create a moist and balanced meal.

This homemade cat food recipe provides protein from chicken, a small amount of carbohydrates from rice, and a touch of vegetables. Make sure to consult your veterinarian or a veterinary nutritionist before introducing homemade meals to your cat’s diet to ensure it’s nutritionally balanced and appropriate for your cat’s health needs.


Always introduce new foods gradually and watch for any signs of allergies, sensitivities, or digestive issues in your cat. Also, consult your veterinarian before significantly changing your cat’s diet.

Homemade chicken broth recipes for cats

Homemade chicken broth can be a soothing and hydrating addition to your cat’s diet. It’s important to ensure that the broth is plain, free from seasonings, and contains no potentially harmful ingredients. Here’s a simple homemade chicken broth recipe that is safe for cats:

Homemade Chicken Broth for Cats:

Ingredients:

Boneless, skinless chicken (such as chicken breast or thighs)

Water

Instructions:

Prepare the Chicken: Cut the boneless, skinless chicken into small, manageable pieces.

Boil the Chicken: Place the chicken pieces in a pot and cover them with water. Bring the water to a boil.

Simmer: Once the water boils, reduce the heat to a simmer. Allow the chicken to simmer for about 20-30 minutes until fully cooked and tender.

Remove the Chicken: Use a slotted spoon to remove the cooked chicken pieces from the pot. Set them aside for your cat.

Cool the Broth: Allow the chicken broth to cool completely. You can refrigerate it for a while to speed up the cooling process.

Serve to Your Cat: Once the broth is cool, you can offer it to your cat in a shallow dish. Mix some of the cooked chicken pieces you set aside earlier.

Remember to serve the chicken broth in moderation as a treat or supplement to your cat’s regular diet. While this homemade chicken broth can benefit your cat, it should not replace a balanced and nutritionally complete cat food.

Always consult your veterinarian before introducing new foods or treats to your cat’s diet, especially if your cat has any health issues or dietary restrictions. Additionally, watch your cat’s reactions to the new food to ensure it agrees with them and doesn’t cause digestive issues or allergies.

Commercially available cat-friendly chicken soups

There are commercially available cat-friendly soups and broths formulated specifically for cats. These products are designed to be safe and nutritionally appropriate for feline consumption. When choosing a cat-friendly soup, please read the ingredient list and nutritional information to ensure it meets your cat’s dietary needs. Here are a few examples of commercially available cat-friendly soups and broths:

Tiki Cat Broths: Tiki Cat offers a range of broths made from real chicken or fish. These broths are designed to be a supplemental treat and can be a hydrating and flavorful addition to your cat’s regular diet.

Weruva Cats in the Kitchen: Weruva offers a line of cat food pouches that include broths with real protein sources like chicken or fish. These pouches can be served as a meal topper or a standalone treat.

Inaba Churu: Inaba Churu is a creamy puree treat in a squeeze tube. It’s available in various flavors, including chicken, and is a great way to provide hydration and nutrition to your cat.

Feline Natural Chicken & Venison Feast: Feline Natural offers canned cat food that can also be served as a broth or soup. Their products are made from high-quality ingredients; you can dilute them with water to create a soup-like consistency.

Wellness CORE Simply Shreds: While not exactly a soup, Wellness CORE Simply Shreds offers pouches of real meat shreds in a tasty broth. It can be used as a topper or a standalone treat.

Instinct Grain-Free Stews: Instinct offers grain-free stews from real meat sources like chicken or turkey. These stews are formulated to provide hydration and nutrition.

Before introducing any new commercial product to your cat’s diet, it’s a good idea to consult your veterinarian to ensure that the ingredients are appropriate for your cat’s health and dietary needs. While these products can be convenient and appealing, they should still be fed in moderation and as a supplement to a balanced cat food diet.

Conclusion: Understanding the importance of a balanced and appropriate diet for cats

In conclusion, a balanced and appropriate diet for cats is crucial for their overall health and well-being. Cats have unique nutritional requirements due to their status as obligate carnivores. Here are the key takeaways:

Nutritional Needs: Cats require a diet rich in high-quality animal-based protein. Their bodies are adapted to metabolize nutrients from animal sources, and they need essential amino acids, vitamins, and minerals found in animal tissues.

Avoid Harmful Ingredients: Cats should avoid certain ingredients that are safe for humans but harmful to them, such as onions, garlic, grapes, and chocolate. These can lead to serious health issues or toxicity.

Hydration: Proper hydration is essential for cats to support their kidney function and overall health. Moist foods, such as wet cat food or diluted broths, can contribute to their hydration.

Weight Management: Providing an appropriate diet helps manage a cat’s weight. Obesity can lead to various health problems, so feeding a balanced diet and avoiding excessive treats is important.

Commercial Cat Food: High-quality commercial cat foods are specifically formulated to meet feline nutritional needs. They provide the right balance of proteins, fats, vitamins, and minerals to support cats at different life stages.

Variety: While cats have specific dietary requirements, some variety can be beneficial. Introduce new foods gradually, and consult your veterinarian if you’re considering changing your cat’s diet.

Consult a Veterinarian: Always consult your veterinarian before significantly changing your cat’s diet. They can provide guidance based on your cat’s age, health status, and individual needs.

Homemade Options: If you’re considering homemade foods or treats, consult a veterinarian or a veterinary nutritionist to ensure they’re balanced and safe for your cat.

Allergies and Sensitivities: Cats can develop allergies or sensitivities to certain ingredients. Monitor their reactions to new foods and address any adverse symptoms promptly.

Moderation: Treats, snacks, and supplemental foods should be offered in moderation and should not replace a balanced diet.

By prioritizing a balanced and appropriate diet, you’re providing the foundation for your cat’s long and healthy life. Understanding their specific dietary needs and choosing foods that support those needs will help ensure that your feline companion thrives and enjoys optimal health.

Wondering What Else Is Off-Limits for Cats?

If your cat is a regular table-food scavenger, our guide to whether cats can have McDonald’s fries breaks down the real risks (and debunks a common myth about hidden seasoning) so you know when to worry and when it’s fine.
Can I walk my Dog after cutting the quick?

Can I walk my Dog after cutting the quick?

Quick answer: No, you shouldn’t walk your dog right after cutting the quick. Wait until the bleeding has fully stopped and a clot has formed, which usually takes a few minutes with pressure or styptic powder, before heading out. Walking too soon can dislodge the clot, restart the bleeding, and introduce dirt or bacteria into the wound, so a short rest period first makes for a much faster, cleaner recovery.

Key Takeaways

  • Wait until bleeding has completely stopped, not just slowed, before walking your dog.
  • Styptic powder is the fastest way to stop the bleeding; cornstarch or flour with firm pressure works as a backup.
  • Most minor quick cuts stop bleeding within a few minutes and heal fully within one to two days.
  • A quick, careful indoor bathroom break on a clean surface is fine once bleeding stops; save longer walks for the next day.
  • Bleeding that won’t stop after 20 to 30 minutes, or signs of infection, need a vet’s attention.

Why Trust This Guide?

This guide draws on veterinary and professional grooming guidance on treating a cut quick, stopping nail bleeding safely, and standard aftercare timelines. It’s intended as general information – always consult your vet if bleeding is severe, doesn’t stop, or your dog shows signs of infection.

What Is the Quick, and Why Does Cutting It Hurt?

The quick is the soft tissue inside a dog’s nail that contains blood vessels and nerve endings, similar to the sensitive tissue under a human fingernail. In dogs with light-colored nails, the quick is often visible as a pinkish area, which makes it easier to avoid during trimming. In dogs with dark or black nails, the quick isn’t visible from the outside, which is exactly why accidental cuts happen far more often in dark-nailed dogs.

Cutting into the quick is painful for your dog, comparable to the sting of cutting your own nail too short, and it bleeds because the tissue is rich in blood vessels. The pain is usually sharp but brief, and most dogs recover their normal comfort level within a day, though the experience can understandably make a dog more nervous about future nail trims.

Immediate First Aid: Stopping the Bleeding

The first priority after cutting the quick is stopping the bleeding, not walking anywhere. Styptic powder, available at most pet stores and often included in nail trimming kits, is the fastest and most reliable option – pressing a small amount firmly onto the tip of the nail typically stops bleeding within about two minutes. If you don’t have styptic powder on hand, a styptic pencil (the kind used for shaving nicks) works in a similar way.

Keep your dog calm and still during this process, since movement and excitement can raise blood pressure and slow clotting. Applying firm, steady pressure with a clean cloth or gauze for a minute or two, even without any powder, often helps on its own for very minor nicks.

Home Remedies If You Don’t Have Styptic Powder

Several common household items work as reasonable backups when styptic powder isn’t available. Cornstarch and flour both work by drying and thickening the blood at the wound site, which helps promote clotting; baking soda works through a similar mechanism. A bar of plain soap can also be pressed onto the nail tip to help seal the bleeding vessel.

The key to making any of these work is firm, sustained pressure – dipping the nail briefly or dusting powder on without pressing it in usually isn’t enough. Hold the powder or substance firmly against the nail tip for a couple of minutes – a common mistake is barely touching the nail to the substance and expecting results, when what actually stops the bleeding is sustained, deliberate contact. These alternatives are generally slower than styptic powder, often taking five to ten minutes for a superficial cut rather than two.

Should You Walk Your Dog Right After Cutting the Quick?

No – walking immediately after a quick cut is one of the most common mistakes owners make, and it’s worth avoiding even if the bleeding seems to have mostly stopped. The pressure and repeated ground contact from walking can dislodge a fresh, still-fragile clot, restarting the bleeding and extending the whole recovery process. Walking on an unhealed, freshly bleeding nail also raises the chances of picking up dirt, debris, or bacteria from outdoor surfaces, which increases infection risk right when the wound is most vulnerable.

The safest approach is to keep your dog resting indoors on a clean surface until the bleeding has fully and reliably stopped, not just slowed to an occasional drop.

How Long to Wait Before Walking

For a minor nick with light bleeding, waiting roughly 15 to 30 minutes after the bleeding has visibly stopped is a reasonable buffer before any activity, including a short indoor bathroom break. For a deeper cut with more significant bleeding, waiting a few hours, or even resting for the remainder of the day before a full walk, gives the clot more time to stabilize. If you’re ever unsure whether the bleeding has truly stopped versus just paused, checking the nail again after 10 minutes of rest before deciding to head out is a sensible extra step.

What a Short Bathroom Break Might Look Like

Once bleeding has genuinely stopped, a brief, calm walk to the yard or a nearby patch of grass for bathroom needs is generally fine, especially if your dog seems comfortable putting weight on the paw. Keep this outing short and low-key rather than a full walk with running or play, and try to avoid rough terrain, gravel, or anything that could re-irritate the healing nail tip. Saving longer walks, runs, or hikes for the next day, once the nail has had a full night to continue healing, is the more cautious and generally recommended approach.

It also helps to keep an eye on your dog’s gait during this first short outing. A dog favoring the injured paw or walking noticeably differently is a sign to cut the outing even shorter and head back inside, while a dog putting normal weight on the paw and moving comfortably is a reasonable signal that things are progressing well.

Signs of Infection to Watch For

Most quick cuts heal without complications, but it’s worth knowing the warning signs of infection in the days following. Watch for increasing redness or swelling around the nail bed, a foul odor, discharge that isn’t just blood, ongoing limping beyond the first day, or your dog showing new sensitivity when the paw is touched days after the initial injury. Any of these signs, or bleeding that restarts repeatedly without an obvious cause, warrants a call to your vet rather than continued home monitoring.

How Long Full Healing Takes

Recovery time depends on how deep the cut was. A minor nick typically stops bleeding within minutes and causes only mild, brief soreness that resolves within a day, with no lasting issues. A deeper cut into the quick can leave the area tender for one to two days and may take up to about two weeks for the nail itself to fully regrow and adequately cover and protect the quick again. During this longer healing window, it’s worth keeping an eye on the nail during walks and avoiding activities that put repeated pressure on that specific paw.

Why Some Dogs Have More Prominent Quicks Than Others

The length of the quick isn’t the same across all dogs, and this partly explains why some dogs seem to get quicked far more easily than others. Dogs whose nails haven’t been trimmed regularly tend to have a quick that has gradually grown longer along with the nail itself, since the blood vessel extends to fill the available space when there’s no regular trimming pressure keeping it shorter. This is part of why a dog transitioning from infrequent trims to a regular trimming schedule may need several sessions, spaced a couple of weeks apart, to gradually encourage the quick to recede before nails can be trimmed to an ideal short length in one sitting.

Breed and nail thickness play a role too – dogs with particularly thick or fast-growing nails sometimes have a proportionally longer quick, which is one more reason very gradual, incremental trimming tends to work better than trying to achieve a short nail length in a single session, especially for a dog who hasn’t been trimmed in a while.

When to Call the Vet

Most quick cuts are manageable at home, but certain situations call for veterinary attention rather than continued home care. If bleeding hasn’t stopped after 20 to 30 minutes of firm, consistent pressure and styptic powder or a home remedy, proper clotting likely isn’t occurring and a vet visit is warranted. Persistent limping beyond a day, visible signs of infection, or a cut that seems unusually deep or accompanied by a torn nail rather than a clean trim also justify a vet check, since these situations sometimes need more than basic first aid. A nail that’s bent or twisted rather than cleanly cut is a different situation worth understanding on its own – this guide on a dog’s nail bent sideways and bleeding covers what that specific injury usually means.

Preventing Future Quick Cuts

The most reliable way to avoid cutting the quick is trimming small amounts at a time rather than attempting one large cut, checking the nail’s cross-section after each small trim for a pale, slightly moist center that signals you’re getting close to the quick. Good lighting makes a real difference, particularly for dark-nailed dogs where the quick isn’t visible from the outside – trimming in bright, direct light, or using a nail grinder that lets you gradually shorten the nail rather than cutting all at once, both reduce risk considerably. This step-by-step guide to trimming without cutting the quick walks through the technique in more detail.

Keeping your grooming tools sharp also matters more than most owners expect, since dull clippers tend to crush rather than cleanly cut the nail, which is both more painful and less precise. If you’re building out a more complete at-home grooming setup, this guide on professional dog grooming equipment covers tools worth having on hand, including options that make nail trims safer and more controlled.

Helping a Nervous Dog After a Quick Cut

A dog that’s had a quick cut once often becomes noticeably more resistant to future nail trims, understandably associating the process with pain. Rebuilding trust takes patience – short, positive sessions that involve simply handling the paws and offering treats, without any actual trimming, can help reset the association before you attempt another real trim. Trimming just one or two nails at a sitting, rather than doing all of them in one go, also reduces the overall stress of the experience and gives you more control if something goes wrong.

If nail trims consistently remain a struggle despite this kind of gradual desensitization, a professional groomer or vet tech is often faster and less stressful for both of you than continuing to fight through it at home, and can also model safer technique you can eventually try again yourself.

Quick Cuts on Different Types of Surfaces

Where your dog walks once you do resume activity matters more than owners often realize. A freshly healed or still-healing nail is more vulnerable on rough pavement, gravel, or hiking trails than it is on grass or carpet, since abrasive surfaces can catch or re-irritate a nail tip that hasn’t fully hardened back over yet. If a full walk is unavoidable within the first day or two, sticking to grass or smooth, even ground reduces the odds of re-injury compared to concrete or trail terrain.

Booties or a soft paw wrap can also add a layer of protection during this early healing window, particularly for dogs that are active or live somewhere with rough outdoor surfaces. This isn’t strictly necessary for a minor nick, but it’s a reasonable extra precaution for a deeper cut or for dogs who tend to be rough on their paws regardless of injury.

Multiple Nails Cut at Once

Occasionally more than one nail gets cut too short during the same trimming session, which changes the calculus slightly. With multiple affected nails, your dog is carrying more overall discomfort and has more points of vulnerability to reinjury, so it’s worth being extra conservative about activity level for the following day or two. Watch each affected nail individually for bleeding and signs of infection, since they may not all heal at exactly the same pace even if the cuts looked similarly minor at the time.

If you’re trimming multiple nails and accidentally cut one, it’s often worth pausing the rest of the session rather than continuing, both to let your dog calm down and to reduce the chance of a second mistake while you’re both a little rattled.

Bottom Line

Don’t walk your dog immediately after cutting the quick – stop the bleeding first with styptic powder or firm pressure, wait until it has genuinely stopped, and keep activity light for the rest of the day. Most quick cuts are minor and heal within a day or two with no lasting effects, but persistent bleeding, signs of infection, or ongoing limping are worth a vet’s attention rather than continued home care.

FAQ: Walking a Dog After Cutting the Quick

How long should I wait before walking my dog after cutting the quick? Wait until bleeding has fully stopped, generally 15 to 30 minutes for a minor nick, longer for a deeper cut, before any activity beyond a brief indoor bathroom break.

What’s the fastest way to stop a dog’s nail from bleeding? Styptic powder pressed firmly onto the nail tip typically stops bleeding within about two minutes.

What can I use if I don’t have styptic powder? Cornstarch, flour, baking soda, or a bar of soap pressed firmly onto the nail for a few minutes can work as a backup, though more slowly.

Is it normal for a dog’s nail to bleed a lot after being cut too short? Some bleeding is normal since the quick is rich in blood vessels, but bleeding that continues beyond 20 to 30 minutes of firm pressure needs veterinary attention.

Can my dog still go outside to go to the bathroom after a quick cut? Yes, once bleeding has genuinely stopped, a brief, calm bathroom break is generally fine – save longer walks for later or the next day.

How long does it take a cut quick to fully heal? Minor nicks resolve within a day; deeper cuts can take up to two weeks for the nail to regrow and fully cover the quick again.

What are signs of infection after a quick cut? Increasing redness, swelling, discharge, foul odor, or ongoing limping days after the injury are signs worth a vet visit.

Why do dark nails get cut too short more often? The quick isn’t visible from the outside on dark nails, making it much harder to judge exactly where to stop trimming compared to light-colored nails.

Should I use a nail grinder instead of clippers to avoid this? A grinder lets you shorten nails gradually and can reduce the risk of a sudden deep cut, though it takes some getting used to for both owner and dog.

My dog is now scared of nail trims after this happened – what can I do? Rebuild trust with short, positive paw-handling sessions using treats, trim fewer nails per sitting, and consider a professional groomer if the fear persists.

Do Leopard Geckos have teeth?

Do Leopard Geckos have teeth?

Quick Answer: Yes, leopard geckos have teeth — around 100 small, sharp teeth used to grip and crush their insect prey, though their bite is generally harmless to humans.

Key Takeaways

  • Leopard geckos have roughly 100 tiny teeth adapted for gripping prey.
  • They’re polyphyodont, meaning their teeth are continuously replaced throughout life.
  • Teeth are used mainly for catching and crushing insects, not defense against people.
  • A bite from a leopard gecko rarely breaks human skin.
  • Proper diet and calcium supplementation support healthy dental and bone development.

Why Trust This Guide?

This guide is researched and written by the Pets Store Home editorial team, drawing on general veterinary and animal-care information. It’s intended as general information; consult your veterinarian for advice specific to your pet.

Introduction to Leopard Geckos

Leopard geckos (Eublepharis macularius) are small reptiles native to the arid regions of Afghanistan, Pakistan, and parts of India. They are among the most popular pet reptiles due to their docile nature, striking appearance, and relatively easy care requirements. Leopard geckos have become a favorite choice for reptile enthusiasts and beginners alike.

Here are some key aspects to know about leopard geckos:

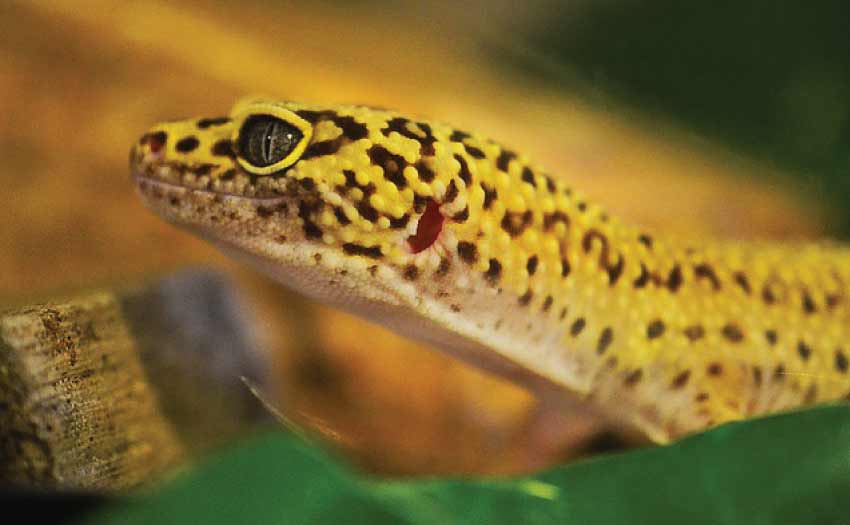
Physical Appearance: Leopard geckos have a distinct appearance with their stout bodies, large triangular heads, and long, thick tail. They grow to 8 to 10 inches on average, with males somewhat outweighing females. They have thin, rough scales covering their skin, and their colors can range from white to yellow, orange, and brown. One of their defining features is their iconic leopard-like spots, which are present on their bodies and tail.

Nocturnal Behavior: Because they are typically nocturnal animals, leopard geckos are most active at night. Although they have excellent night vision, they must navigate using their keen hearing and senses of smell. During the day, they hide and rest in cool, dark places like crevices or caves.

Habitat: In the wild, leopard geckos inhabit rocky desert and grassland regions. As pets, they require a suitable enclosure that mimics their natural environment. A 20-gallon tank is generally recommended for a single adult gecko, with additional space for multiple geckos or breeding pairs. The tank should include a substrate like a reptile carpet, paper towels, a non-adhesive shelf liner, hiding spots, climbing structures, and a shallow water dish.

Temperature and Lighting: Leopard geckos are ectothermic, meaning they rely on external heat sources to regulate their body temperature. A temperature gradient within their enclosure is crucial, with a warm side maintained at around 88-92°F (31-33°C) and a more relaxed side around 75-80°F (24-27°C). This can be achieved using an under-tank heating pad, heat tape, and a thermostat for temperature control. While they do not require UVB lighting, providing a low-intensity UVB bulb can benefit their overall well-being.

Feeding: Leopard geckos are insectivores whose diet mainly consists of various live insects. Suitable food options include crickets, mealworms, waxworms, and dubia roaches. It’s essential to provide appropriately sized prey items no more comprehensive than the width of the gecko’s head to prevent choking. A calcium and vitamin D3 supplement should be dusted onto the insects before feeding, ensuring proper nutrition and preventing metabolic bone disease.

Temperament and Handling: Leopard geckos are known for their calm and docile nature. With regular and gentle handling, they can become accustomed to human interaction. It’s essential to handle them with care, supporting their body and tail to avoid injury. It’s advisable to wash hands before handling to remove scents that might confuse or stress the gecko.

Breeding: Leopard geckos are known to breed readily in captivity. If planning to produce, it’s crucial to research and understand the steps and considerations involved in successful breeding, including appropriate temperature cycles, mating behaviors, and egg incubation conditions.

Leopard geckos make fascinating and relatively low-maintenance pets. However, responsible ownership involves providing suitable habitats, proper nutrition, and regular veterinary care to ensure their health and well-being.


Anatomy of a Leopard Gecko

Here’s an overview of the anatomy of a leopard gecko:

Head:

Snout: The snout of a leopard gecko is pointed and houses the nostrils.

Eyes: Leopard geckos have large, lidless eyes with vertical pupils, allowing them excellent night vision.

Ears: They have small ear openings on the sides of their head.

Mouth: Leopard geckos have wide mouths with small teeth for grasping and chewing food.

Body:

Skin: The skin of a leopard gecko is covered in small, bumpy scales. It helps them retain moisture and provides some protection.

Limbs: They have four short, sturdy legs with five clawed toes on each foot, used for walking, climbing, and grasping prey.

Tail: Leopard geckos have a thick, fleshy tail that stores fat reserves. As mentioned earlier, they can drop their seats as a defense mechanism, and it will regenerate over time.

Internal Organs:

Digestive System: Leopard geckos have a relatively short digestive tract adapted for processing a diet of insects.

Respiratory System: They have a pair of lungs for breathing air.

Cardiovascular System: Leopard geckos have a four-chambered heart that pumps oxygenated blood throughout their body.

Reproductive System: Males have hemipenes, paired reproductive organs, while females have ovaries and a reproductive tract for producing and laying eggs.


Senses:

Vision: Leopard geckos have well-developed eyesight, particularly in low-light conditions, due to their nocturnal nature.

Hearing: They can detect sounds and vibrations through their ears, although they have relatively limited hearing compared to their vision.

Smell and Taste: Leopard geckos use their sense of smell and taste to locate food and assess their environment.

Leopard geckos have a compact and efficient anatomy that allows them to thrive in their natural habitat and adapt to captive environments. Understanding their anatomy helps reptile keepers provide appropriate care and recognize any signs of potential health issues.

Description of the teeth structure in Leopard Geckos

Like other reptiles, Leopard geckos have specialized teeth adapted to their specific dietary needs. Their teeth design enables them to capture and consume their prey efficiently. Here’s a description of the teeth structure in leopard geckos:

Teeth Types: Leopard geckos have two main types of teeth: incisors and maxillary teeth.

Incisors: Leopard geckos possess a row of sharp, pointed incisor teeth at the front of their upper and lower jaws. These teeth are used for grasping and holding onto prey items.

Maxillary Teeth: Behind the incisors, leopard geckos have multiple rows of smaller, recurved teeth known as maxillary teeth. These teeth are used for tearing and crushing the prey into manageable pieces.

Tooth Replacement: Like many reptiles, leopard geckos can continuously replace their teeth throughout their lives. This process, known as polyphyodont dentition, ensures they always have functional teeth. When a tooth is lost or damaged, a replacement tooth develops and moves forward to take its place.

Tooth Attachment: Leopard geckos have acrodont dentition, meaning their teeth are fused to the top of their jawbones rather than rooted in sockets like mammals. The teeth are attached directly to the bone, making them less likely to fall out during feeding or handling.

Tooth Adaptations: Leopard geckos’ teeth are well-adapted for capturing and consuming small prey items. The sharp incisors allow them to grasp the prey firmly. At the same time, the recurved maxillary teeth aid in tearing apart the prey’s exoskeleton and breaking it into smaller pieces that can be swallowed.

It’s important to note that leopard geckos do not chew their food like mammals do. Instead, they typically swallow their prey whole or in smaller pieces. Providing appropriately sized prey items that match the gecko’s mouth and teeth structure is essential to ensure they can consume their food quickly.

Understanding the teeth structure of leopard geckos helps us appreciate their unique adaptations for their natural diet and provides insights into their feeding behavior and care requirements as captive pets.

Do Leopard Geckos Have Teeth?

Yes, leopard geckos do have teeth. Like other reptiles, they possess teeth specialized for capturing and consuming their prey. These teeth are an essential part of their feeding and digestive process.

Types of Teeth in Leopard Geckos

Leopard geckos have two main types of teeth: incisors and maxillary teeth.

Incisors: Leopard geckos have sharp, pointed incisor teeth at the front of their upper and lower jaws. These teeth are used for grasping and holding onto prey items. The incisors are positioned at the front of the mouth and aid in the initial capture of the prey.

Maxillary Teeth: Behind the incisors, leopard geckos have multiple rows of smaller, recurved teeth called maxillary teeth. These teeth are positioned along the upper and lower jaws and are used for tearing and crushing the prey into manageable pieces. The recurved shape of the maxillary teeth helps grip and tear apart the prey’s exoskeleton or flesh.

Combining the incisors and maxillary teeth allows leopard geckos to capture, manipulate, and consume their prey efficiently. It’s worth noting that leopard geckos do not chew their food like mammals. Instead, they typically swallow their prey whole or in smaller pieces.

The teeth of leopard geckos continuously grow and are replaced throughout their lives. This ensures that they always have functional teeth for hunting and feeding.

Dental Care for Leopard Geckos

Dental care is essential for leopard geckos’ overall health and well-being. While their teeth naturally wear down through feeding and chewing, there are a few things you can do to support their dental health:

Appropriate Diet: A balanced diet is crucial for maintaining dental health in leopard geckos. Feeding various appropriately sized live insects helps promote natural chewing and jaw exercise. Avoid feeding prey that is too large, as it may cause dental trauma. Additionally, dusting the insects with calcium and vitamin D3 supplements helps prevent nutritional deficiencies that can impact dental health.

Clean Water: Provide a shallow dish of fresh, clean water for your leopard gecko. Regularly change the water to ensure it remains free of debris and contamination. Keeping the water clean helps prevent oral infections and promotes overall oral hygiene.

Monitoring Chewing Behavior: Observe your leopard gecko while it eats to ensure normal chewing behavior. Healthy teeth should wear down naturally through regular feeding and chewing. It could indicate dental issues if you notice any difficulties or changes in chewing behavior, such as reduced appetite, dropping food, or pawing at the mouth. Consult a reptile veterinarian if you have concerns about your gecko’s dental health.

Regular Veterinary Check-ups: It’s important to schedule regular veterinary check-ups for your leopard gecko. A reptile veterinarian can assess the overall health of your gecko, including their dental condition. They can identify dental abnormalities, such as overgrown or misaligned teeth, and provide appropriate treatment.

It’s worth noting that leopard geckos’ teeth are continuously replaced throughout their lives. However, dental issues can occur in some cases, such as overgrowth, malocclusion, or infection. These conditions may require professional intervention and treatment from a reptile veterinarian. Regular dental care, a balanced diet, and proper hygiene can help maintain good dental health in leopard geckos.

Dealing with Dental Problems

Dealing with dental problems in leopard geckos requires proper identification, intervention, and veterinary care. If you suspect your leopard gecko is experiencing dental issues, it’s essential to consult a reptile veterinarian who can provide an accurate diagnosis and appropriate treatment. Here are some common dental problems in leopard geckos and potential approaches to address them:

Overgrown Teeth: Overgrown teeth occur when the teeth do not wear down properly through normal chewing and use. This can result in misalignment, discomfort, or difficulty eating. If necessary, a reptile veterinarian can trim or file down the overgrown teeth under sedation to restore proper alignment and function.

Malocclusion: Malocclusion refers to misalignment of the upper and lower jaws, leading to problems with bite and tooth contact. Malocclusion can cause pain, difficulty eating, and potentially injure mouth tissues. Treatment options may include tooth trimming, orthodontic devices, or extraction of affected teeth in severe cases. A reptile veterinarian will determine the most appropriate course of action.

Dental Infections: Dental infections can occur due to trauma, abscesses, or bacterial/fungal overgrowth in the oral cavity. Signs of dental diseases may include swelling, redness, discharge, or a foul odor from the mouth. Treatment typically involves:

  • Addressing the underlying cause, such as draining abscesses.
  • Providing antibiotics or antifungal medication.
  • Maintaining oral hygiene.

Tooth Loss or Injury: In cases where a leopard gecko loses a tooth or experiences dental trauma, veterinary intervention may be necessary. Depending on the severity, treatment options may include:

  • Managing pain.
  • Providing antibiotics to prevent infection.
  • Ensuring proper healing of oral tissues.

Remember, it is essential to seek professional help from a reptile veterinarian experienced in treating dental problems in leopard geckos. They can perform a thorough examination, provide an accurate diagnosis, and recommend appropriate treatment options based on the specific condition of your gecko. Regular veterinary check-ups and proactive dental care can help prevent or identify dental problems early, ensuring the best possible outcome for your leopard gecko’s oral health.

Conclusion

Leopard geckos are fascinating reptiles and popular pets known for their unique appearance, docile nature, and low maintenance requirements. Understanding their teeth structure and dental care needs is essential for providing proper care. Leopard geckos have incisors and maxillary teeth, which allow them to capture, tear, and consume their prey. Dental care for leopard geckos involves:

  • Providing a balanced diet.
  • Monitoring chewing behavior.
  • Maintaining clean water.
  • Scheduling regular veterinary check-ups.

If dental problems arise, such as overgrown teeth, malocclusion, dental infections, or tooth loss/injury, it is crucial to seek veterinary care from a reptile veterinarian. They can diagnose the issue and recommend appropriate treatment options, including tooth trimming, orthodontic devices, antibiotics, or other interventions as necessary.

By ensuring proper dental care and addressing any dental issues promptly, you can help maintain your leopard gecko’s oral health, contribute to their overall well-being, and enjoy a fulfilling relationship with your pet for years to come.

Conclusion

Leopard geckos are fascinating reptiles and popular pets known for their unique appearance, docile nature, and low maintenance requirements. Understanding their teeth structure and dental care needs is essential for providing proper care. Leopard geckos have incisors and maxillary teeth, which allow them to capture, tear, and consume their prey. Dental care for leopard geckos involves:

  • Providing a balanced diet.
  • Monitoring chewing behavior.
  • Maintaining clean water.
  • Scheduling regular veterinary check-ups.

If dental problems arise, such as overgrown teeth, malocclusion, dental infections, or tooth loss/injury, it is crucial to seek veterinary care from a reptile veterinarian. They can diagnose the issue and recommend appropriate treatment options, including tooth trimming, orthodontic devices, antibiotics, or other interventions as necessary.

By ensuring proper dental care and addressing any dental issues promptly, you can help maintain your leopard gecko’s oral health, contribute to their overall well-being, and enjoy a fulfilling relationship with your pet for years to come.

Dog Died Suddenly Tongue Out

Dog Died Suddenly Tongue Out

Quick Answer: We’re sorry for your loss. A dog dying suddenly with its tongue out is often linked to a cardiac event, severe internal bleeding, bloat, or toxin exposure — a vet can sometimes help identify the cause through a post-mortem exam, which may offer some closure.

Key Takeaways

  • Sudden death can be caused by cardiac arrest, GDV (bloat), internal bleeding, poisoning, or a severe seizure.
  • Tongue protrusion at death often reflects loss of muscle control rather than continued distress.
  • A veterinary necropsy can sometimes identify the underlying cause.
  • Regular vet checkups can catch some underlying heart or organ conditions earlier.
  • Pet loss support groups and hotlines can help if you’re struggling with grief.

Why Trust This Guide?

This guide is researched and written by the Pets Store Home editorial team, drawing on general veterinary information, with care for pet owners going through a difficult loss. It’s intended as general information, not a diagnosis; a veterinarian is the best resource for understanding what happened to your specific pet.

What to do if your dog dies suddenly with their tongue out?

I’m sorry to hear about the loss of your dog. Losing a pet can be a difficult and emotional experience. When a dog passes away suddenly with their tongue out, it may indicate that it experienced a medical emergency or distress. Here are some steps you can take:

Contact a veterinarian: If your dog has passed away, it’s still a good idea to contact a veterinarian. They can guide what steps to take and may be able to offer support or recommend a pet cremation service or other options.

Handle the remains with care: It’s essential to handle your dog’s remains with care and respect. You can wrap them in a clean towel or blanket and keep them cool until you can make arrangements.

Decide on aftercare: Consider your options for aftercare. You may bury your dog in a pet cemetery or on your property or opt for cremation. Some veterinary clinics offer cremation services or can provide information on local pet crematories.

Seek support: Dealing with the loss of a pet can be overwhelming. Contact friends, family, or support groups who understand what you’re going through. They can offer comfort and help you through the grieving process.

Take care of yourself:

  1. Remember to take care of yourself during this difficult time.
  2. Allow yourself to grieve and process your emotions.
  3. Engage in self-care activities that can provide comfort and solace.

What to do if your dog has a stroke?

Recognize the signs: Common signs of a stroke in dogs include sudden weakness or paralysis, loss of balance, difficulty walking, head tilt, circling, disorientation, loss of vision, abnormal eye movements, facial drooping, and seizures. If you observe any of these symptoms, contact a veterinarian right away.

Keep your dog calm and comfortable: While waiting for veterinary assistance, keep your dog in a relaxed and quiet environment to reduce stress. Limit their movement to prevent further injury, especially if they are experiencing difficulty with coordination or balance.

Contact your veterinarian: If you think your dog has suffered a stroke, call your vet or an emergency veterinary clinic to explain the circumstances. They will walk you through the process and suggest you bring your dog in immediately.

Follow the veterinarian’s advice: To ascertain the origin and extent of the stroke, the veterinarian will perform a comprehensive examination and may advise diagnostic procedures like blood work, imaging (such as an MRI or CT scan), or other evaluations. They will offer the most suitable treatment solutions based on the diagnosis.

Provide supportive care: Your veterinarian may prescribe medications or therapies to manage the stroke and its underlying cause. Follow their instructions carefully and administer any prescribed medications as directed. Additionally, provide a comfortable and quiet space for your dog to rest during recovery.

Causes of death in dogs with their tongue out

If a dog is found deceased with their tongue out, it could indicate a variety of potential causes of death. However, with further information and a proper examination, it is easier to determine the exact cause. Some possible reasons that could result in a dog passing away with their tongue out include:

Trauma or injury: Severe trauma, such as being hit by a vehicle or experiencing a significant fall, could lead to fatal injuries that result in a dog’s death. Traumatic events can cause physical damage to various organs and systems, leading to sudden death.

Cardiovascular issues: Dogs can experience heart conditions, such as heart failure or heart disease, which may result in sudden death. These conditions can affect the heart’s ability to pump blood effectively and may lead to cardiac arrest.

Respiratory issues: Certain respiratory conditions or disorders can cause breathing difficulties in dogs, potentially resulting in respiratory failure and death. This could include respiratory infections, severe pneumonia, or respiratory distress syndrome.

Neurological disorders: Some neurological conditions or events, such as seizures or strokes, may cause a dog’s tongue to protrude or hang out due to a loss of muscle control. Sometimes, these events can be fatal, particularly if they lead to other complications.

Toxicity: Ingestion of toxic substances, such as certain plants, chemicals, medications, or foods that are poisonous to dogs, can result in sudden death. Toxicity can affect multiple organ systems and lead to severe complications.

Suffocation or choking: A dog choking on a foreign object or experiencing airway obstruction can lead to suffocation and subsequent death. The dog’s tongue may protrude in such cases due to the blockage.

It’s important to note that the causes listed above are just some possibilities, and other factors could be involved. To determine the specific cause of death, a thorough examination and sometimes postmortem evaluation (necropsy) by a veterinarian would be necessary.

If you have recently experienced the loss of your dog, reach out to a veterinarian or a pet grief support service in your area for guidance and emotional support during this difficult time.

Conclusion

Finding a dog that has died suddenly, especially with its tongue out, is frightening and heartbreaking. In most cases the tongue position simply reflects the body relaxing at the moment of death and isn’t itself a sign of suffering. The most common explanations are cardiac events, strokes, choking, trauma, or poisoning; toxic ingestion in particular can act fast and without obvious warning signs (our guide on what to do if your dog eats something it shouldn’t covers what to watch for).

If this happens to your dog, a veterinarian or emergency clinic can help you understand what happened, and in cases where the death was unwitnessed, a necropsy can determine the exact cause. In the vast majority of sudden-death cases there was nothing an owner could have done differently, and it’s worth reminding yourself of that while you grieve. Lean on your vet, your support network, and give yourself the time you need to process the loss.

FAQ: When a Dog Dies Suddenly With Its Tongue Out

Is it normal for a dog’s tongue to be out after death?
Yes, in most cases. As the body’s muscles relax after death, the jaw can fall open and the tongue can slip out. On its own, this isn’t evidence of pain or suffering.

Could I have done something to prevent this?
In the vast majority of sudden-death cases, no. Conditions like cardiac events, strokes, and internal trauma often show no warning signs beforehand. Try not to carry blame for something that was largely outside your control.

Should I get a necropsy (animal autopsy)?
It’s optional, but worth considering if the death was unwitnessed, if you want a clear answer for your own peace of mind, or if you have other pets and want to rule out something contagious or environmental.

What should I do with my dog’s body right now?
Keep them somewhere cool, wrapped gently in a towel or blanket, and contact your vet or an emergency clinic when you’re ready. They can walk you through cremation, burial, or other next steps.

How Many Flakes in a Bale of Hay?

How Many Flakes in a Bale of Hay?

Quick Answer: A standard bale of hay typically contains around 8-15 flakes, depending on the bale’s size and how tightly it’s compressed, though this varies by hay type and baling method.

Key Takeaways

  • Most conventional bales yield roughly 8-15 flakes each.
  • Flake size and weight vary by hay type (alfalfa vs. grass hay) and baling tightness.
  • Flake count helps with portioning feed for horses and livestock.
  • Bale size and regional baling practices can shift the count.
  • Weighing flakes gives more consistent feeding than counting alone.

Why Trust This Guide?

This guide is researched and written by the Pets Store Home editorial team, drawing on general veterinary and animal-care information. It’s intended as general information; consult your veterinarian for advice specific to your pet.

How Many Flakes in a Bale of Hay?

What is a Bale of Hay?

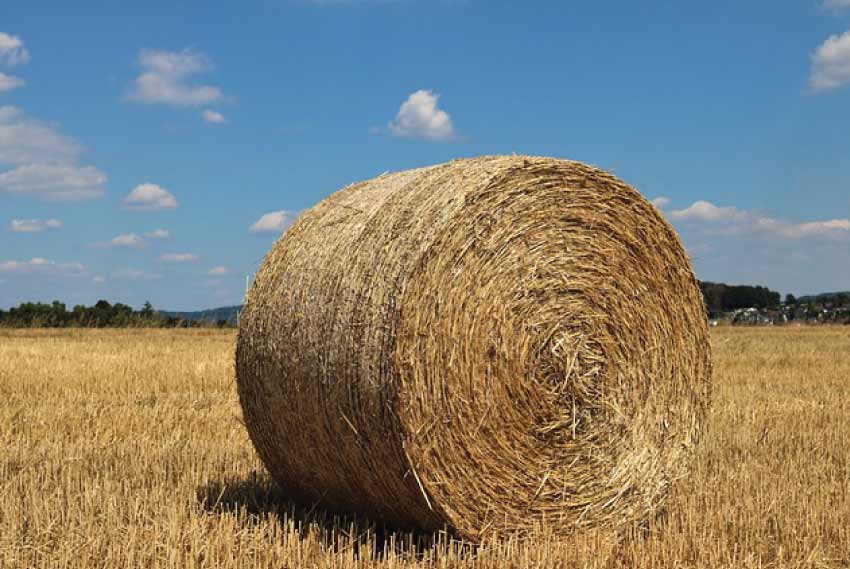
A hay bale is a compacted bundle of dried grass or other plants, typically used as animal feed, bedding, or other agricultural purposes. It is a standard method of storing and transporting large amounts of forage material. Hay bales are often cylindrical or rectangular and are bound tightly with twine or wire to maintain their shape and integrity.

In the field, hay is harvested by cutting and drying grasses or legumes, such as alfalfa or clover. Once the vegetation sufficiently dries, it is gathered into small, manageable bundles known as bales. These bales are stacked or stored for later use, such as feeding livestock during seasons when fresh grazing is limited or unavailable.

Bales of hay come in various sizes, depending on factors such as the baling equipment used and regional practices. The most common sizes are small square bales, typically weighing around 40-60 pounds (18-27 kilograms), and large round bales, ranging from several hundred to over a thousand pounds (hundreds of kilograms). The size and weight of bales may vary in different agricultural regions and depending on the intended use.

PREMIUM QUALITY HAY FOR SALE 

We offer a variety of hay options to fit your needs and budget, including Alfalfa, Bermuda Grass, Paca Verde, Teff Grass, Straw, and Sudan Grass. Our hay is barn-stored to help retain quality throughout the year. Hay can be picked up at our farm in Texas. Local delivery is available. Our website: haybalesforsale.net

The Different Types of Hay

There are several types of hay, each with its characteristics and uses. The specific type of hay ideal for a particular purpose depends on factors such as the nutritional needs of the animals, the climate, and the intended use. Here are some common types of hay:

Timothy Hay: Timothy hay is one of the most popular hay for feeding horses. It is known for its high fiber, moderate protein, and low sugar content. Timothy hay is often leafy and soft, making it palatable for horses.

Alfalfa Hay: Alfalfa hay is highly nutritious and is commonly fed to horses, cattle, and other livestock. It has a higher protein content than grass hays like Timothy and higher calcium levels. Alfalfa hay is often leafy and can be a good energy source for animals with higher nutrient requirements.

Orchard Grass Hay: Orchard grass hay is another type suitable for feeding horses, rabbits, and other small herbivores. It has a softer texture and is generally well-liked by animals. Orchard grass hay provides a balance of fiber and protein.

Bermuda Grass Hay: Bermuda grass hay is prevalent in warmer climates and is commonly fed to horses, cattle, and other livestock. It is known for its high heat and drought tolerance. Bermuda grass hay has a coarser texture than other hays but can still provide good nutrition.

Clover Hay: Clover hay is derived from clover plants and often combines different clover varieties. It is nutritious and commonly used as feed for horses, cattle, and other livestock. Clover hay has a higher protein content than some grass hays.

Mixed Grass Hay: Mixed grass hay blends different grasses, providing nutrients and flavors. It can be a good option when specific types of hay are not readily available. Mixed grass hay is used for various livestock, including horses, cattle, sheep, and goats.

These are just a few examples of hay types commonly available. The availability of specific types may vary depending on regional agricultural practices and climate conditions. It’s essential to consider the nutritional requirements of the animals and consult with local experts to determine the most suitable type of hay for specific feeding needs.

How Many Flakes are in a Bale?

The number of flakes in a bale of hay can vary depending on the size of the bale and how the hay is compressed and baled. “flake” refers to a portion of hay separated from the bale for feeding purposes.

In small square bales, typically around 40-60 pounds (18-27 kilograms), it is common to have around 15-25 flakes per bale. 

However, this can vary based on factors such as the density of the bale and the size of the flakes being taken.

Large round bales, on the other hand, are typically not divided into flakes since they are much larger and are fed by unrolling or cutting portions from the outside. 

The number of flakes or portions you can obtain from a round bale will depend on the size and thickness of the slices you make.

It’s important to note that the number of flakes in a bale is not a standardized measurement and can vary. 

It is often more helpful to consider the weight or volume of hay you want to feed your animals rather than focusing solely on the number of flakes.

Storing hay

Storing hay properly is crucial to maintain its quality and prevent spoilage. Here are some guidelines for storing hay:

Dry Storage Area: Choose a well-ventilated storage area that is dry and free from moisture. This helps prevent mold and mildew growth. A dedicated hay barn or shed is ideal, but if that’s not available, consider using a covered area with a waterproof tarp or plastic sheeting to protect the hay from rain and snow.

Elevate Hay: Keep the hay off the ground using pallets or other elevated surfaces. This helps prevent moisture absorption from the ground and allows air circulation around the bales.

Stack Bales Properly: When stacking bales, create rows with space between them to allow air to flow freely. Avoid stacking bales too high, as excessive height can lead to instability and potential collapses. Ensure that the stack is secure and won’t topple over.

Protect from Sunlight: Sunlight exposure can cause hay to lose nutritional value and fade in color. Cover hay outside with UV-resistant tarps or place it under a shade structure to minimize direct sunlight exposure.

Maintain Ventilation: Good airflow is essential to prevent the accumulation of heat and moisture. Avoid tightly packing bales together, as it restricts airflow. Leave sufficient gaps between bales and along the sides of the storage area for air to circulate.

Monitor Moisture Levels: Regularly check the moisture content of stored hay to ensure it remains within acceptable limits. High moisture levels can lead to mold growth and spontaneous combustion. Use a hay moisture meter to assess the moisture content periodically.

Rotate Stock: Practice a first-in, first-out system to use older hay before newer hay. This helps prevent older hay from sitting for extended periods, potentially losing quality or becoming a fire hazard.

Pest Control: Take precautions to deter rodents and insects from accessing the hay storage area. Use appropriate pest control methods and keep the storage area clean and free from debris that can attract pests.

By following these storage guidelines, you can help maintain your hay’s quality and nutritional value over an extended period, ensuring it remains suitable for feeding your animals.

Using hay for livestock

Hay is commonly used as a primary feed source for various livestock types, including horses, cattle, sheep, goats, and rabbits. Here are some key points to consider when using hay for livestock:

Nutritional Requirements: Different livestock species have varying nutritional needs. Ensure that the hay you provide meets the specific nutritional requirements of your animals. Factors such as protein, energy, and fiber content should be considered. Consult with a veterinarian or livestock nutritionist to determine the appropriate type and quality of hay for your animals.

Quality Assessment: Evaluate the quality of the hay before feeding it to your livestock. Look for bright green color, sweet smell, absence of mold or dust, and good leaf retention. High-quality hay should be free from weeds, foreign objects, and excessive moisture.

Feeding Methods: There are several ways to feed hay to livestock, depending on the animal’s size, feeding behavior, and nutritional needs. Options include:

Pasture Grazing: Allowing animals to graze on open pastures where hay is readily available.

Bale Feeding: Providing hay bales in feeders or racks, allowing livestock to consume the hay as needed. This method helps minimize waste and keeps the hay off the ground, reducing contamination.

Hay Net or Slow Feeder: Using hay nets or slow feeder systems can help regulate hay intake, reduce waste, and simulate grazing behavior for animals in stalls or pens.

Quantity and Frequency: Determine the appropriate amount of hay to feed based on the animal’s body weight, age, activity level, and nutritional requirements. Feeding 1-2% of the animal’s body weight in hay is generally recommended daily. Divide the total amount into multiple daily feedings, especially for animals with limited grazing access.

Supplemental Feeding: Depending on the nutritional content of the hay and the specific requirements of your livestock, you may need to supplement their diet with additional feeds, such as grain, pellets, or mineral supplements. Consult a veterinarian or livestock nutritionist to design a balanced animal diet.

Water Access: Ensure that livestock can always access clean and fresh water, especially when feeding hay. Hay intake can increase an animal’s water requirements, so monitor water availability and replenish as needed.

Storage and Quality Maintenance: As discussed earlier, store hay properly to maintain its quality over time. Protecting hay from moisture, sunlight, pests, and excessive heat will help preserve its nutritional value.

Remember that individual animals may have specific dietary needs and health considerations. It is advisable to seek guidance from a veterinarian or livestock nutritionist to develop a feeding plan tailored to your specific livestock and management practices.

Conclusion

In conclusion, hay is vital in feeding and caring for livestock. It is a valuable source of nutrition, fiber, and roughage for horses, cattle, sheep, goats, and rabbits. 

Understanding the nutritional requirements of your livestock, assessing hay quality, and implementing proper storage and feeding methods are essential for maintaining the health and well-being of your animals.

By selecting the appropriate type of hay, providing sufficient quantities based on body weight and nutritional needs, and ensuring access to clean water, you can help meet the dietary requirements of your livestock.

 Additionally, proper storage techniques, such as keeping hay dry, well-ventilated, and protected from sunlight and pests, will help maintain the quality and nutritional value of the hay over time.

Always consult a veterinarian or livestock nutritionist for specific feeding recommendations tailored to your animals’ needs and to address individual health considerations. With careful attention to hay selection, storage, and feeding practices, you can provide your livestock with a balanced and nutritious diet that supports their overall health and productivity.