how to trim a bird’s beak at home

how to trim a bird’s beak at home

How to trim a bird’s beak at home

You looked at your bird today and something about the beak seemed off — longer than you remember, a little uneven, maybe curving in a way that looks wrong. The instinct to search for how to fix it yourself makes sense. Here’s the reassuring part: a healthy beak essentially never needs a full trim, so if yours looks overgrown, that’s useful information pointing you toward a clear next step, not a grooming job waiting on you.

This guide walks through what a normal beak actually looks like, why overgrowth happens, how to judge whether it’s urgent, and what really happens at a vet visit. It also covers the one narrow thing that’s reasonable to handle at home. It won’t walk you through performing a full trim yourself — every avian-veterinary source we could find agrees that’s genuinely risky to the bird, for reasons explained below.

Quick Answer

A healthy bird’s beak wears down naturally through normal eating, chewing, and use, and rarely needs trimming. If yours looks overgrown, it’s usually a sign of an underlying issue — diet, liver health, infection, or an old injury — rather than something to simply file down. Light filing of an already-sharp tip is reasonable at home; anything beyond that should be handled by an avian veterinarian, since the beak has a live blood supply.

Key Takeaways

  • A truly healthy beak almost never needs a full trim — overgrowth is a symptom worth investigating, not a routine grooming task.
  • Common causes include diet-related liver strain, infections, old injuries, genetic issues, and mites — a vet visit identifies which one applies.
  • The beak’s blood supply makes a full DIY trim genuinely risky, not just old-fashioned advice to be cautious.
  • Some species naturally have longer or more curved beaks than others — what looks “overgrown” may just be normal for that bird.

In this article: What a Healthy Beak Looks Like · Why Beaks Become Overgrown · Is This an Emergency? · What Happens at the Vet · What’s Reasonable at Home · Why Not to DIY a Full Trim · Prevention · Species Notes · FAQ

What a Healthy Beak Actually Looks Like

A bird’s beak is made of bone covered by a layer of keratin, the same protein in human nails, and it grows continuously throughout life. In a healthy bird, normal eating, chewing, and preening wear it down at roughly the same pace it grows, so it stays a stable, functional length without any intervention.

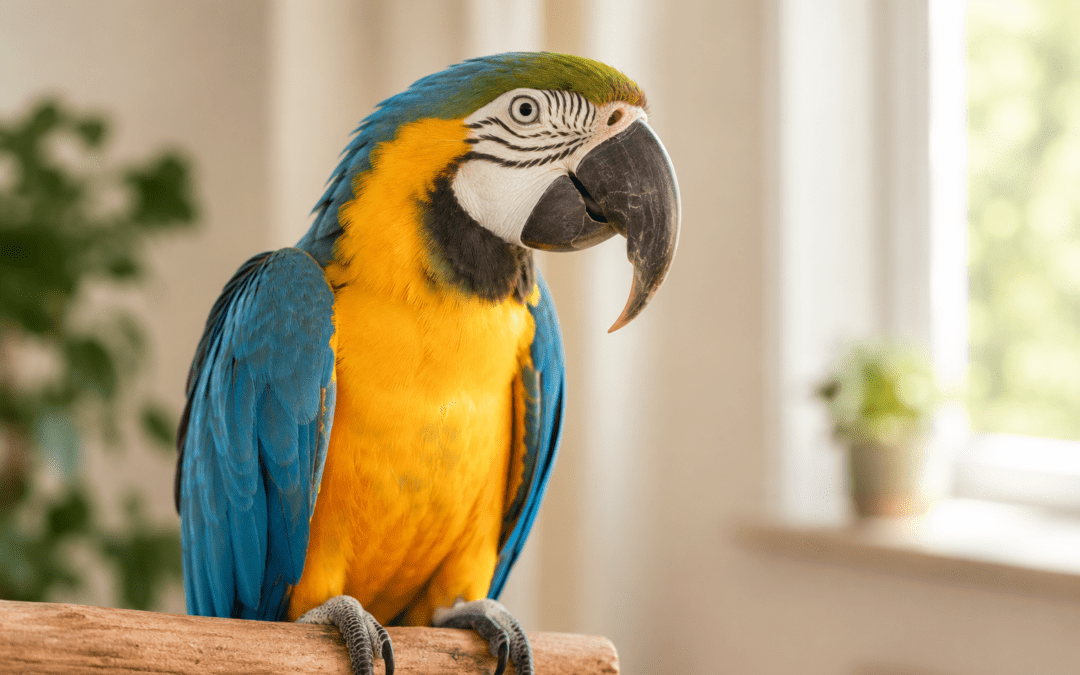
Beak shape and length also vary a lot by species, and that normal variation gets mistaken for overgrowth more often than you’d think. Macaws and pionus parrots, for example, are commonly flagged by worried owners as having an overgrown beak when the length and curve are simply typical for that species.

Pet Care Tip: Before assuming something’s wrong, look up reference photos of healthy adult beaks for your specific species. A shape that looks unusual to you may be completely normal for your bird.

Why Beaks Become Overgrown: The Real Causes

Because a healthy beak self-maintains, visible overgrowth is a sign that something is interfering with that natural balance. The most common causes are:

  • Diet-related liver strain. A diet too high in fat can contribute to chronic liver disease, which is one of the more frequent underlying causes of beak overgrowth.
  • Infectious disease, including viral infections like PBFD (psittacine beak and feather disease), which can affect beak growth and structure.
  • Trauma to the base of the beak, which can disrupt normal growth patterns even after the injury itself has healed.
  • Genetic or developmental issues, more often seen in young birds whose beaks didn’t develop or align normally.
  • Parasitic or fungal infections, including mites such as Knemidocoptes, which can cause a crusty, overgrown appearance.

Pet Care Tip: Because the cause matters as much as the trim itself, a vet visit for an overgrown beak is really a diagnostic visit — treating the underlying issue is what prevents the overgrowth from simply coming back.

Is This an Emergency? A Simple Decision Framework

Not every overgrown-looking beak needs same-day attention, but some situations do. Use this to sort out how quickly to act:

  • Schedule a routine avian vet visit if the beak looks longer or uneven but your bird is eating, drinking, and behaving normally, with no bleeding or visible injury.
  • Seek same-day or emergency care if there’s bleeding, an obvious injury, or your bird is struggling to eat.
  • Compare against normal species variation first if the beak looks fine otherwise and your bird seems completely normal — then book a routine check if you’re still unsure.

Pet Care Tip: When in doubt, a routine vet visit costs you far less than waiting through uncertainty. Avian vets see this exact question often and can usually resolve the worry in one appointment.
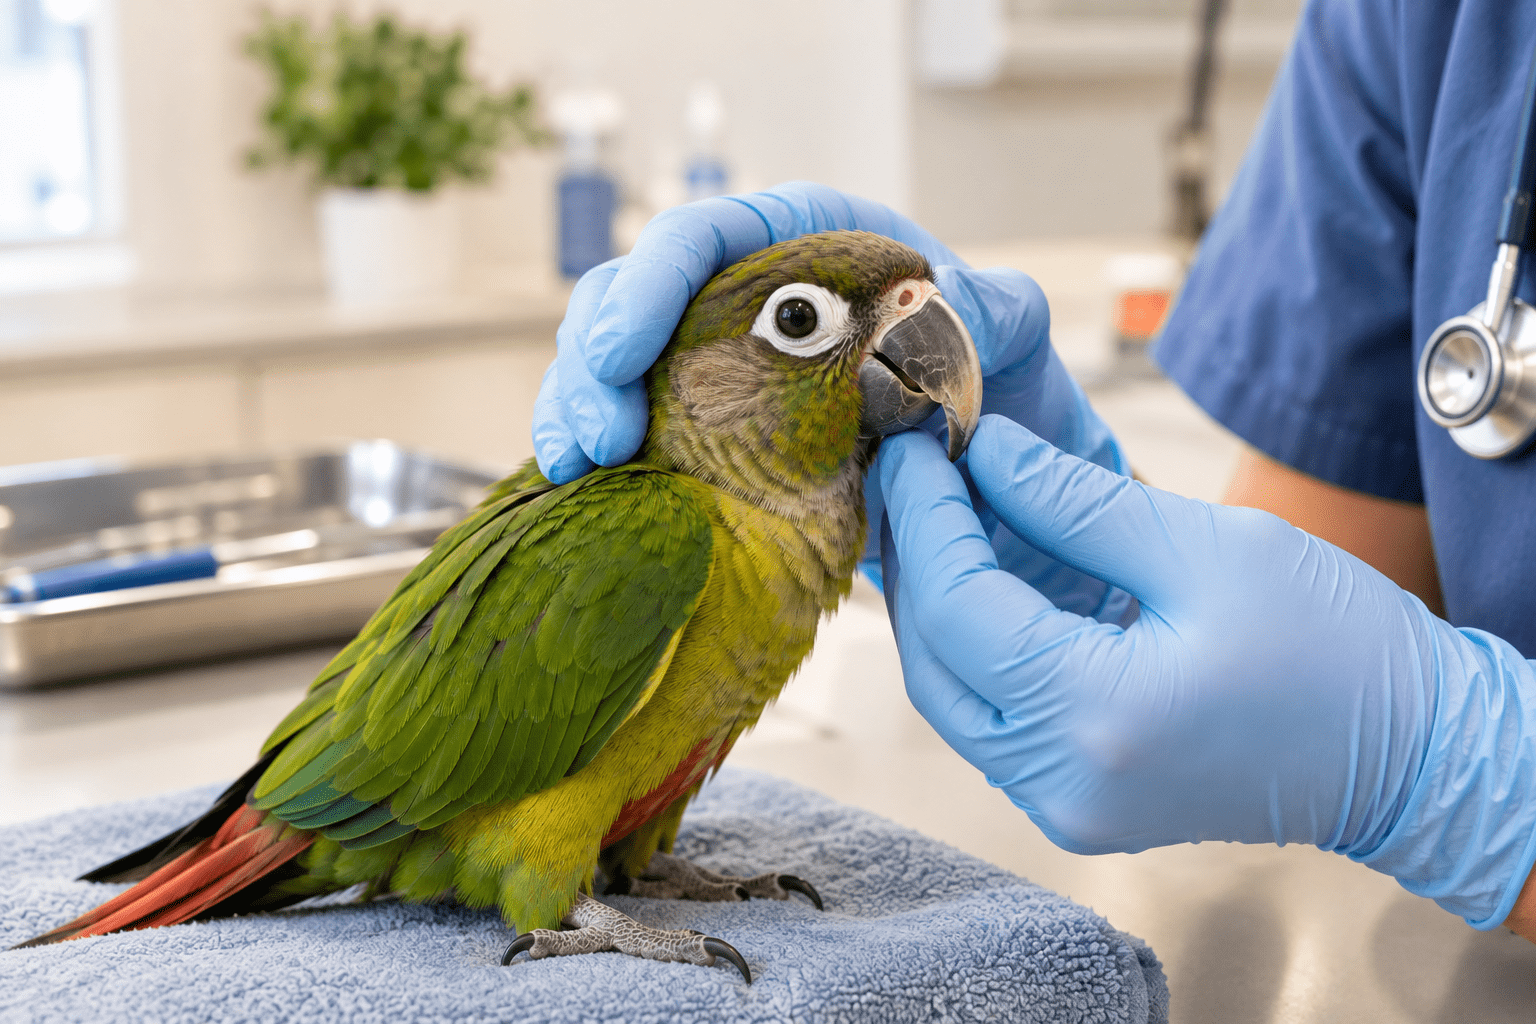
overgrown beak in birds

What Actually Happens at an Avian Vet Beak Appointment

An avian vet’s exam typically starts with a look at the whole bird, not just the beak, since overgrowth is so often tied to something systemic like liver health. Bloodwork or other diagnostics are common, aimed at finding the actual cause rather than just addressing the symptom.

If a trim is needed, vets use tools most households don’t have on hand and aren’t trained to use safely — including Dremel-style rotary tools and cautery pens, which allow precise shaping with far less bleeding risk than clippers or files in inexperienced hands.

Pet Care Tip: Ask your vet to show or explain what they found and why, not just to perform the trim. Understanding the cause helps you prevent a repeat visit.

The One Thing That’s Reasonable to Do at Home

There’s a real difference between correcting genuine overgrowth and simply softening an already-healthy beak’s sharp tip — and only the second one is reasonable for an owner to handle. If your bird‘s beak is otherwise normal but has developed a slightly sharp point, some bird owners lightly file just that point with a fine-grit file, using a few gentle strokes at most, gripping near the base to avoid stressing the beak’s attachment.

This is not a substitute for addressing an actually overgrown, uneven, or misshapen beak — that always calls for a vet. Stop well short of anything that looks like reshaping; a sharp tip is a quick, low-risk touch-up, not a project.

Pet Care Tip: If you’re ever unsure whether what you’re looking at is “a bit sharp” or “actually overgrown,” treat it as the latter and check with a vet. The downside of an unnecessary vet visit is far smaller than the downside of a home trim gone wrong.

Why a Full Trim Should Never Be DIY

The beak isn’t inert material — it’s living tissue with a blood supply and nerve endings running through it, similar in principle to a nail’s quick. Veterinary sources are consistent that trimming it incorrectly can cause real bleeding, and that risk is often greater in an already-overgrown beak, where the blood supply tends to extend further than in a normal one.

Beyond bleeding, an improper trim can split or crack the beak, jar its base, or lead to a permanent deformity if the wrong tools or technique are used. These aren’t rare edge cases — they’re the specific reasons every veterinary source we reviewed advises against attempting a structural trim without training and the right equipment.

Pet Care Tip: If you ever feel tempted to “just trim it a little” yourself, treat that urge as a sign to book a vet visit instead — the risk isn’t proportional to how small the trim feels going in.

Preventing Overgrowth: Diet, Perches, and Enrichment

Since diet-related liver strain is one of the more common underlying causes, a balanced diet appropriate for your species — rather than a fatty, seed-heavy one — supports both general health and normal beak wear. Varied perch textures give your bird more natural opportunities to wear the beak down through everyday activity, and offering a rotation of safe chew materials (rather than just one toy) does the same.

Pet Care Tip: If you’re not sure your bird’s diet is well-balanced for its species, ask your avian vet to review it at your next visit — this is a quick check that can head off a much bigger issue later.
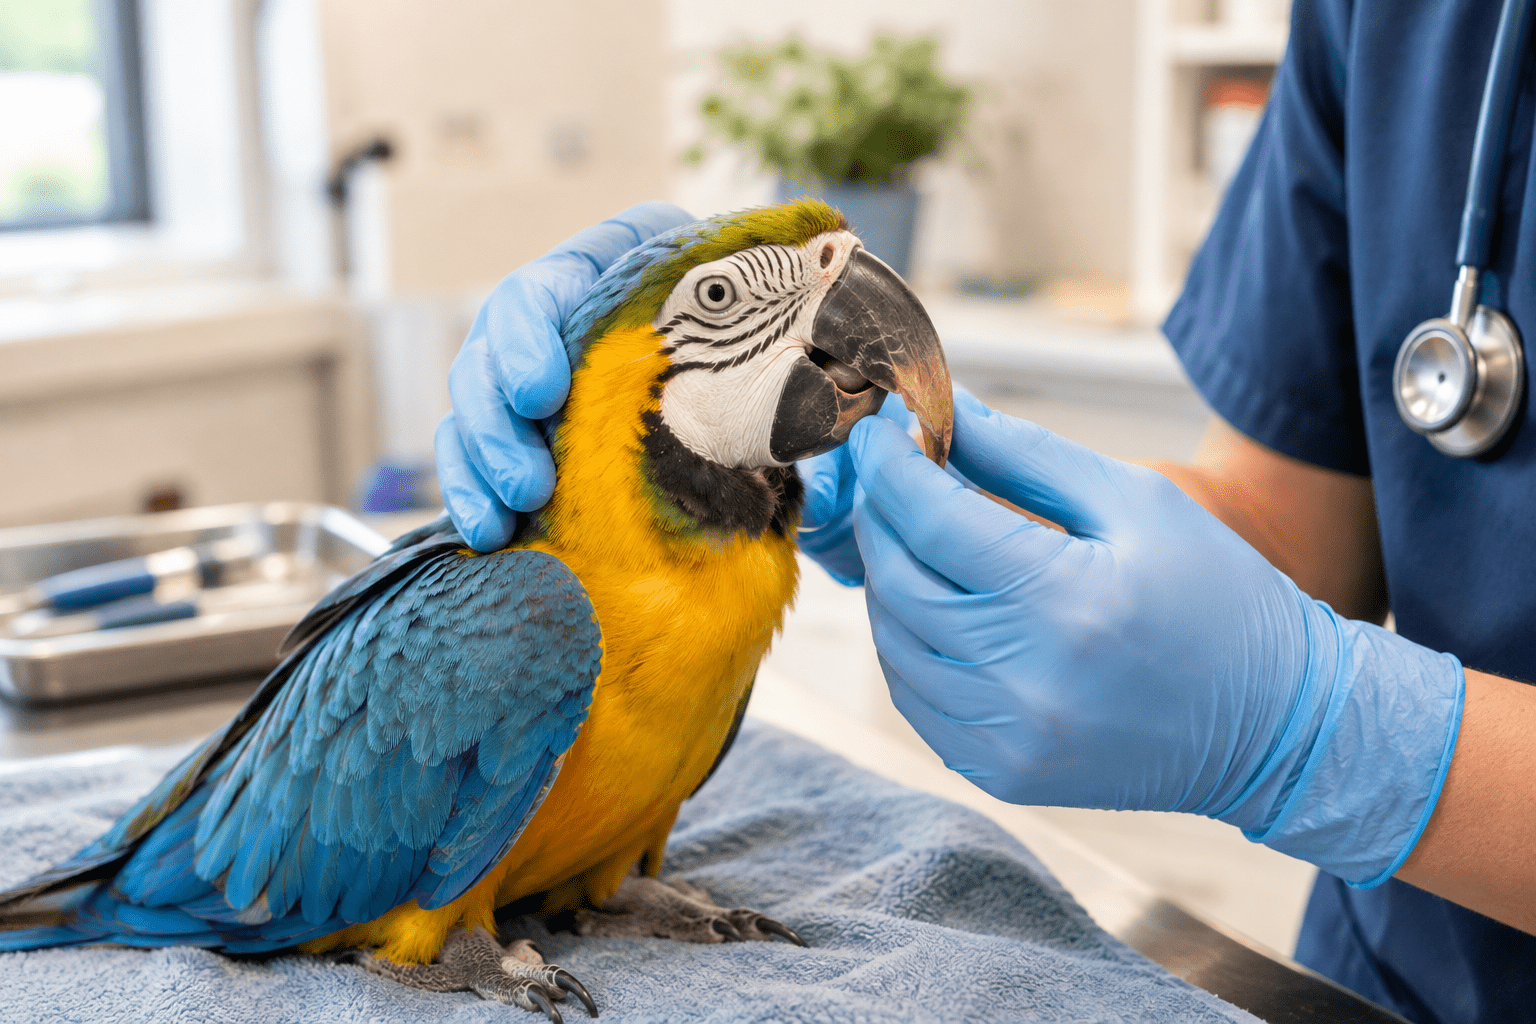
bird beak overgrown

Species Notes

Beak size and curve vary meaningfully across species — a macaw’s substantial hooked beak and a budgie’s small, neat one are both completely normal for their respective birds. Rather than comparing your bird’s beak to a different species’ shape, use reference images specific to your own bird’s breed as your baseline, and treat a genuine change from that baseline — not just an unfamiliar shape — as the signal worth investigating.

Pet Care Tip: When you search for reference photos, look specifically for adult birds of your exact species and, if possible, your bird’s subspecies or color mutation — even close relatives can have meaningfully different beak shapes.

Practical Examples

An owner who worried over a normal macaw beak. The beak’s length and hook looked dramatic compared to smaller birds the owner had previously kept, but a vet visit confirmed it was entirely typical for the species, with no trim needed.

Overgrowth traced back to diet. A bird’s beak had grown visibly uneven over several months; bloodwork pointed to early liver strain linked to a high-fat diet. Dietary changes alongside a couple of vet-guided trims during recovery resolved the underlying issue.

A young bird with a developmental misalignment. A cockatiel chick’s beak didn’t align normally from an early age. Rather than a one-time fix, the vet set up an ongoing care plan, since this kind of issue typically needs periodic management rather than a single trim.

Common Mistakes to Avoid

  • Assuming any long-looking beak is automatically overgrown, without checking what’s normal for that species first.
  • Attempting to correct real overgrowth with clippers or heavy filing at home. This is the specific scenario every vet source warns against.
  • Treating overgrowth as cosmetic instead of investigating why it’s happening.
  • Delaying a vet visit because the bird is “still eating okay.” Some underlying causes progress even while a bird seems otherwise fine.
  • Skipping the diet and enrichment side of prevention after a vet-corrected trim, which lets the original cause simply cause it again.

Editor’s Insights

  • Photograph your bird’s beak periodically. A simple photo record makes it much easier to tell whether something has actually changed versus just catching your attention differently today.
  • Ask your vet what caused the overgrowth, not only for the trim — the cause is what determines whether it’s likely to recur.
  • Offer a genuine variety of chew-safe textures rather than a single toy, since variety is what supports natural wear.
  • If you do lightly file a sharp tip yourself, keep it to a light touch-up only — anything more belongs with a vet.

Which Situation Applies to You?

  1. Is your bird eating, drinking, and behaving normally with no bleeding or visible injury? → Schedule a routine avian vet visit to check the beak.
  2. Is there bleeding, an obvious injury, or difficulty eating? → Seek same-day or emergency avian vet care.
  3. Does the beak look longer but your bird seems completely normal otherwise? → Compare against normal photos for your species first, then book a routine check if you’re still unsure.

When to Act: A Quick Reference

Situation

What it usually means

What to do

Beak looks long but bird eats and behaves normally

Possibly normal species variation, or early overgrowth

Compare to normal species reference photos; schedule a routine vet check if unsure

Beak visibly uneven, flaking, or growing unevenly

Possible malocclusion, old injury, or nutritional issue

Routine avian vet visit for diagnosis

Sudden change, bleeding, or bird stops eating

Possible injury or acute illness

Same-day or emergency avian vet care

Sharp tip catching on things, beak otherwise healthy

Normal minor sharpness

Light filing at home is reasonable, or a quick vet check if unsure

Checklists

Before You Worry Checklist

  • Compare your bird’s beak to reference photos of healthy adults of the same species
  • Confirm your bird is eating and preening normally
  • Check for any bleeding, swelling, or visible asymmetry
  • Note any recent diet or environment changes

When You See the Vet Checklist

  • Bring a list of any recent diet changes
  • Note how long the beak has looked different
  • Mention any other behavior changes (appetite, energy, droppings)
  • Ask what likely caused it, not just for the trim itself

Frequently Asked Questions

Why does my bird’s beak look overgrown? 

Usually because something is interfering with the beak’s natural wear — common causes include diet-related liver strain, infections, old injuries, genetic issues, or mites. A vet visit identifies the actual cause.

Is it safe to trim my bird’s beak myself? 

A full, structural trim isn’t safe to do at home — the beak has a live blood supply, and improper trimming risks bleeding, splitting, or permanent deformity. Lightly filing an already-sharp tip on an otherwise healthy beak is the one exception generally considered reasonable.

What causes a bird’s beak to grow unevenly? 

Uneven growth is often linked to an old injury to the beak’s base, a genetic or developmental issue, or an underlying illness affecting overall growth.

How do I know if my bird’s beak length is actually normal for its species? 

Compare it to reference photos of healthy adults of your specific species — beak size and curve vary a lot between species, and what looks unusual for one bird may be completely normal for another.

Can diet really affect beak health? 

Yes. A diet too high in fat is a common contributor to liver strain, which is one of the more frequent underlying causes of beak overgrowth.

What happens if an overgrown beak isn’t treated? 

The underlying cause can progress, and an increasingly overgrown or misshapen beak can eventually interfere with normal eating.

How often do birds need professional beak trims? 

A healthy bird typically needs none at all. If your bird needs recurring trims, that’s a sign worth discussing with your vet, since it usually points to an ongoing underlying cause rather than something to just keep trimming around.

Is filing a bird’s beak at home ever okay? 

Yes, in one narrow case: lightly softening an already-sharp tip on an otherwise healthy beak. Anything beyond that — correcting real overgrowth or reshaping — should be done by an avian vet.

Related Reading

  • Bird Diet and Nutrition Basics
  • Choosing the Right Perches and Enrichment for Your Bird
  • Recognizing Signs of Illness in Birds
  • How to Find and Choose an Avian Vet

Related Reading

  • Bird Diet and Nutrition Basics
  • Choosing the Right Perches and Enrichment for Your Bird
  • Recognizing Signs of Illness in Birds
  • How to Find and Choose an Avian Vet

Sources & References

  • PetMD, “What to Do if Your Bird’s Beak is Overgrown”
  • VCA Animal Hospitals, “Beak and Nail Care in Birds”
  • Melbourne Bird Vet, “Abnormal and Overgrown Beaks in Birds”
  • Lovebird Care, “Beak Trimming” — cited only for the narrow, bounded light-filing guidance, separate from any structural trim advice


Written and reviewed by the Pets Store Home editorial team. This article is not a substitute for professional veterinary advice — if you’re concerned about your bird’s beak, please consult an avian veterinarian.

Last reviewed: September 2026

Where to Go From Here

Noticing a change in your bird’s beak and looking into it is exactly the right first step — in almost every case, the path forward is a straightforward vet visit rather than anything you need to handle alone. Since diet plays such a large role in beak and overall health, our guide to bird diet and nutrition basics is a good next read, especially if you’re working through an overgrowth issue tied to what your bird’s been eating.

pet insurance that covers pre existing conditions

pet insurance that covers pre existing conditions

Pet insurance that covers pre existing conditions

If a pet insurance claim just got denied, or you’re shopping for a policy and worried an old vet visit will come back to haunt you, “pre-existing condition” can feel like a vague, unfair label. It isn’t as vague as it seems. Insurers apply a fairly specific definition, and a few key distinctions decide almost everything about what happens next.

This guide walks through what actually counts as pre-existing, why the difference between a curable and an incurable condition matters more than anything else, how to check your own pet’s situation, and what to do if a claim gets denied. It won’t rank insurers or tell you which one to buy — policy terms and pricing change, and the right choice depends on your situation and current offers. Instead, it explains the mechanics so you can ask better questions before you sign anything.

Quick Answer

Most pet insurers won’t cover a condition that showed symptoms — diagnosed or not — before your policy started or during the waiting period. Curable conditions, like an ear infection, may become insurable again after a symptom-free stretch, often around six months to a year depending on the insurer. Incurable or chronic conditions, like arthritis or diabetes, are almost never covered by standard policies.

Key Takeaways

  • A condition can count as pre-existing even if it was never formally diagnosed — a symptom noted once in old vet records is often enough.
  • Curable vs. incurable is the single biggest factor in whether coverage is ever possible for that condition again.
  • A pre-existing condition doesn’t disqualify your pet from insurance altogether — it excludes coverage for that specific issue, not everything else.
  • A denied claim isn’t necessarily the final word; most insurers have a documented appeal process.

In this article: What Counts as Pre-Existing · Curable vs. Incurable · Self-Check Your Situation · How Insurers Verify It · Why “Managed” Isn’t “Cured” · Bilateral Exclusions · Appealing a Denied Claim · Alternatives

What Actually Counts as “Pre-Existing”

Across insurers, the definition is consistent: a pre-existing condition is any illness or injury that showed signs or symptoms before your policy’s effective date, or during the waiting period after you enrolled — whether or not a vet formally diagnosed it at the time.

That last part catches people off guard. If a symptom was ever noted in your pet’s records, even in passing, an insurer can point to it later. A single vague note like “occasional limping” from years ago can be enough for an insurer to classify a current limp as pre-existing, even if nobody diagnosed anything at the time.

Pet Care Tip: Before applying, request your pet’s complete vet history rather than relying on memory. You want to know exactly what’s on record before an insurer does.

curable vs incurable pet insurance

Curable vs. Incurable: Why This Distinction Decides Everything

This is the split that determines whether a pre-existing condition is temporary or permanent from an insurance standpoint.

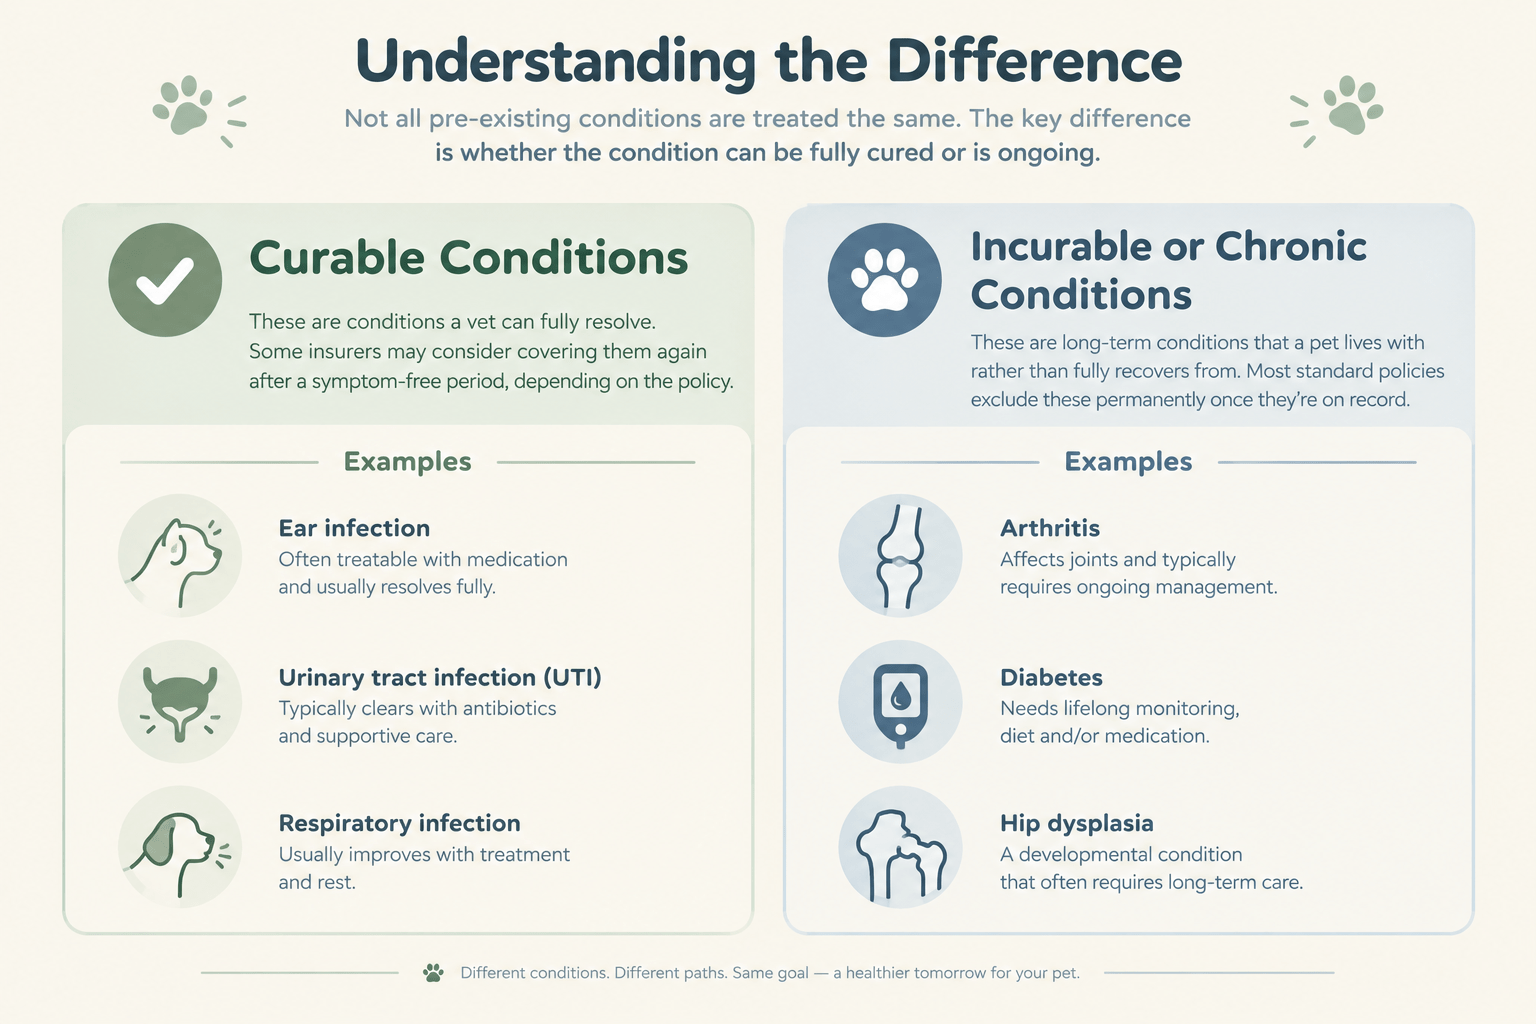
Curable conditions are ones a vet can fully resolve — ear infections, urinary tract infections, respiratory infections, and similar one-time issues. Several insurers will reconsider these for coverage after a defined symptom-free period. ASPCA Pet Health Insurance, for example, covers previously cured conditions again after 180 consecutive symptom-free days, with an exception carved out for knee and ligament issues.

Incurable or chronic conditions — arthritis, diabetes, hip dysplasia, ongoing allergies, cancer — are conditions a pet lives with rather than fully recovers from. Most standard policies exclude these permanently once they’re on record. AKC Pet Insurance is a notable exception: its policy states it covers both curable and incurable pre-existing conditions after 365 days of continuous coverage, with certain conditions like intervertebral disc disease and cruciate ligament disease eligible after 180 days instead. Coverage isn’t available in every state, so this varies by location.

Pet Care Tip: When you’re comparing policies, ask specifically how each one handles incurable conditions — not just curable ones. Most marketing materials focus on the more common curable case.

A Self-Check: Is Your Pet’s Situation Likely to Be Treated as Pre-Existing?

Before assuming the worst, walk through these questions:

  1. Did the symptom appear before your policy’s start date, or during the waiting period? If yes, it’s likely to be classified as pre-existing regardless of when it was formally diagnosed.
  2. Is it documented anywhere in vet records, even briefly? An offhand note counts, not just a formal diagnosis.
  3. Has it been fully resolved and symptom-free for the insurer’s specified window? If it’s curable and you can show a clean stretch, it may become insurable again.
  4. Is it a condition your pet will likely manage long-term rather than recover from? If so, expect it to stay excluded under most standard policies.

Pet Care Tip: Keep your own simple log — condition, first noted date, and any symptom-free stretches — separate from what’s in the vet’s file. It’s useful both for your own tracking and if you ever need to demonstrate a resolved condition.

How Pet Insurance Companies Actually Verify Pre-Existing Status

Insurers typically request your pet’s full veterinary history when you apply or when you file a claim, rather than taking your word for a clean bill of health. They compare the date a symptom first appears in those records against your policy’s effective date and waiting period. Some insurers review this upfront during enrollment; others only pull records when a claim is filed, which is why a policy can look fully approved at signup and still result in a denial

Why “Managed” Isn’t the Same as “Cured”

This is a common source of frustration. A condition that’s controlled with ongoing medication or care isn’t the same, from an insurer’s perspective, as one that’s actually resolved. Trupanion’s own guidance illustrates this with an allergy example: a dog diagnosed with allergies before getting a policy remains excluded for that condition even if years pass without symptoms, because the underlying diagnosis is still on record. The absence of flare-ups doesn’t erase the diagnosis.

The practical takeaway: if your pet’s condition requires ongoing management rather than a clean resolution, don’t expect a symptom-free stretch alone to reset its status with most insurers.

Pet Care Tip: If you’re unsure whether your pet’s condition would be considered “cured” versus “managed,” ask the insurer directly, in writing, before you rely on a symptom-free period to reapply for coverage.

Bilateral Exclusions, Explained Simply

A “bilateral exclusion” trips up a lot of pet owners. If your pet had a joint or ligament issue on one side of the body before enrollment, many policies will exclude that same type of condition on the opposite side too — even though the other leg has never actually been injured. A torn ligament in the left knee, for instance, can mean the right knee’s future ligament issues are excluded as well, on the reasoning that pets prone to one-sided joint problems are often prone to the same issue on the other side.

It’s worth asking any insurer directly whether they apply bilateral exclusions and to which conditions, since this isn’t always obvious from marketing pages.

If a Claim Is Denied for This Reason: Appeal Steps

A denial isn’t automatically the end of the conversation. A typical appeal process looks like this:

  1. Read the denial letter carefully. Identify exactly which policy provision was cited, the appeal deadline, and any documentation the insurer is asking for.
  2. Gather your supporting documentation. Complete vet records, invoices, your policy certificate, any pre-enrollment exam records, and a clear timeline of symptoms.
  3. Write a formal appeal. Address the specific reason for denial directly, reference the relevant policy language, and attach your documentation clearly.
  4. Submit before the deadline. Most insurers specify a window, commonly 30 to 60 days, and many accept appeals through an online portal or certified mail.
  5. Follow up. Check in periodically, keep a record of who you spoke with and when, and ask for a supervisor if the process stalls.

Pet Care Tip: Appeals tend to succeed when they address the exact reason for denial with specific evidence — a general complaint that “this isn’t fair” is far less effective than pointing to a dated vet record that contradicts the insurer’s timeline.

Alternatives When a Condition Truly Can’t Be Insured

If a condition is permanently excluded, insurance isn’t the only option for managing the cost:

  • Veterinary financing programs (like CareCredit) let you spread out treatment costs over time.
  • Wellness or membership plans through some vet practices cover routine and ongoing care outside traditional insurance.
  • Breed- or condition-specific charitable funds and grants exist for certain chronic conditions — a quick search or a conversation with your vet’s office can surface options relevant to your pet’s specific diagnosis.
  • A dedicated savings fund for your pet’s ongoing care, separate from general savings, can help absorb predictable recurring costs even without insurance.

Common Mistakes to Avoid

  • Assuming an undiagnosed symptom doesn’t count. It often does, if it’s noted anywhere in the records.
  • Not requesting full vet records before switching insurers. You want to know what’s on file before an insurer reviews it.
  • Confusing “managed with treatment” for “cured.” Ongoing management doesn’t reset a condition’s pre-existing status with most insurers.
  • Not confirming the exact symptom-free window required. These vary by insurer and by condition — don’t assume a generic figure applies to your policy.
  • Giving up after a denial without requesting the reason in writing or appealing. Many denials are appealable with the right documentation.

Editor’s Insights

  • Ask any insurer directly how they define “cured” versus “managed” before you count on a symptom-free window resetting coverage.
  • If you’re adopting a pet with limited medical history, treat any documented symptom — however minor — as potentially relevant to future coverage.
  • Compare how each insurer handles incurable conditions specifically, not just their curable-condition policy, since this is where coverage differs most.
  • Keep every piece of correspondence with an insurer in writing, especially around denials and appeals.
what is a pre-existing condition in pet insurance

Special Case: Adopted or Rescue Pets

If you adopted a pet with an unknown or incomplete medical history, there’s often no clean record to check against. Ask the shelter or rescue directly what medical records they do have, even partial ones, before applying for insurance. Enrolling as soon as possible after adoption — before any new symptoms have a chance to appear — is the most direct way to limit how much falls into “pre-existing” territory for a pet whose history you can’t fully verify.

Which Situation Applies to You?

  1. Did a symptom appear before your policy started or during the waiting period, even if undiagnosed at the time? → Likely to be treated as pre-existing.
  2. Was it fully resolved and symptom-free for the insurer’s specified window? → May become insurable again if it’s a curable condition.
  3. Is it a condition your pet is expected to manage long-term? → Unlikely to be covered by a standard policy, regardless of symptom-free stretches.

How Insurers Typically Treat Different Condition Types

Condition type

Example

Typical treatment

Curable, resolved

UTI, ear infection, respiratory infection

May become insurable again after a symptom-free window — commonly around 180 days, though this varies by insurer

Curable, recent/unresolved

An injury still healing

Excluded until it’s documented as fully resolved

Incurable or chronic

Arthritis, diabetes, ongoing allergies

Generally excluded permanently under most standard policies; a small number of insurers offer coverage after an extended waiting period — confirm current terms directly

Bilateral

A ligament issue in one leg

The opposite side may be excluded too, even without a prior injury there

Checklists

Before You Apply

  • Request your pet’s complete veterinary history
  • Note any symptoms in the records, even minor or undiagnosed ones
  • Ask the insurer directly how they define and verify “pre-existing” and “cured”
  • Confirm the waiting period separately from any pre-existing exclusions

If Your Claim Is Denied

  • Request the specific denial reason in writing
  • Gather all relevant vet documentation and a symptom timeline
  • Confirm the appeal deadline and submission method
  • Keep a written record of every follow-up conversation

Frequently Asked Questions

Can I get pet insurance if my pet already has a health condition? 

Yes. A pre-existing condition excludes coverage for that specific issue, not for insurance overall — your pet can still be covered for new, unrelated illnesses or injuries.

Does an undiagnosed symptom count as pre-existing? 

Often, yes. If a symptom appears anywhere in your pet’s vet records before your policy started, an insurer can treat it as pre-existing even without a formal diagnosis at the time.

How long until a curable condition can be covered again? 

It varies by insurer and condition. Some use a 180-day symptom-free window; others require longer. Confirm the specific term with any insurer you’re considering.

What’s the difference between a waiting period and a pre-existing exclusion? 

A waiting period is a set time after enrollment before any claims are accepted. A pre-existing exclusion is separate — it applies to conditions that showed symptoms before the policy started or during that waiting period, and can last for the life of the policy for chronic conditions.

Why doesn’t a symptom-free period always mean my pet’s condition is “cured”? 

Because insurers distinguish between a condition that’s fully resolved and one that’s simply being managed without flare-ups. A managed condition can still be classified as pre-existing even after a long quiet stretch.

What is a bilateral exclusion? 

It’s when an insurer excludes a condition on one side of the body because a related issue was already documented on the other side — common with joint and ligament conditions.

Can I appeal a denied claim for a pre-existing condition? 

Yes, most insurers have a formal appeal process. Success generally depends on addressing the specific reason for denial with clear supporting documentation.

Are there alternatives if my pet’s condition can’t be insured at all? 

Yes — veterinary financing programs, wellness or membership plans, condition-specific charitable grants, and a dedicated savings fund are all options worth exploring.

Related Reading

  • Adopting a Dog: A Complete Adjustment Checklist
  • How to Potty Train an Older Rescue Dog: A Week-by-Week Guide
  • Senior Dog Care Basics: What Changes as Your Dog Ages
  • Understanding Your Dog’s Body Language and Anxiety Signals
  • Sources & References

    • ASPCA Pet Health Insurance, “Pet Insurance and Pre-existing Conditions”
    • AKC Pet Insurance, “Pre-Existing Conditions Coverage for Pets”
    • Trupanion, “Does Trupanion cover pre-existing conditions?”
    • Spot Pet Insurance, “Pre-Existing Conditions in Pet Insurance: What You Should Know”
    • State Farm, “Does Pet Insurance Help Cover Pre-existing Conditions?”
    • BestMoney, “How to Appeal a Denied Pet Insurance Claim”

Written and reviewed by the Pets Store Home editorial team. This article is for general education only and is not financial or insurance advice. Policy terms, waiting periods, and coverage details vary by provider and change over time — confirm current details directly with any insurer before purchasing a policy.

Last reviewed: September 2026

Where to Go From Here

Understanding the curable-versus-incurable split, and knowing that an undiagnosed symptom can still count against you, puts you in a much stronger position than most pet owners walking into a pet insurance application or a claims conversation. If you’ve recently adopted a pet with limited medical history, our guide to adjusting after adoption covers what else to expect in those first few months, from routines to trust-building — the same period when getting insurance sorted out matters most.

how to potty train an older rescue dog

how to potty train an older rescue dog

how to potty train an older rescue dog

You brought home an adult or senior rescue dog, and you’re already cleaning up accidents. Maybe you expected this. Maybe you didn’t, because you assumed a grown dog would already be house-trained. Either way, you’re not doing anything wrong, and neither is your dog.

Potty training an older rescue dog is a different job than potty training a puppy. Your dog’s bladder and bowel muscles are fully developed, so this isn’t about physical growth catching up. It’s about building a predictable routine and enough trust for your dog to relax into it. Some rescue dogs were never house-trained at all. Others were, but the stress of a shelter stay, a new home, and unfamiliar smells has temporarily scrambled that habit.

This guide walks through what to expect week by week, how to figure out what’s actually causing the accidents, and how to handle the very common setback that hits a few weeks in.

Quick Answer

Potty train an older rescue dog with a strict outdoor schedule (every 1–2 hours at first), immediate rewards for outdoor success, and close supervision or confinement whenever you can’t watch them directly. A dip in progress around weeks 3–8 is normal as the dog settles in. Most rescue dogs are reliably house-trained within two to three months.

Key Takeaways

  • Older rescue dogs don’t need more time to learn than puppies — they need routine and trust.
  • A slip-up a few weeks in usually means your dog is settling in, not regressing.
  • Treat “unknown house-training history” as “not house-trained yet,” even if the shelter said otherwise.
  • Confinement tools (crate, pen, gated room) should match your dog’s comfort level, not just your convenience.
  • Sudden or unusual accidents are a reason to call the vet before assuming it’s behavioral.

In this article: Why It’s Different Than Puppy Training · Diagnose the Real Cause · Week-by-Week Timeline · Building the Routine · Choosing a Confinement Setup · The Honeymoon-Period Dip · Senior Dog Adjustments · Vet or Trainer? · Common Mistakes · FAQ

Why Older Rescue Dogs Need a Different Approach

A puppy is learning bladder control for the first time. An adult or senior rescue dog already has it — what they’re missing is a reliable routine, a clear signal for where to go, and confidence that this home is stable enough to relax in.

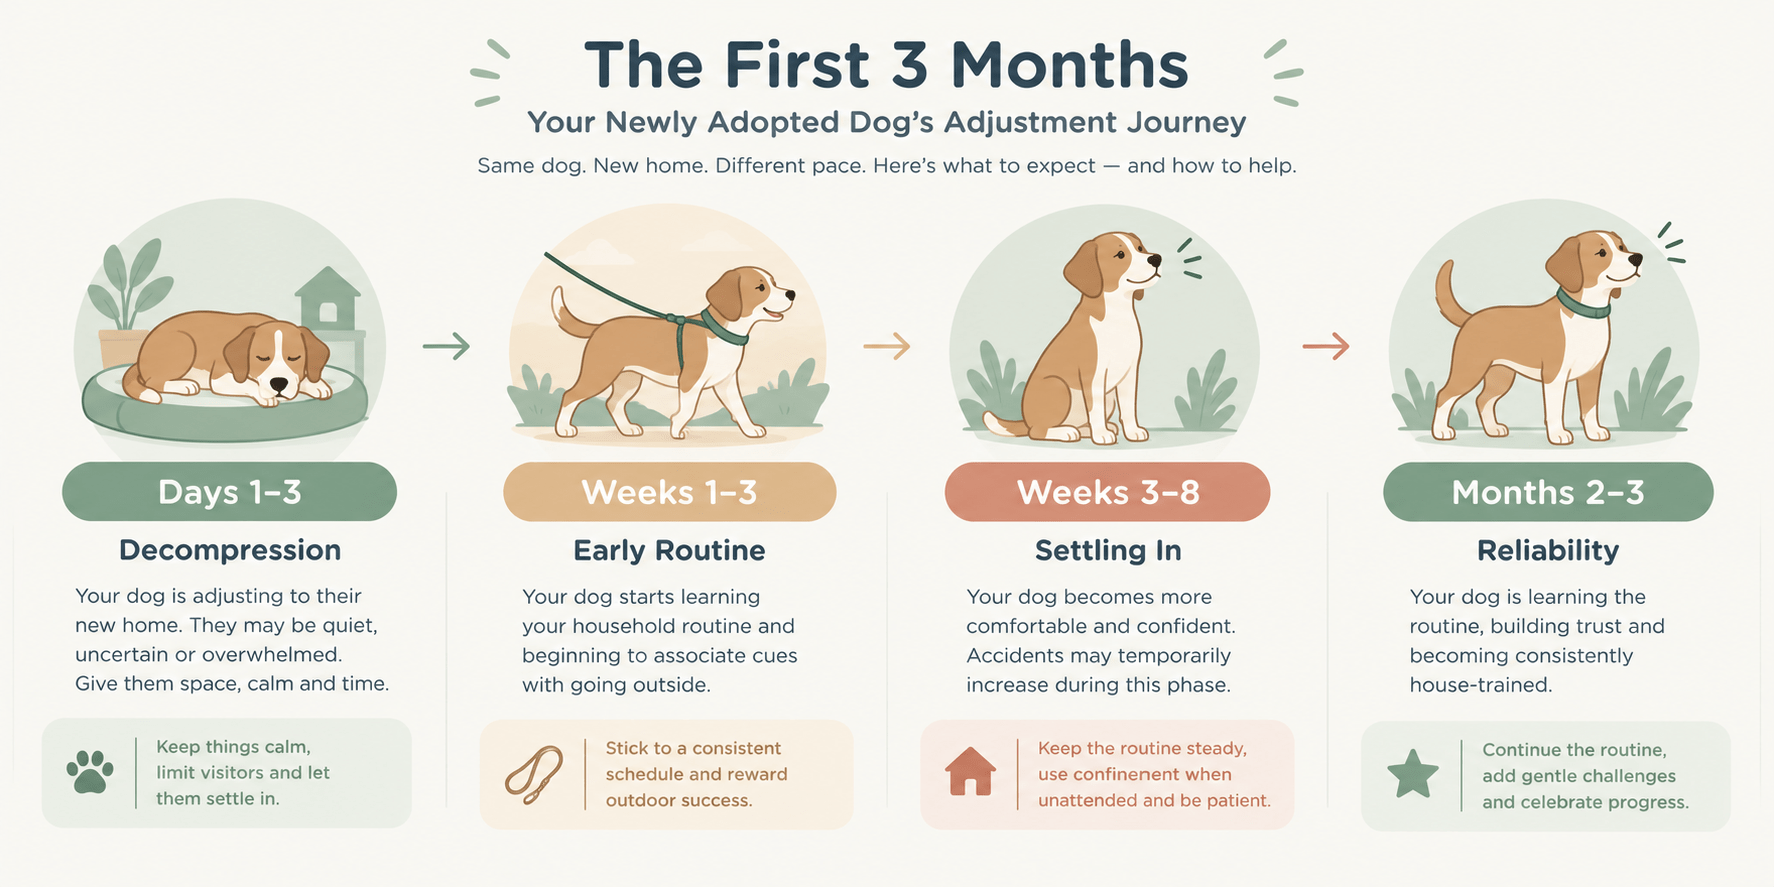
Shelters and rescues often describe a dog’s adjustment using what’s known as the 3-3-3 timeline: roughly three days to decompress from the move, three weeks to start learning your household’s routine, and three months to feel genuinely settled. House-training tends to follow that same arc. A dog who seems to “forget” everything in week one hasn’t forgotten anything — they’re still decompressing.

Pet Care Tip: Resist the urge to test your dog’s limits early on (free roam of the house, skipping a scheduled trip outside). The first few weeks go more smoothly with more structure, not less.

adult dog potty training regression

Diagnose What You’re Actually Dealing With

Before you can fix the accidents, it helps to know which of these you’re dealing with, since each one calls for a slightly different response.

Never house-trained. The dog shows no sign of recognizing “outside” as the goal — no hesitation before going indoors, no relief-seeking behavior at doors.

Stressed or regressed. The dog was likely trained before but is having accidents tied to the move itself — often clustered in the first days or during the week-3-to-8 adjustment dip.

Surface preference. Some dogs, especially those who lived outdoors on concrete or spent time on shelter flooring, associate elimination with a specific surface rather than “outdoors” generally.

Submissive or excitement urination. This is involuntary and tied to greetings or excitement, not a house-training failure. According to the American Kennel Club, dogs displaying it often show accompanying signs like a tucked tail, flattened ears, or crouching, and it’s a social signal rather than a bladder-control issue.

Marking. Marking uses small amounts of urine in multiple spots rather than a full, single-spot emptying, and it often follows a period of sniffing beforehand.

Pet Care Tip: Keep a simple log for the first two weeks — time, location, and what happened right before. Patterns usually surface within a few days and point straight to the cause.

Week-by-Week Expectations for the First 3 Months

Days 1–3 (decompression): Expect some accidents even from previously house-trained dogs. Keep the schedule tight and the household calm; this isn’t the week to judge progress.

Week 1–3 (early routine): Your dog starts associating specific cues — a leash, a door, a phrase — with going outside. Accidents should start spacing out, even if they haven’t stopped.

Weeks 3–8 (settling in, and the dip): This is when many owners see a frustrating step backward. As your dog relaxes and starts showing their real personality, testing boundaries or reacting to lingering anxiety, accidents can tick back up. This dip is a sign of adjustment, not failure — hold the routine steady rather than loosening it.

Months 2–3 (reliability): Most rescue dogs are dependable with an established routine by this point, though dogs with a harder background or ongoing anxiety may need longer.

[IMG: calendar or timeline graphic showing the 3-3-3 adjustment phases]

Pet Care Tip: Don’t judge progress week to week in isolation — compare each week to the one before it. A slow downward trend in accidents matters more than any single bad day.

Building the Core Routine

The daily mechanics are the same fundamentals every trainer recommends, and they matter regardless of your dog’s background:

  • Take your dog out on a consistent schedule — roughly every 1–2 hours at first, plus immediately after waking, eating, and play.
  • Keep them on a leash for outdoor breaks, even in a fenced yard, so you can see exactly what happens.
  • Reward the moment they finish outside, not after you’re back inside. Timing is what makes the connection stick.
  • Feed on a consistent schedule so bathroom needs become predictable too.
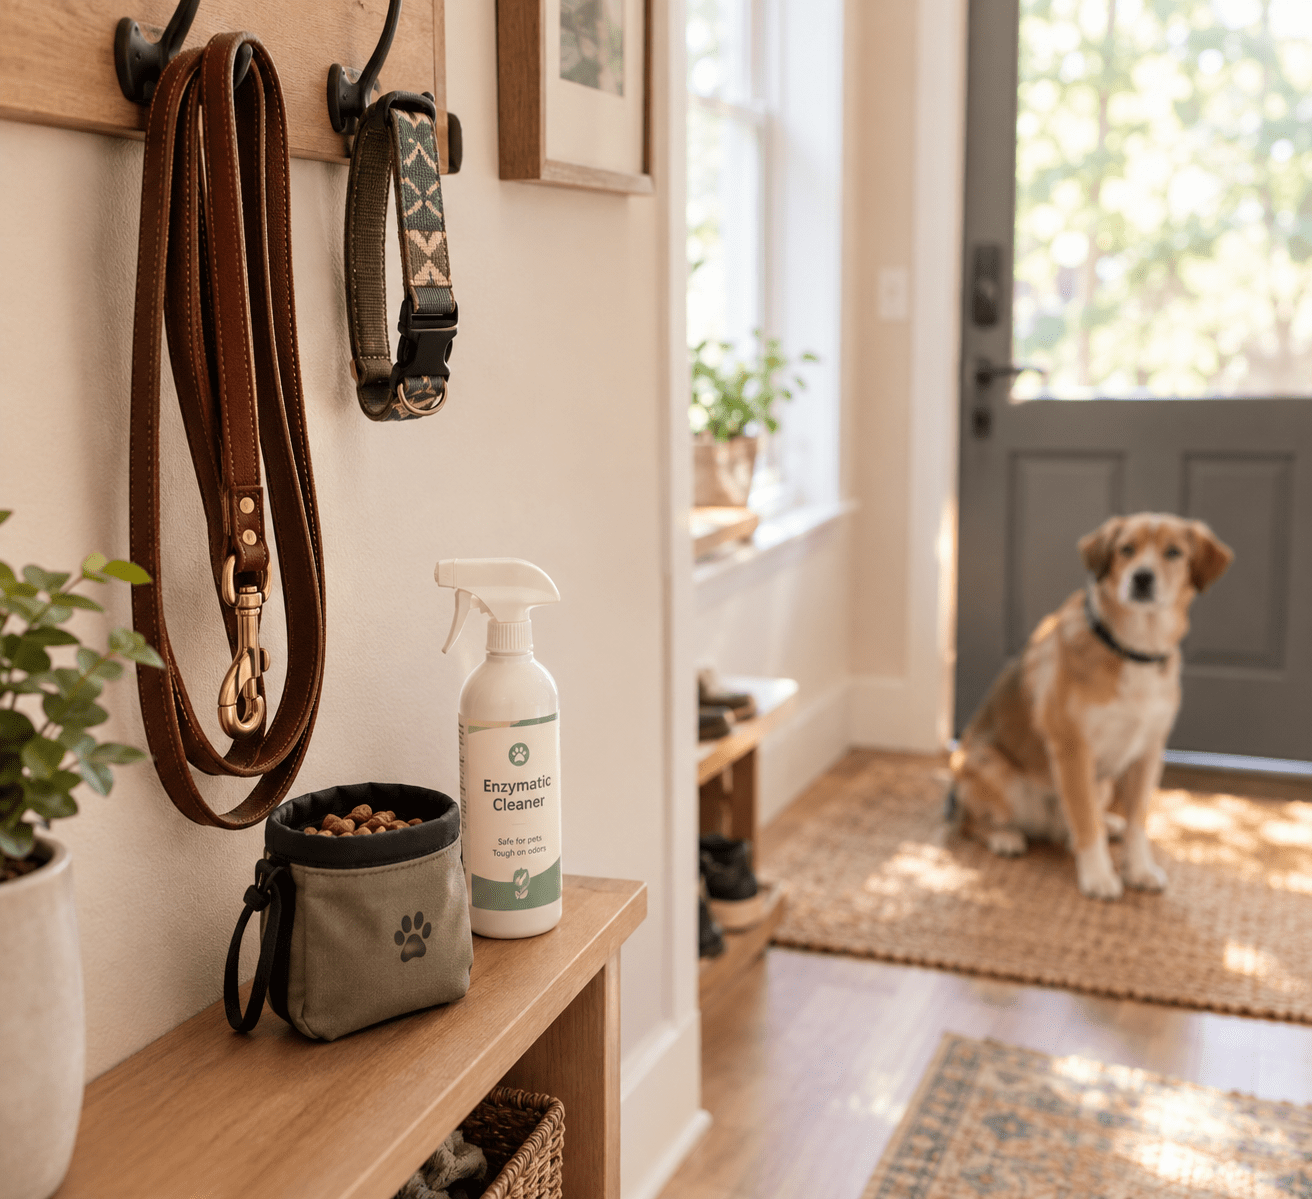
  • Clean any indoor accidents with an enzymatic cleaner rather than an ammonia-based one, since standard cleaners can leave a scent trace that draws the dog back to the same spot.

Pet Care Tip: Reserve one particularly high-value treat exclusively for successful outdoor trips. A reward your dog only gets for this one behavior builds the connection faster than everyday treats.

Choosing a Confinement Setup for an Unknown History

When you can’t supervise directly, some form of confinement prevents accidents from happening unseen — but the right choice depends on your dog’s comfort, not just your floor plan.

A dog who shows no fear of small spaces generally does well with a properly sized crate. A dog who paces, pants, or resists entering one may have had a bad experience with crates before and may do better in an exercise pen or a gated room with more open space. For dogs who are calm but benefit from staying close to you, a short indoor tether during active hours can work well as a bridge step.

Confinement Options at a Glance

Method

Best For

Watch Out For

Crate

Dogs with no crate anxiety who need tight, reliable containment

Can worsen stress if the dog has a negative crate history

Exercise pen

Dogs uneasy in enclosed spaces who need more room to settle

Takes up more floor space; less secure than a crate

Gated room

Larger dogs or multi-dog households

A bigger area gives more room for an accident to go unnoticed

Indoor tether

Supervised time and building trust

Not appropriate for unsupervised periods

Pet Care Tip: Introduce any new confinement space gradually, with the door open and treats scattered inside, before ever closing your dog in. This matters even more when you don’t know their history with crates or small spaces.

Handling the Honeymoon-Period Dip (Weeks 3–8)

This is the part most guides skip, and it’s often the most discouraging stretch for new adopters. Your dog does well for a few weeks, then accidents pick back up.

This isn’t your dog backsliding on purpose. As the initial stress response fades, dogs often become more comfortable expressing their actual personality and, sometimes, their actual anxiety. They may also start testing which behaviors get a reaction from you.

The right response is to tighten the routine back to what worked in week one rather than loosen it, keep rewarding outdoor success consistently, and resist reading this as a sign the dog can’t be trained. For most dogs, this phase passes within a few weeks if the routine stays steady.

Pet Care Tip: If the dip coincides with a specific change — new visitors, a schedule shift, a different food — note it. Sometimes the setback has an identifiable trigger you can simply remove.

Senior-Specific Adjustments

Older dogs sometimes need physical accommodations that a younger adult doesn’t. Arthritis or joint pain can make it harder for a dog to hold a position long enough to signal you, or to get up quickly enough to reach the door.

Age can also bring true urinary incontinence, which is different from a house-training issue. According to VCA Animal Hospitals, this involuntary leakage — often noticed as wet spots where a dog has been sleeping or resting — happens because the dog isn’t aware it’s occurring, unlike a normal accident. It’s most common in middle-aged to senior dogs, and it’s worth ruling out rather than assuming it’s behavioral.

For senior dogs, plan on more frequent outdoor access, a shorter distance to the door, and non-slip footing on the way out if mobility is a concern.

Pet Care Tip: If your senior dog suddenly needs to go out far more often than before, or you notice wet bedding after naps, that’s a vet conversation — not a training problem to solve alone.

housetraining a rescue dog

When to Call the Vet vs. When to Call a Trainer

See a veterinarian first if accidents start suddenly, involve straining, blood, or a strong odor, or if a previously reliable dog starts having frequent accidents without a clear behavioral trigger. A healthy adult dog can typically hold their bladder for about 8 to 10 hours, so unusually frequent urination is worth flagging.

Consider a certified trainer or behaviorist if you’ve ruled out a medical cause and accidents continue past the 2–3 month mark, or if you’re seeing signs of fear, anxiety, or resource guarding alongside the house-training issue.

Pet Care Tip: Bring your accident log to the vet appointment. A clear record of timing and frequency helps them narrow down a cause much faster than a general description.

Practical Examples

A 6-year-old shelter dog with no known history. Treated as fully untrained from day one, on a strict two-hour schedule with a crate she showed no aversion to. Accidents dropped off steadily by week four, with a brief uptick around week five that resolved by tightening the schedule back up for a few days.

A senior dog with mild arthritis. His owner moved his overnight setup closer to the bedroom door and added a ramp to the yard exit. Once getting outside took less effort, nighttime accidents nearly stopped.

A dog with visible crate anxiety. She paced and drooled in a crate but settled easily in a gated laundry room with a bed and a chew toy. Switching setups, not more crate time, solved the problem.

Common Mistakes to Avoid

  • Punishing accidents. Scolding a dog for an accident — especially one you didn’t catch in the act — tends to increase anxiety and can teach a dog to hide when eliminating, making the problem harder to solve.
  • Assuming “no known issues” means “already trained.” Shelters and rescues don’t always have complete information. Start as if your dog needs full training unless you have clear evidence otherwise.
  • Giving up during the weeks 3–8 dip. This stretch feels like failure but is usually a normal part of adjustment.
  • Inconsistent rules across the household. If one person allows unsupervised roaming while another confines the dog, the routine your dog needs to learn gets muddled.
  • Skipping the vet check. Sudden changes, blood, straining, or unusual frequency deserve a medical look before you assume it’s purely behavioral.

Editor’s Insights

  • Use the same exit door and the same general outdoor spot at first. A consistent location builds the habit faster than a rotating routine.
  • If you catch your dog starting to go indoors, an upbeat interruption and an immediate trip outside works better than a sharp correction.
  • Ask your shelter or rescue directly what surface the dog eliminated on before adoption (grass, gravel, concrete, pads) — it can explain a stubborn preference.
  • A consistent verbal cue, said calmly right as your dog goes, helps them connect the word to the action over time.

Which Confinement Setup Fits Your Dog?

  1. Does your dog show fear or avoidance around small enclosed spaces? → Start with a gated room or exercise pen.
  2. Is your home hard to gate off, or multi-level? → Try a crate, introduced slowly and positively.
  3. Is your dog calm but benefits from staying near you during the day? → Use a short indoor tether during supervised hours only.

Checklists

First 48 Hours Checklist

  • Leash on for every outdoor trip, even in a fenced yard
  • Confinement area set up and ready before your dog arrives
  • One agreed-upon verbal cue the whole household will use
  • A notebook or note app started for tracking accidents and successes

What to Ask Your Shelter or Rescue

  • Is there any known house-training history?
  • Has the dog shown any reaction to crates?
  • What was their living situation before (indoor, outdoor, kennel)?
  • Are there any known anxiety triggers?
  • Is there any medical history relevant to bathroom habits?

Frequently Asked Questions

How long does it take to potty train a rescue dog? 

Most rescue dogs become reliable within 2–3 months on a consistent routine, though dogs with a harder background or ongoing anxiety may take longer.

Why does my rescue dog pee when excited or being greeted? 

This is usually submissive or excitement urination, an involuntary social response rather than a house-training failure. Keeping greetings calm and low-key typically helps.

Will an older dog ever be fully house-trained if they never were before? 

Yes. Adult dogs already have full bladder control, so with a consistent routine, most can become reliably house-trained regardless of age.

Do older rescue dogs potty train faster than puppies? 

Often, yes, because they don’t need to develop physical bladder control — only a routine. Progress depends more on stress level and consistency than age.

Why did my rescue dog start having accidents again after doing fine for weeks? 

This is commonly the weeks 3–8 adjustment dip. Tighten the routine back to basics rather than assuming the training has failed.

Should I use pee pads for an adult rescue dog? 

Pee pads can help in specific situations, such as limited mobility, but they can also confuse a dog who’s meant to learn to go outside only. Use them deliberately, not as a default.

Is it normal for a senior rescue dog to have accidents overnight? 

Occasional accidents can be behavioral, but frequent overnight wetting — especially while asleep — can point to age-related incontinence and is worth a vet visit.

What if my rescue dog won’t eliminate outside at all? 

Try a longer, quieter outdoor session with less pressure, and consider whether a specific surface (like grass versus concrete) is the sticking point.

Related Reading

  • Crate Training a Rescue Dog: A Step-by-Step Guide
  • Separation Anxiety in Rescue Dogs: Signs and Solutions
  • Senior Dog Care Basics: What Changes as Your Dog Ages
  • Adopting a Dog: A Complete Adjustment Checklist
  • Best Enzymatic Cleaners for Pet Stains and Odors
  • Understanding Your Dog’s Body Language and Anxiety Signals

Sources & References

  • American Kennel Club, “Dog Urine Marking vs. Peeing: How to Tell the Difference”
  • American Kennel Club, “Tips for Dealing with Submissive Urination”
  • VCA Animal Hospitals, “Urethral Incontinence in Dogs”
  • Mills Animal Hospital, “How Long Can a Dog Go Without Peeing?”
  • SPCA of Hancock County, “The 3-3-3 Rule for Adopting”


Written and reviewed by the Pets Store Home editorial team. This article is intended for general guidance and is not a substitute for professional veterinary advice — always consult your veterinarian about sudden or persistent house-training changes.

Last reviewed: September 2026

Ready for the Next Step?

A settled bathroom routine is often the first real sign that your rescue dog is starting to trust their new home. If accidents keep showing up in the same context — like being left alone — it may be less about the bathroom and more about anxiety around your absence. Our guide to separation anxiety in rescue dogs walks through how to recognize that pattern and what to do about it, so you can keep building on the progress you’ve already made together.

why is my rabbit thumping its foot

why is my rabbit thumping its foot

Quick Answer: Thumping is a rabbit’s built-in alarm and communication signal — most often fear, annoyance, or territorial hormones. A single thump followed by normal behavior is usually just alertness. Repeated or sustained thumping combined with reduced appetite, hiding, or a hunched posture is different — it can point to pain, and in rabbits, pain-related appetite loss can progress toward a genuine emergency (gut stasis) faster than most owners expect.

Why Is My Rabbit Thumping Its Foot?

Nearly every guide to rabbit thumping gives you the same three categories — fear, annoyance, hormones — and stops there. What’s missing is a way to actually tell them apart in the moment, and a clear sense of when thumping is nothing to worry about versus when it’s an early signal worth acting on quickly. This guide builds that framework, then goes deeper into the two causes most competitor guides only mention in passing: gut stasis and sore hocks.

Key Takeaways

  • A single thump is usually just alertness; repeated or sustained thumping paired with appetite changes or hiding is worth taking more seriously.
  • Rabbits are prey animals whose ancestors thumped to warn the warren of danger — domestic rabbits keep this instinct even in a safe home.
  • Pain-driven thumping matters more than it might seem, because pain and stress are known triggers for gut stasis, a rabbit digestive emergency that can turn dangerous within hours.
  • Sore hocks (pododermatitis) can be both a cause of pain-thumping and made worse by frequent thumping — flooring and substrate are the fix.
  • Thumping between bonded or newly introduced rabbits often reflects normal hierarchy-establishing behavior, not necessarily a failing introduction.

What Thumping Actually Is

Foot thumping is rooted in wild rabbit survival behavior. Rabbits are prey animals that historically avoided predators by freezing, hiding, and retreating underground, and thumping evolved as a warning signal within their social groups — other rabbits in the warren watch for danger while some feed, and a thump alerts the group to a possible threat. Domestic rabbits retain this instinct fully intact, even in a home with no actual predators around. Understanding thumping as an alarm-and-communication behavior — rather than a random quirk — is what makes the categories below make sense.

Reading the Pattern: A Simple Way to Tell What’s Going On

Instead of memorizing a list of possible causes, it helps to read the pattern alongside what else your rabbit is doing.

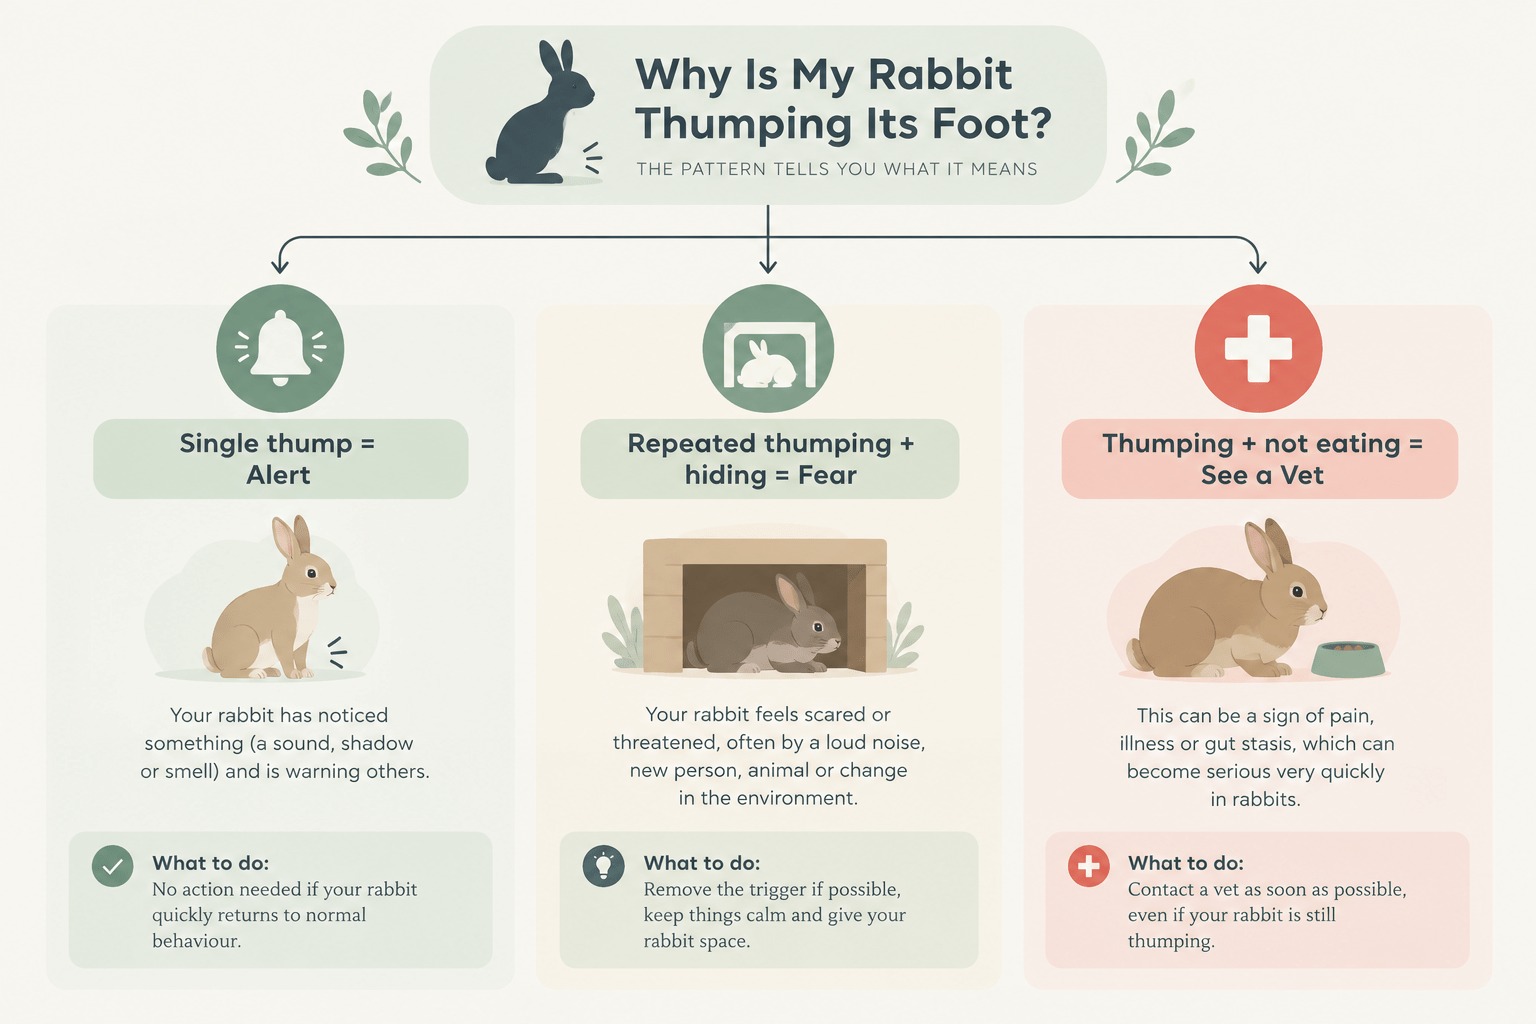
A single thump, then back to normal — This is typically just alertness: your rabbit noticed something (a sound, a shadow, a smell) and flagged it, then moved on. No action needed.

Repeated or rapid thumping with fleeing or hiding — This points to genuine fear. Look for what triggered it (a loud noise, an unfamiliar animal or person, a sudden environmental change) and address that specific trigger.

Thumping that’s stationary, with upright ears, often right after handling — This usually reads as annoyance or protest rather than fear — a rabbit expressing displeasure about being picked up, having a toy removed, or another disruption it didn’t want.

Thumping combined with reduced appetite, a hunched posture, grinding teeth, or reluctance to move — This combination is different from the others. It’s worth treating as a possible pain signal and moving toward the next section rather than waiting to see if it passes.

rabbit thumping and not eating

When Thumping Signals a Real Emergency: Gut Stasis

This is the piece most guides to rabbit thumping skip almost entirely, and it’s the most important one. According to VCA Animal Hospitals, gut stasis develops when a rabbit stops eating — for any underlying reason, including pain, stress, dental problems, or infection — and the resulting change in gut chemistry favors gas-producing bacteria, which can spiral into a genuinely dangerous condition. VCA is direct about the timeline: “A rabbit that is not eating can progress from just feeling poorly to developing a life-threatening illness in a matter of hours.”

The Royal Veterinary College identifies pain and stress specifically as gut stasis triggers, noting that “any painful condition can lead to gut stasis,” alongside more familiar risk factors like obesity, insufficient dietary fiber, ingested hair during molting, and dehydration. Early warning signs to watch for, per the RVC, include reduced appetite, decreased and smaller or drier droppings, and a rabbit withdrawing or hiding even when offered food or treats.

The connection to thumping is this: if your rabbit is thumping alongside any of these appetite or stool changes, that’s not a moment to wait and observe — it’s a same-day veterinary conversation, given how quickly the condition can progress.

Sore Hocks: A Cause and a Consequence

Pododermatitis, commonly called sore hocks, is worth understanding because it works in both directions with thumping. According to guidance from Companion Animals Extension, the condition develops from a combination of factors: being overweight and putting excess pressure on the hind feet, inadequate flooring (wire flooring without a solid resting area causes ongoing pressure and discomfort), cramped housing that limits movement, poor hygiene, and overly long nails that create pressure imbalances or even puncture the pads.

Sore hocks cause real pain, which can be a source of pain-related thumping. But the relationship runs the other way too — a rabbit thumping frequently on already-tender feet, especially on a hard or wire surface, can worsen existing hock irritation. Breaking this cycle comes down to housing: ensuring your rabbit has a solid, cushioned resting area (not just wire or hard flooring), enough space to move normally, clean bedding, a healthy weight, and regularly trimmed nails. If you notice redness, swelling, or reluctance to put weight on the feet, that’s worth a vet visit rather than a wait-and-see approach.

Fear-Based Thumping and Common Triggers

Fear-driven thumping responds to whatever your rabbit perceives as a threat — loud or sudden noises, unfamiliar people or animals, a strong new scent, or a change in the environment like moved furniture. Individual rabbits vary in sensitivity partly based on prior experience and temperament, and some owners notice their rabbit’s ear position or type seems to correlate with how easily they startle, though this is more anecdotal than formally studied. The response that helps most is identifying the specific trigger and reducing exposure gradually, along with making sure your rabbit always has an accessible hiding spot to retreat to rather than forcing exposure to whatever startled it.

Annoyance, Protest, and Territorial Thumping

Not all thumping is fear. A rabbit that thumps immediately after being picked up, having something taken away, or being disturbed during rest is usually expressing protest rather than alarm — the body language (staying in place, upright ears, direct posture) looks different from a fear response, which typically involves fleeing or hiding. Unneutered rabbits, particularly as they reach sexual maturity, often show increased territorial thumping tied to hormonal changes; spaying or neutering commonly reduces this over time, alongside general benefits for health and behavior.

Thumping Between Bonded or Introduced Rabbits

Rabbits establishing a social hierarchy — whether during a structured introduction or as an already-bonded pair working out day-to-day dynamics — will sometimes thump at each other. This is often a normal part of establishing who defers to whom, rather than a sign the bonding process is failing. What’s worth watching for during an active introduction is whether the thumping is paired with actual aggression (biting, prolonged chasing, fur pulling) versus brief posturing followed by the rabbits settling back into calm proximity — the former is a sign to slow down or separate and consult an experienced rabbit-savvy resource, while the latter is typically just part of the process.

Does Age Change the Picture?

Younger rabbits, especially those newly settling into a home, tend to thump more frequently simply because they’re still learning what in their environment is safe — this generally decreases as they become familiar with their surroundings and routine. In senior rabbits, a new or increased pattern of thumping is more likely to reflect pain from arthritis or dental disease than fear of something new, since an older rabbit’s environment is usually already well known to them. A sudden change in an older rabbit’s thumping frequency is worth a veterinary conversation rather than being written off as personality.

rabbit foot thumping meaning

Know Your Rabbit’s Baseline

Because normal thumping frequency genuinely varies between individual rabbits, the most useful thing you can do is get familiar with what’s typical for yours specifically — how often it thumps in a normal week, in what contexts, and what its body language looks like when it does. With that baseline established, a real change (more frequent thumping, a different accompanying posture, or thumping paired with appetite shifts) becomes something you’ll actually notice, rather than blending into “rabbits just do this sometimes.”

How to Respond to a Thumping Rabbit

Start by identifying which category above the pattern fits, since the right response differs. For fear-based thumping, stay calm, avoid forcing your rabbit toward whatever startled it, and make sure a hiding spot is available. For protest thumping, respect what your rabbit is communicating rather than punishing the behavior. For anything paired with appetite or behavior changes, move straight to contacting your vet rather than trying home remedies first, given how quickly gut stasis in particular can progress.

Common Mistakes Owners Make

Assuming every thump means fear, when context (stationary posture, timing right after handling) often points to annoyance instead. Dismissing thumping paired with reduced appetite as “being dramatic” rather than recognizing it as a possible early gut stasis warning sign. Overlooking hock condition and flooring as a contributing cause of pain-driven thumping. And treating brief thumping between bonding rabbits as a failed introduction when it’s often normal hierarchy behavior.

Practical Examples

A rabbit thumps once at a delivery truck outside, then goes back to grazing normally: ordinary alertness, no action needed.

A rabbit thumps repeatedly over an afternoon and is eating less than usual, with smaller droppings than normal: this fits the gut-stasis warning pattern above and is worth a same-day call to your vet rather than waiting to see if appetite returns on its own.

Two newly introduced rabbits thump at each other during supervised time together, then settle a few feet apart and start grooming: typical hierarchy-establishing behavior, not a sign the introduction is failing.

FAQ

Is it normal for rabbits to thump every day? 

Some rabbits thump occasionally as part of normal alertness or personality; what matters more than daily frequency is whether the pattern is consistent with your specific rabbit’s usual baseline.

How do I know if my rabbit’s thumping means pain? 

Pain-related thumping usually comes with other signs — reduced appetite, a hunched posture, reluctance to move, or smaller/fewer droppings — rather than appearing on its own.

Why does my rabbit thump at night? 

Rabbits are naturally most active at dawn and dusk and have sensitive hearing, so nighttime sounds an owner might not notice can still trigger an alert thump.

Do rabbits thump when they’re happy or excited? 

Thumping is generally an alarm or protest signal rather than an expression of happiness — excitement in rabbits is more commonly shown through behaviors like running and jumping (binkying).

Should I comfort my rabbit when it thumps? 

Calm, non-forceful reassurance and access to a hiding spot are more helpful than trying to physically soothe a frightened rabbit, which can add to its stress in the moment.

Can thumping hurt my rabbit’s feet?

Yes, particularly on hard or wire flooring — frequent thumping on an inadequate surface can contribute to or worsen sore hocks (pododermatitis).

Why do my bonded rabbits thump at each other? 

This is often normal hierarchy-establishing behavior; it’s worth more attention only if it’s paired with real aggression like biting or prolonged chasing rather than brief posturing.

When should I take a thumping rabbit to the vet? 

When thumping is paired with reduced appetite, changed droppings, hiding, or reluctance to move — these combinations can signal pain or early gut stasis, both of which warrant prompt veterinary attention.

Sources & References

  • VCA Animal Hospitals — Gastrointestinal Stasis in Rabbits
  • Royal Veterinary College — Reducing the Risk of Gut Stasis in Rabbits
  • Companion Animals Extension — Pododermatitis (Sore Hocks) in Rabbits
  • dvm360 — Understanding Rabbit Behavior and Preventing and Treating Behavior Problems

Written by the Pets Store Home Team — pet care writers and researchers who cross-check every behavioral and health claim against the veterinary and academic sources cited above, rather than other blogs. This article has not yet been reviewed by a named, credentialed rabbit-savvy veterinarian; add one here before publishing if genuinely available. Last reviewed: September 2026

Conclusion

A thump on its own doesn’t tell you much — it’s the pattern and what comes with it that matters. A single alert thump is nothing to worry about; thumping paired with appetite loss, hiding, or a change in droppings is worth same-day veterinary attention given how quickly gut stasis can progress in rabbits. Get to know what’s normal for your own rabbit, keep an eye on housing and hock health, and read the accompanying signs rather than the thump alone.

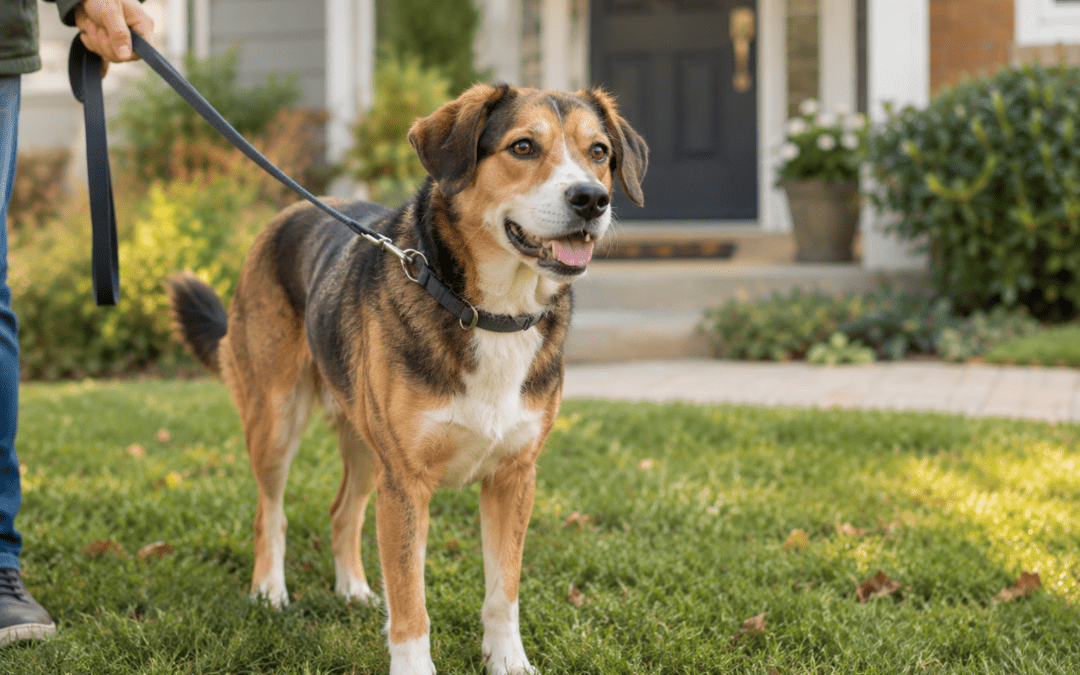
Best harness for dogs that pull on walks

Best harness for dogs that pull on walks

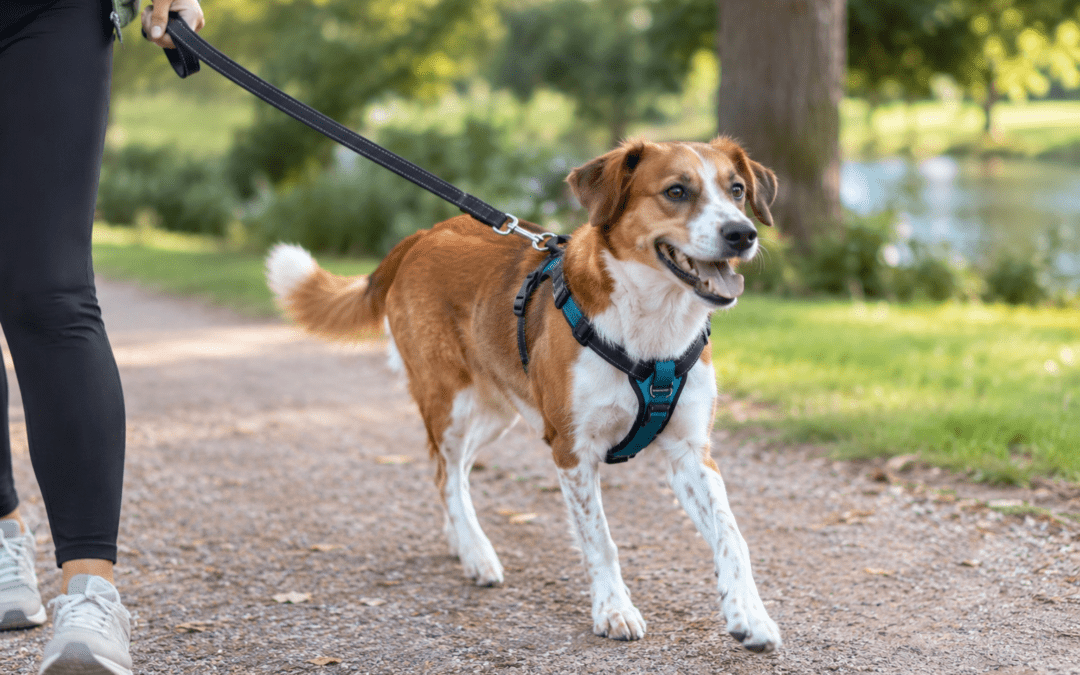
Quick Answer: A front-clip harness is usually the best starting point for a dog that pulls, because it interrupts the instinct to lean into pressure rather than reinforcing it the way a back-clip harness or collar can. From there, the right choice depends on your dog’s size and breed (small dogs prone to tracheal issues need pressure off the neck entirely), how well the harness actually fits, and whether you’re using it as a permanent fix or a bridge while leash training progresses.

Best harness for dogs that pull on walks

Most “best harness” roundups hand you a ranked list of products and a two-finger fit test, then move on. What they skip is the actual reasoning: why front-clip designs work at all, what a bad-fitting harness does to your dog’s movement over time, which dogs face a genuinely higher safety stake than others, and what to do when the harness alone isn’t solving the pulling. This guide is built around that reasoning rather than a product ranking, so you can apply it to whatever’s actually available to you.

Key Takeaways

  • Front-clip harnesses work by interrupting a dog’s instinct to lean into pressure — a well-documented behavioral pattern often called the opposition reflex — rather than by physical restraint alone.
  • Harness shape affects shoulder movement, but recent gait research complicates the common “Y-shaped is more shoulder-friendly” assumption — no single design has been shown to be universally better.
  • Small and toy breeds prone to tracheal collapse have a genuinely higher stake in getting neck pressure off entirely, not just a general preference for harnesses.
  • A harness is a tool to make walks manageable, not necessarily a permanent fix — pairing it with leash training gives you somewhere to go if pulling doesn’t improve.
  • “Escape-proof” is a marketing term more often than a guarantee — fit and design details determine whether a dog can actually back out of a harness.

Why Dogs Pull, and Why Harness Design Actually Matters

Dogs have a well-documented instinct to lean into steady pressure rather than away from it — commonly referred to as the opposition reflex. When a collar or back-clip harness applies pressure to a dog’s neck or back as it pulls forward, that pressure can trigger more pulling rather than less, since the dog’s instinct is to push back against whatever’s resisting it.

A front-clip harness changes the physics of that interaction: pressure from the leash comes from the front and pulls the dog sideways rather than adding resistance in the direction it’s already moving. According to VCA Animal Hospitals, this lets an owner use “gentle leash pressure to turn the dog away from a distraction or back toward the handler” — redirecting rather than fighting the pull. That’s the actual mechanism behind why front-clip designs tend to outperform back-clip ones for a dog that pulls, not just a manufacturer’s design choice.

The Main Harness Types, Compared

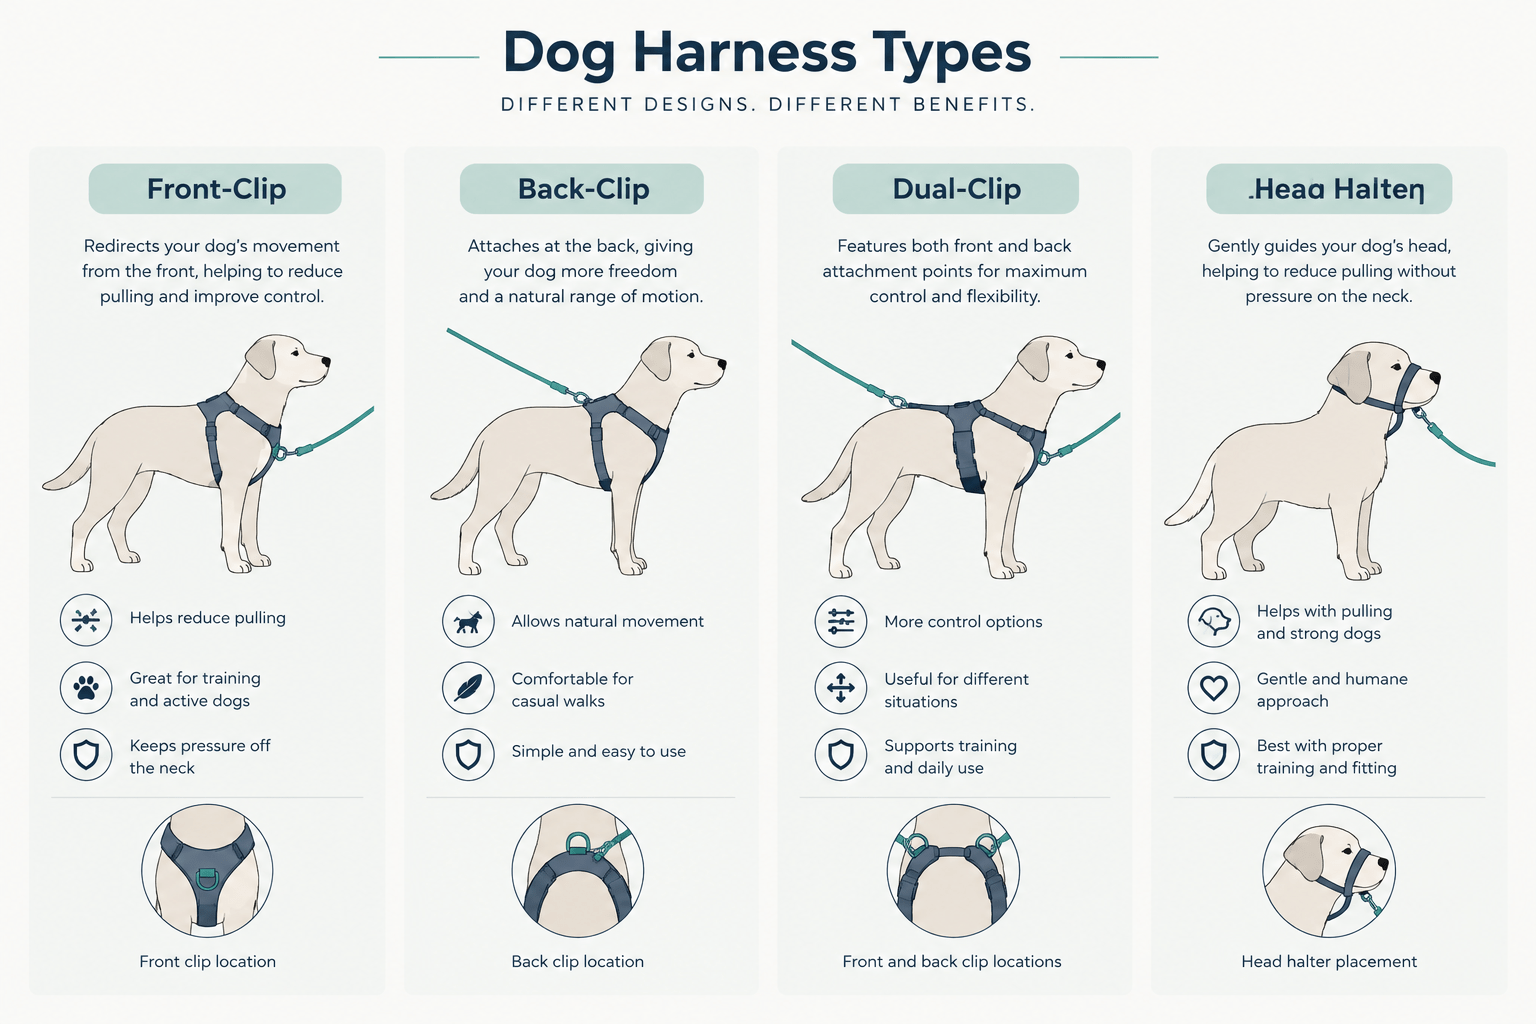
Type

How it works

Best fit for

Back-clip

Leash attaches at the shoulders; simple, comfortable for non-pullers

Dogs that already walk well on a loose leash

Front-clip

Leash attaches at the chest; redirects a pulling dog sideways

Most dogs that pull, as a starting point

Dual-clip

Offers both front and back attachment points

Dogs needing more control than front-clip alone, or transitioning between training stages

Head halter

Fits around the muzzle and behind the ears; controls head direction

Strong pullers needing more control than a harness provides, used alongside training

Per VCA Animal Hospitals, head halters carry their own escape consideration — some dogs can back out of them, so a head halter is generally recommended in combination with a harness or buckle collar rather than as the sole attachment point.

front clip vs back clip harness

Fit Isn’t Just Comfort — It’s About Movement, Too

A harness that doesn’t fit correctly can restrict how freely a dog moves its front legs, and recent veterinary gait research shows this is more complicated than the common wisdom suggests. A detailed 3D motion-capture study of dogs wearing different harness designs found that harnesses altered gait parameters in roughly two-thirds of measurements taken, with the front legs’ movement affected most. Notably, the research found that so-called “non-restrictive” Y-shaped harnesses were not consistently more shoulder-friendly than straight-chest designs — in some conditions, the Y-shaped design actually showed more shoulder restriction, contradicting the common assumption that shape alone determines freedom of movement. The researchers found no single harness design that was universally superior across dogs.

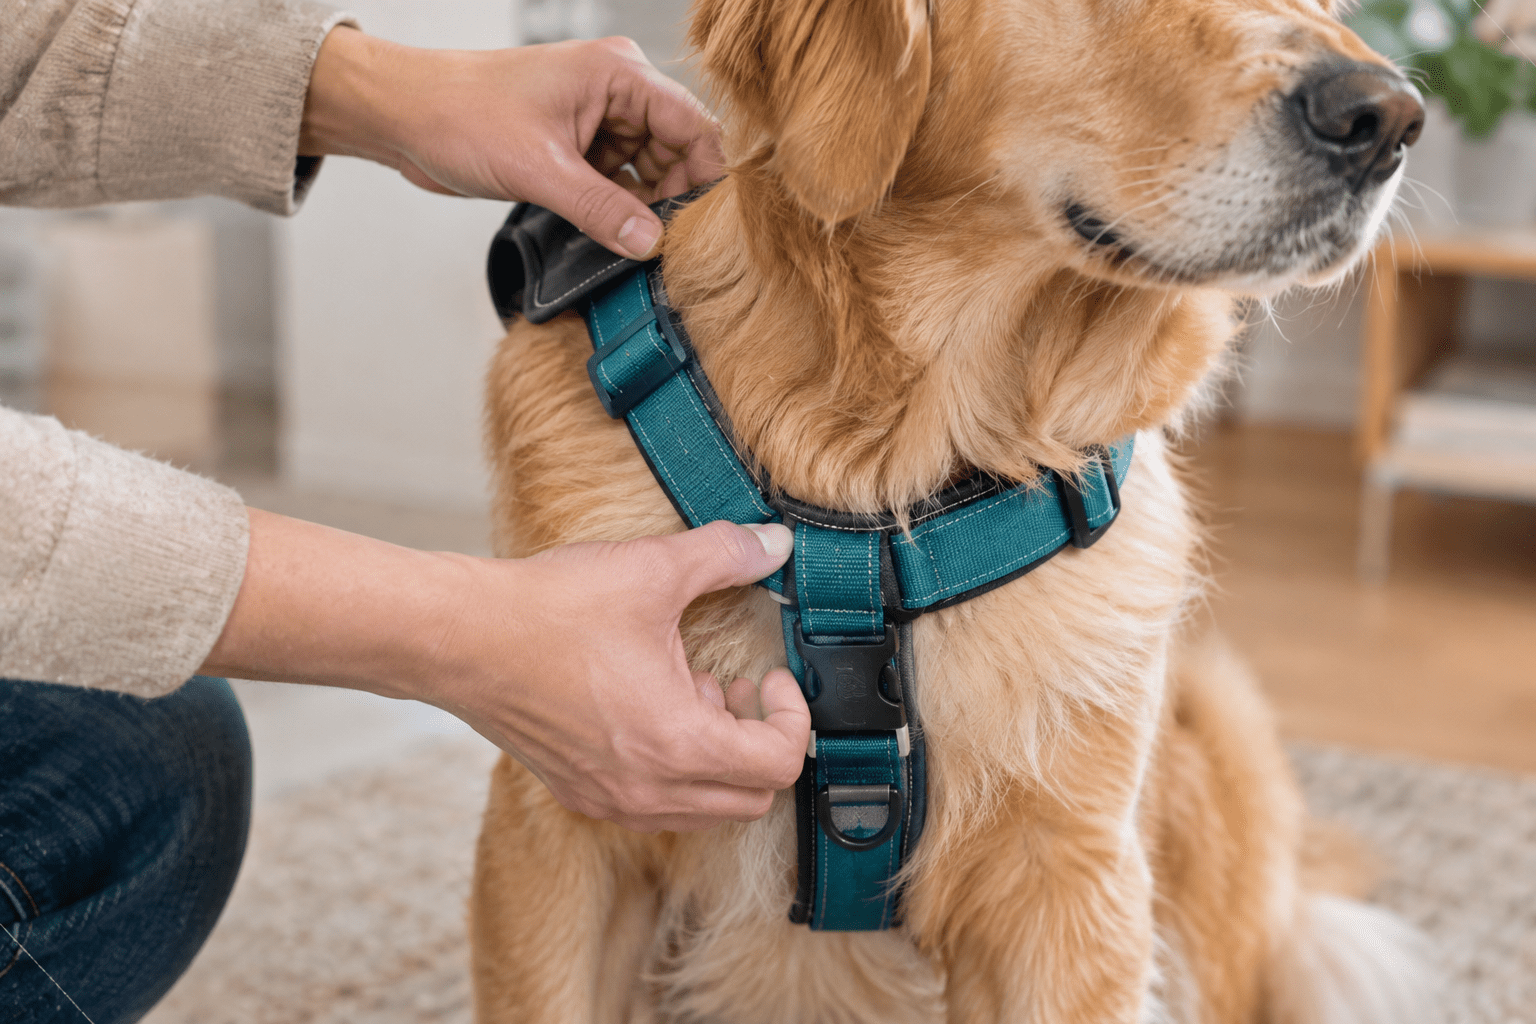
The practical takeaway isn’t “avoid a specific shape” — it’s that proper fit and your individual dog’s build matter more than a harness’s marketing description. Watch your dog’s front leg during a walk: it should be able to extend forward freely without the harness’s chest strap visibly catching or limiting that motion. If a harness looks like it’s stopping the leg partway through its natural stride, that’s a fit or design problem worth addressing regardless of what the harness is labeled.

Collars, Harnesses, and the Trachea: What the Risk Actually Is

The “harnesses are safer than collars” advice you’ll see everywhere has real anatomical grounding, but it matters more for some dogs than others. According to Cornell University’s College of Veterinary Medicine, tracheal collapse — a weakening of the cartilage rings that hold the airway open — is common in toy and small breeds such as Yorkshire Terriers, Pomeranians, and Toy Poodles, particularly as they reach middle age. Pressure on the neck is specifically listed among the factors that can worsen symptoms in affected dogs, alongside stress, heat, and physical exertion.

VCA Animal Hospitals recommends a body harness specifically for dogs with tracheal disease or neck pain, since it “puts minimal pressure on delicate tissue.” For a small-breed puller — especially one from a breed prone to tracheal issues — getting pressure off the neck entirely isn’t just a comfort preference, it’s a genuine risk-reduction step. For larger, sturdier breeds without this predisposition, the case for a harness is still strong for pulling control, just without the same anatomical urgency.

no pull harness for small dogs

Fit Troubleshooting: Beyond the Two-Finger Test

The standard “two fingers should fit under the strap” test catches harnesses that are obviously too tight or loose, but it doesn’t diagnose most real-world fit problems.

Chafing near the front legs usually means the chest strap sits too low or the harness is a size too small, putting pressure directly on the armpit area during movement.

Twisting during walks typically points to a harness that’s too loose overall, or one with a back-clip design on a dog that pulls hard enough to rotate it out of position.

Riding up over the shoulders often means the girth strap (the one running under the belly) isn’t snug enough to hold the harness in its intended position, or the harness is sized too large for the dog’s chest depth.

Rechecking fit after the first few walks — not just at purchase — catches problems that only show up once a harness has been worn during actual movement.

The Harness Is a Bridge, Not a Fix

A front-clip or dual-clip harness makes walks manageable, but it’s worth thinking of it as a tool that supports leash training rather than a permanent substitute for it. As a dog’s leash manners improve, many owners find they need less correction from the harness’s redirect mechanism — loose-leash walking starts happening because the dog has learned it, not just because the harness is preventing forward pulling in the moment.

There’s no fixed timeline for this, and plenty of dogs do fine on a front-clip harness indefinitely without it being a problem. The distinction matters mainly if pulling isn’t improving at all over time despite consistent walks — that’s a sign to look at training technique or professional help, rather than simply concluding a stronger harness is needed.

What “Escape-Proof” Actually Means

Per VCA Animal Hospitals, a dog can back out of a body harness “if the harness is not correctly fitted” — meaning escape resistance comes down to fit and design details, not a label. Features that genuinely reduce escape risk include a martingale-style loop that tightens slightly under leash tension, a properly snug girth strap, and sizing that keeps some adjustment room rather than maxing out the smallest or largest setting. A harness marketed as “escape-proof” without these features, fitted loosely, offers the same escape risk as any other loose harness — the marketing claim doesn’t override fit.

Special Situations

Senior dogs with joint issues: A harness that puts pressure across the chest and shoulders can be more comfortable than neck pressure for a senior dog with arthritis, but check that the fit doesn’t restrict the same joints that are already compromised.

Dogs recovering from surgery: Depending on the procedure and location, some harness designs may need to be avoided entirely during recovery — this is a case where checking with your vet about specific pressure points is worth doing before choosing equipment.

Brachycephalic breeds: Short-nosed breeds already carry breathing considerations independent of the trachea-specific risk covered above, making pressure-free harness options a sensible default rather than a collar.

When to Escalate: A Simple Decision Path

If a front-clip harness alone isn’t reducing pulling after consistent use alongside basic leash training, a dual-clip design gives you a second attachment point for more control without switching equipment entirely. If pulling remains difficult to manage even with a dual-clip harness, a head halter (used alongside a harness or collar per the escape-risk guidance above) offers more direct control over head direction. If none of these are making a meaningful difference, or if pulling comes with other behavioral concerns like reactivity or lunging, that’s a reasonable point to bring in a professional trainer rather than continuing to cycle through equipment.

Common Mistakes Owners Make

Choosing a harness based on marketing terms like “escape-proof” or “no-pull” without checking the actual design features behind the claim. Treating a harness as a permanent solution and never addressing the underlying leash-training gap. Not rechecking fit after the first few real walks, when problems like chafing or twisting actually show up. And using a standard flat collar on a strong-pulling small breed without factoring in tracheal risk.

Practical Examples

A Yorkshire Terrier that pulls hard on walks: given the breed’s documented tracheal-collapse risk, a well-fitted front-clip harness that keeps pressure entirely off the neck is the more urgent choice here, not just a preference.

A dog whose “non-restrictive” Y-shaped harness is causing visible shoulder chafing: per the gait research above, shape alone doesn’t guarantee shoulder freedom — this is a fit and individual-conformation issue worth addressing directly rather than assuming the harness type is automatically fine because of its label.

A dog that’s stopped improving on a front-clip harness despite months of consistent walks: this fits the escalation path above — time to consider a dual-clip design, a head halter, or a session with a professional trainer rather than simply trying another front-clip product.

FAQ

Do no-pull harnesses actually work? 

Front-clip designs generally help by redirecting a dog sideways instead of adding to the pressure it’s pulling against, which is a real behavioral mechanism — but they work best paired with leash training rather than as a standalone fix.

Front-clip or back-clip — which is better for pulling? 

Front-clip is generally the better starting point for a dog that pulls, since back-clip designs can reinforce the instinct to lean into pressure; back-clip works fine for dogs that already walk well on a loose leash.

Can a harness hurt my dog’s shoulders? 

A poorly fitted harness can restrict natural shoulder movement regardless of its shape — recent gait research found no single design is universally shoulder-friendly, so fit and checking your dog’s actual leg extension matter more than the label.

Is a collar ever safer than a harness for a dog that pulls? 

Generally no for a dog that pulls — a harness distributes pressure away from the neck, which matters most for small and toy breeds prone to tracheal collapse, per veterinary guidance.

What’s the difference between a harness and a head halter? 

A harness distributes pressure across the chest and shoulders; a head halter controls direction via the head and muzzle and generally offers more control for strong pullers, but should be used alongside a harness or collar since some dogs can back out of it.

How do I know if my harness fits correctly? 

Beyond the two-finger test, watch for chafing near the front legs, twisting during walks, or the harness riding up over the shoulders — each points to a specific, fixable fit issue.

Will my dog need this harness forever? 

Not necessarily — many dogs need less correction from the harness as leash training improves, though plenty of dogs also do fine on a front-clip harness long-term without it being a problem.

What does “escape-proof” actually mean on a harness?

It’s often a marketing term rather than a guarantee — actual escape resistance comes from a properly snug girth strap, a martingale-style tightening loop, and correct sizing, not the label alone.

Sources & References

Written by the Pets Store Home Team — pet care writers and researchers who cross-check every behavioral and health claim against the veterinary and research sources cited above, rather than other blogs. This article has not yet been reviewed by a named, credentialed veterinary or canine-behavior professional; add one here before publishing if genuinely available. Last reviewed: September 2026

Conclusion

The right harness for a dog that pulls isn’t the one at the top of a review list — it’s the one matched to why your dog pulls, how urgent the anatomical stakes are for their size and breed, and whether it actually fits their individual build. Start with a front-clip design for the behavioral mechanism, take breed-specific tracheal risk seriously if it applies, check fit against your dog’s real movement rather than a label, and treat the harness as one part of a plan that includes training — not the whole plan by itself.