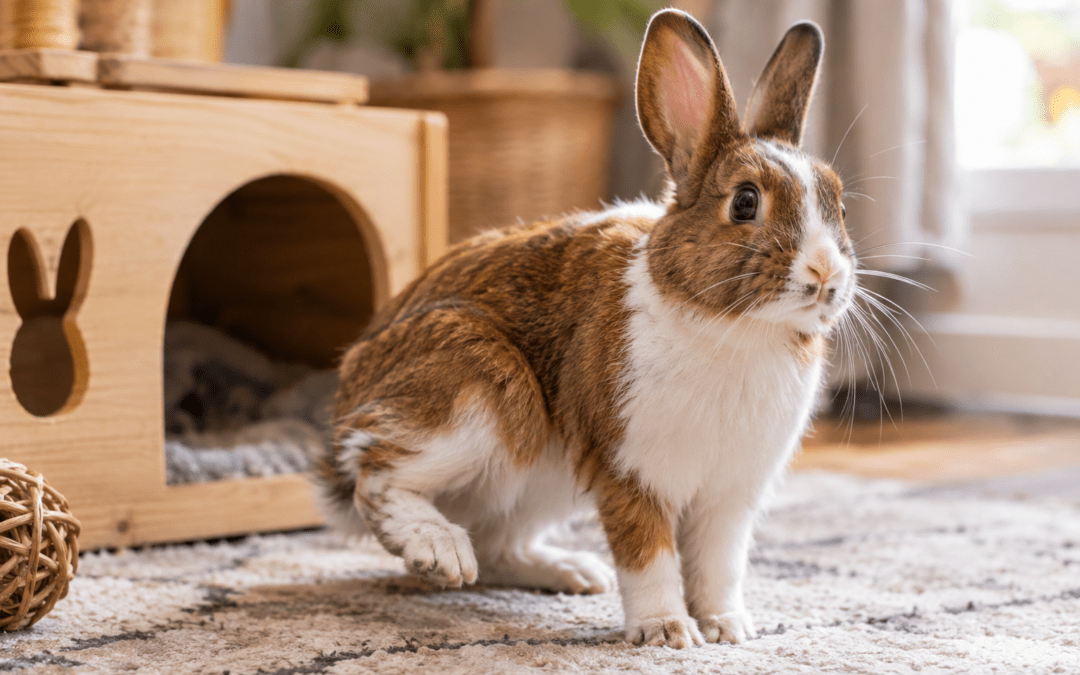
why is my rabbit thumping its foot

why is my rabbit thumping its foot

Quick Answer: Thumping is a rabbit’s built-in alarm and communication signal — most often fear, annoyance, or territorial hormones. A single thump followed by normal behavior is usually just alertness. Repeated or sustained thumping combined with reduced appetite, hiding, or a hunched posture is different — it can point to pain, and in rabbits, pain-related appetite loss can progress toward a genuine emergency (gut stasis) faster than most owners expect.

Why Is My Rabbit Thumping Its Foot?

Nearly every guide to rabbit thumping gives you the same three categories — fear, annoyance, hormones — and stops there. What’s missing is a way to actually tell them apart in the moment, and a clear sense of when thumping is nothing to worry about versus when it’s an early signal worth acting on quickly. This guide builds that framework, then goes deeper into the two causes most competitor guides only mention in passing: gut stasis and sore hocks.

Key Takeaways

  • A single thump is usually just alertness; repeated or sustained thumping paired with appetite changes or hiding is worth taking more seriously.
  • Rabbits are prey animals whose ancestors thumped to warn the warren of danger — domestic rabbits keep this instinct even in a safe home.
  • Pain-driven thumping matters more than it might seem, because pain and stress are known triggers for gut stasis, a rabbit digestive emergency that can turn dangerous within hours.
  • Sore hocks (pododermatitis) can be both a cause of pain-thumping and made worse by frequent thumping — flooring and substrate are the fix.
  • Thumping between bonded or newly introduced rabbits often reflects normal hierarchy-establishing behavior, not necessarily a failing introduction.

What Thumping Actually Is

Foot thumping is rooted in wild rabbit survival behavior. Rabbits are prey animals that historically avoided predators by freezing, hiding, and retreating underground, and thumping evolved as a warning signal within their social groups — other rabbits in the warren watch for danger while some feed, and a thump alerts the group to a possible threat. Domestic rabbits retain this instinct fully intact, even in a home with no actual predators around. Understanding thumping as an alarm-and-communication behavior — rather than a random quirk — is what makes the categories below make sense.

Reading the Pattern: A Simple Way to Tell What’s Going On

Instead of memorizing a list of possible causes, it helps to read the pattern alongside what else your rabbit is doing.

A single thump, then back to normal — This is typically just alertness: your rabbit noticed something (a sound, a shadow, a smell) and flagged it, then moved on. No action needed.

Repeated or rapid thumping with fleeing or hiding — This points to genuine fear. Look for what triggered it (a loud noise, an unfamiliar animal or person, a sudden environmental change) and address that specific trigger.

Thumping that’s stationary, with upright ears, often right after handling — This usually reads as annoyance or protest rather than fear — a rabbit expressing displeasure about being picked up, having a toy removed, or another disruption it didn’t want.

Thumping combined with reduced appetite, a hunched posture, grinding teeth, or reluctance to move — This combination is different from the others. It’s worth treating as a possible pain signal and moving toward the next section rather than waiting to see if it passes.
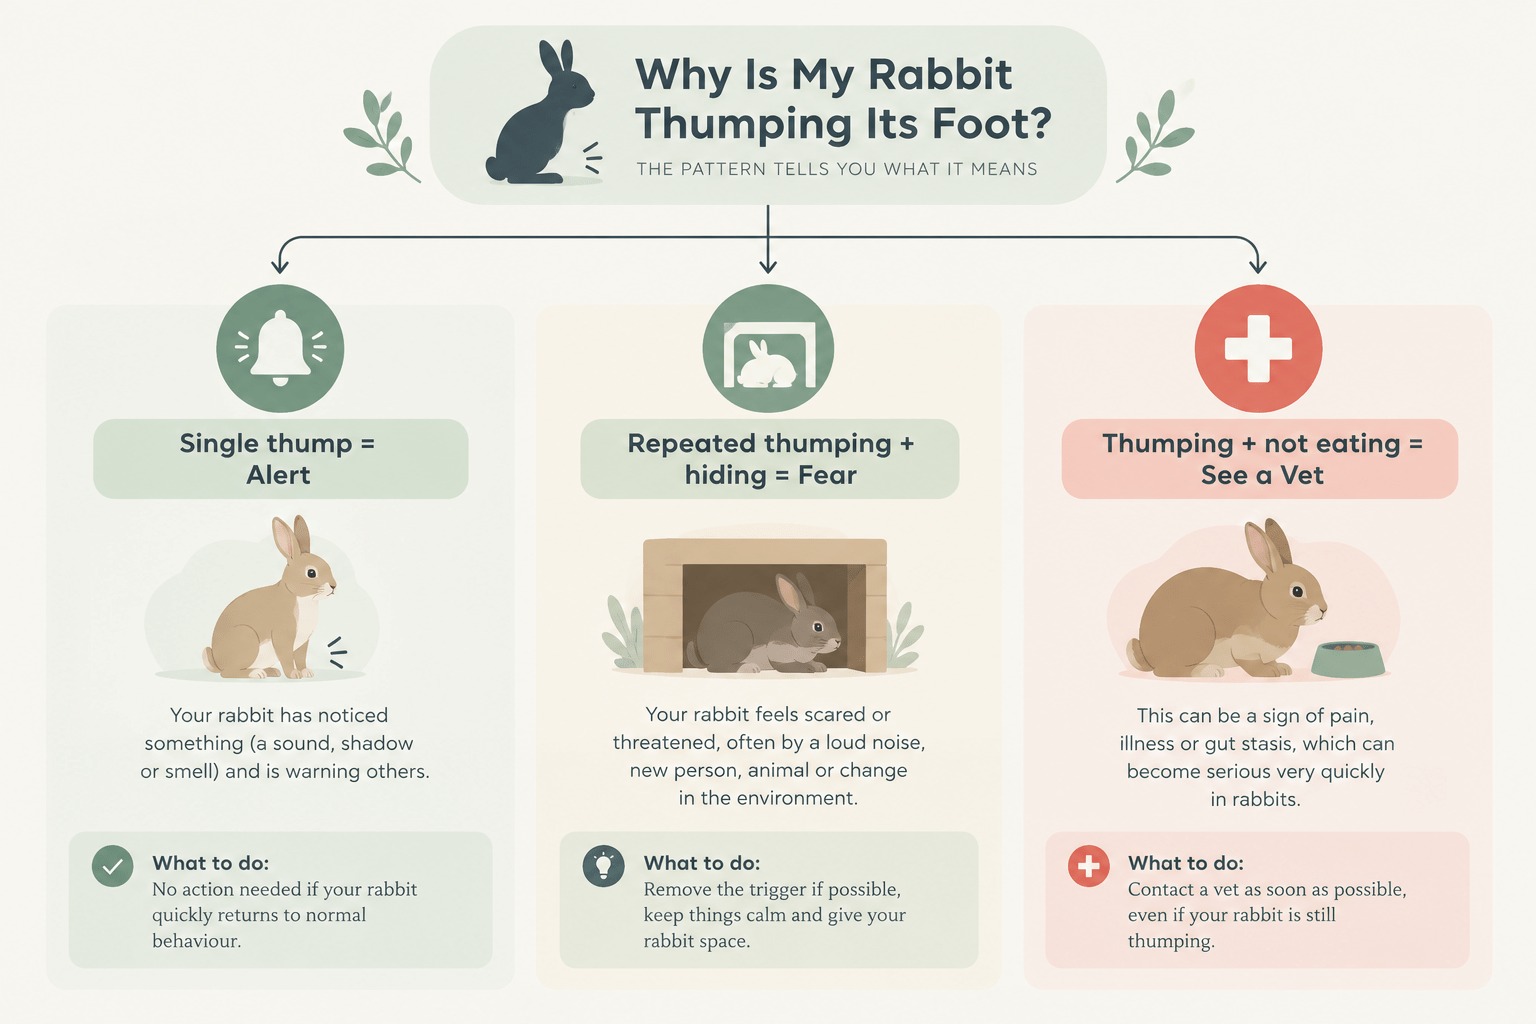
rabbit thumping and not eating

When Thumping Signals a Real Emergency: Gut Stasis

This is the piece most guides to rabbit thumping skip almost entirely, and it’s the most important one. According to VCA Animal Hospitals, gut stasis develops when a rabbit stops eating — for any underlying reason, including pain, stress, dental problems, or infection — and the resulting change in gut chemistry favors gas-producing bacteria, which can spiral into a genuinely dangerous condition. VCA is direct about the timeline: “A rabbit that is not eating can progress from just feeling poorly to developing a life-threatening illness in a matter of hours.”

The Royal Veterinary College identifies pain and stress specifically as gut stasis triggers, noting that “any painful condition can lead to gut stasis,” alongside more familiar risk factors like obesity, insufficient dietary fiber, ingested hair during molting, and dehydration. Early warning signs to watch for, per the RVC, include reduced appetite, decreased and smaller or drier droppings, and a rabbit withdrawing or hiding even when offered food or treats.

The connection to thumping is this: if your rabbit is thumping alongside any of these appetite or stool changes, that’s not a moment to wait and observe — it’s a same-day veterinary conversation, given how quickly the condition can progress.

Sore Hocks: A Cause and a Consequence

Pododermatitis, commonly called sore hocks, is worth understanding because it works in both directions with thumping. According to guidance from Companion Animals Extension, the condition develops from a combination of factors: being overweight and putting excess pressure on the hind feet, inadequate flooring (wire flooring without a solid resting area causes ongoing pressure and discomfort), cramped housing that limits movement, poor hygiene, and overly long nails that create pressure imbalances or even puncture the pads.

Sore hocks cause real pain, which can be a source of pain-related thumping. But the relationship runs the other way too — a rabbit thumping frequently on already-tender feet, especially on a hard or wire surface, can worsen existing hock irritation. Breaking this cycle comes down to housing: ensuring your rabbit has a solid, cushioned resting area (not just wire or hard flooring), enough space to move normally, clean bedding, a healthy weight, and regularly trimmed nails. If you notice redness, swelling, or reluctance to put weight on the feet, that’s worth a vet visit rather than a wait-and-see approach.

Fear-Based Thumping and Common Triggers

Fear-driven thumping responds to whatever your rabbit perceives as a threat — loud or sudden noises, unfamiliar people or animals, a strong new scent, or a change in the environment like moved furniture. Individual rabbits vary in sensitivity partly based on prior experience and temperament, and some owners notice their rabbit’s ear position or type seems to correlate with how easily they startle, though this is more anecdotal than formally studied. The response that helps most is identifying the specific trigger and reducing exposure gradually, along with making sure your rabbit always has an accessible hiding spot to retreat to rather than forcing exposure to whatever startled it.

Annoyance, Protest, and Territorial Thumping

Not all thumping is fear. A rabbit that thumps immediately after being picked up, having something taken away, or being disturbed during rest is usually expressing protest rather than alarm — the body language (staying in place, upright ears, direct posture) looks different from a fear response, which typically involves fleeing or hiding. Unneutered rabbits, particularly as they reach sexual maturity, often show increased territorial thumping tied to hormonal changes; spaying or neutering commonly reduces this over time, alongside general benefits for health and behavior.

Thumping Between Bonded or Introduced Rabbits

Rabbits establishing a social hierarchy — whether during a structured introduction or as an already-bonded pair working out day-to-day dynamics — will sometimes thump at each other. This is often a normal part of establishing who defers to whom, rather than a sign the bonding process is failing. What’s worth watching for during an active introduction is whether the thumping is paired with actual aggression (biting, prolonged chasing, fur pulling) versus brief posturing followed by the rabbits settling back into calm proximity — the former is a sign to slow down or separate and consult an experienced rabbit-savvy resource, while the latter is typically just part of the process.

Does Age Change the Picture?

Younger rabbits, especially those newly settling into a home, tend to thump more frequently simply because they’re still learning what in their environment is safe — this generally decreases as they become familiar with their surroundings and routine. In senior rabbits, a new or increased pattern of thumping is more likely to reflect pain from arthritis or dental disease than fear of something new, since an older rabbit’s environment is usually already well known to them. A sudden change in an older rabbit’s thumping frequency is worth a veterinary conversation rather than being written off as personality.
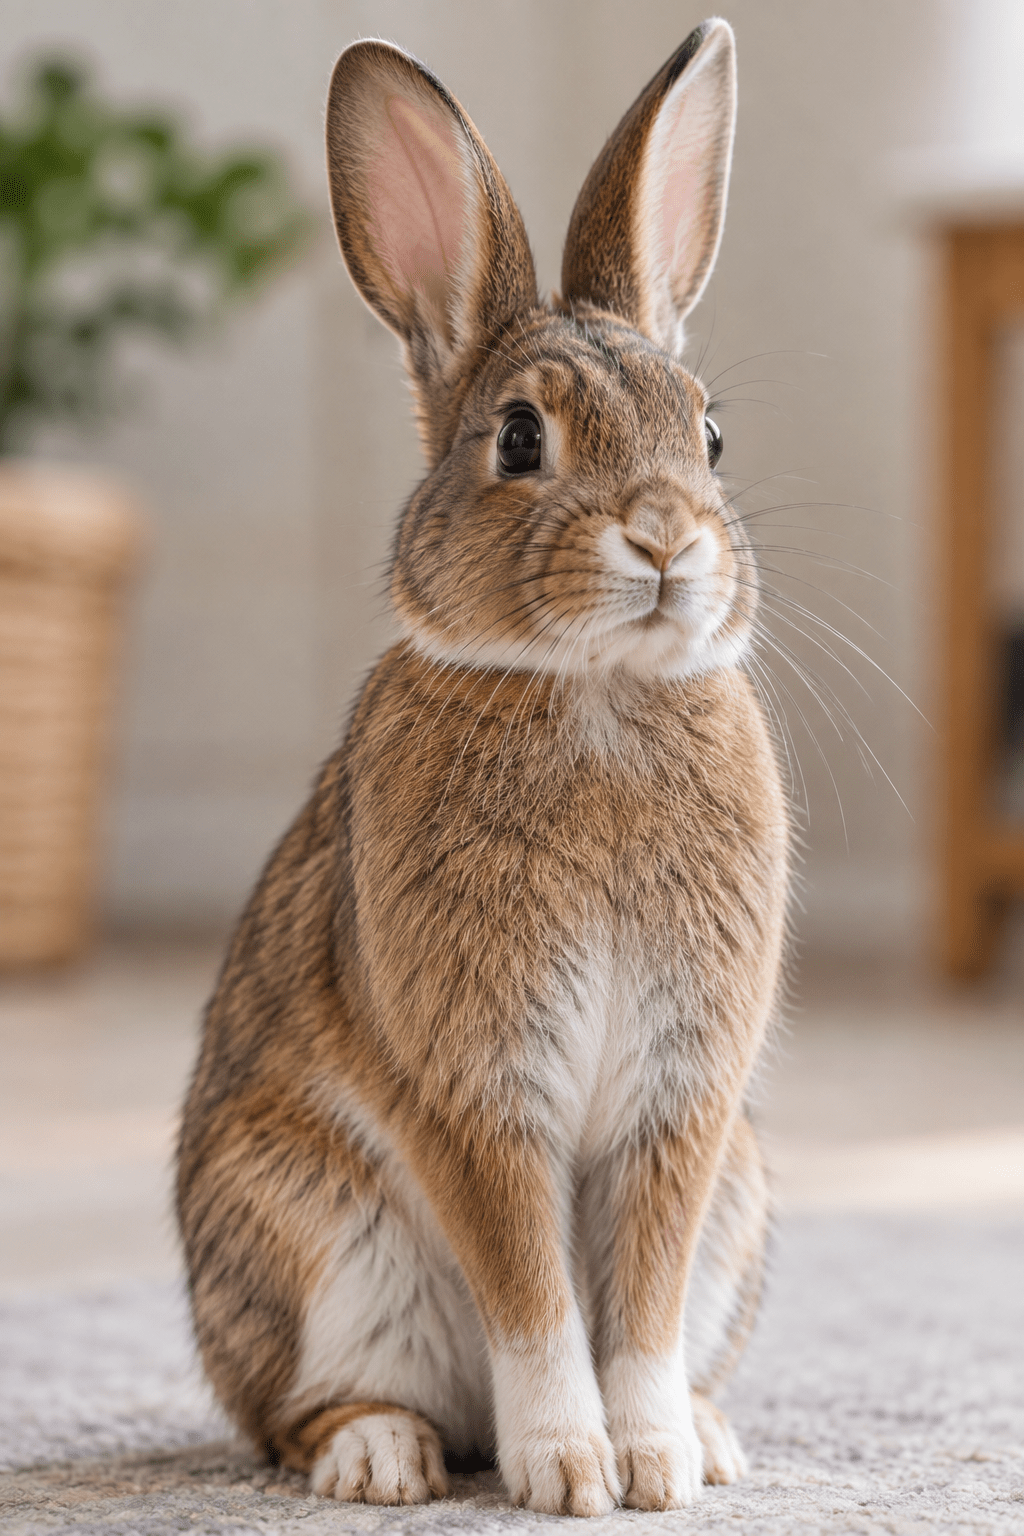
rabbit foot thumping meaning

Know Your Rabbit’s Baseline

Because normal thumping frequency genuinely varies between individual rabbits, the most useful thing you can do is get familiar with what’s typical for yours specifically — how often it thumps in a normal week, in what contexts, and what its body language looks like when it does. With that baseline established, a real change (more frequent thumping, a different accompanying posture, or thumping paired with appetite shifts) becomes something you’ll actually notice, rather than blending into “rabbits just do this sometimes.”

How to Respond to a Thumping Rabbit

Start by identifying which category above the pattern fits, since the right response differs. For fear-based thumping, stay calm, avoid forcing your rabbit toward whatever startled it, and make sure a hiding spot is available. For protest thumping, respect what your rabbit is communicating rather than punishing the behavior. For anything paired with appetite or behavior changes, move straight to contacting your vet rather than trying home remedies first, given how quickly gut stasis in particular can progress.

Common Mistakes Owners Make

Assuming every thump means fear, when context (stationary posture, timing right after handling) often points to annoyance instead. Dismissing thumping paired with reduced appetite as “being dramatic” rather than recognizing it as a possible early gut stasis warning sign. Overlooking hock condition and flooring as a contributing cause of pain-driven thumping. And treating brief thumping between bonding rabbits as a failed introduction when it’s often normal hierarchy behavior.

Practical Examples

A rabbit thumps once at a delivery truck outside, then goes back to grazing normally: ordinary alertness, no action needed.

A rabbit thumps repeatedly over an afternoon and is eating less than usual, with smaller droppings than normal: this fits the gut-stasis warning pattern above and is worth a same-day call to your vet rather than waiting to see if appetite returns on its own.

Two newly introduced rabbits thump at each other during supervised time together, then settle a few feet apart and start grooming: typical hierarchy-establishing behavior, not a sign the introduction is failing.

FAQ

Is it normal for rabbits to thump every day? 

Some rabbits thump occasionally as part of normal alertness or personality; what matters more than daily frequency is whether the pattern is consistent with your specific rabbit’s usual baseline.

How do I know if my rabbit’s thumping means pain? 

Pain-related thumping usually comes with other signs — reduced appetite, a hunched posture, reluctance to move, or smaller/fewer droppings — rather than appearing on its own.

Why does my rabbit thump at night? 

Rabbits are naturally most active at dawn and dusk and have sensitive hearing, so nighttime sounds an owner might not notice can still trigger an alert thump.

Do rabbits thump when they’re happy or excited? 

Thumping is generally an alarm or protest signal rather than an expression of happiness — excitement in rabbits is more commonly shown through behaviors like running and jumping (binkying).

Should I comfort my rabbit when it thumps? 

Calm, non-forceful reassurance and access to a hiding spot are more helpful than trying to physically soothe a frightened rabbit, which can add to its stress in the moment.

Can thumping hurt my rabbit’s feet?

Yes, particularly on hard or wire flooring — frequent thumping on an inadequate surface can contribute to or worsen sore hocks (pododermatitis).

Why do my bonded rabbits thump at each other? 

This is often normal hierarchy-establishing behavior; it’s worth more attention only if it’s paired with real aggression like biting or prolonged chasing rather than brief posturing.

When should I take a thumping rabbit to the vet? 

When thumping is paired with reduced appetite, changed droppings, hiding, or reluctance to move — these combinations can signal pain or early gut stasis, both of which warrant prompt veterinary attention.

Sources & References

  • VCA Animal Hospitals — Gastrointestinal Stasis in Rabbits
  • Royal Veterinary College — Reducing the Risk of Gut Stasis in Rabbits
  • Companion Animals Extension — Pododermatitis (Sore Hocks) in Rabbits
  • dvm360 — Understanding Rabbit Behavior and Preventing and Treating Behavior Problems

Written by the Pets Store Home Team — pet care writers and researchers who cross-check every behavioral and health claim against the veterinary and academic sources cited above, rather than other blogs. This article has not yet been reviewed by a named, credentialed rabbit-savvy veterinarian; add one here before publishing if genuinely available. Last reviewed: September 2026

Conclusion

A thump on its own doesn’t tell you much — it’s the pattern and what comes with it that matters. A single alert thump is nothing to worry about; thumping paired with appetite loss, hiding, or a change in droppings is worth same-day veterinary attention given how quickly gut stasis can progress in rabbits. Get to know what’s normal for your own rabbit, keep an eye on housing and hock health, and read the accompanying signs rather than the thump alone.
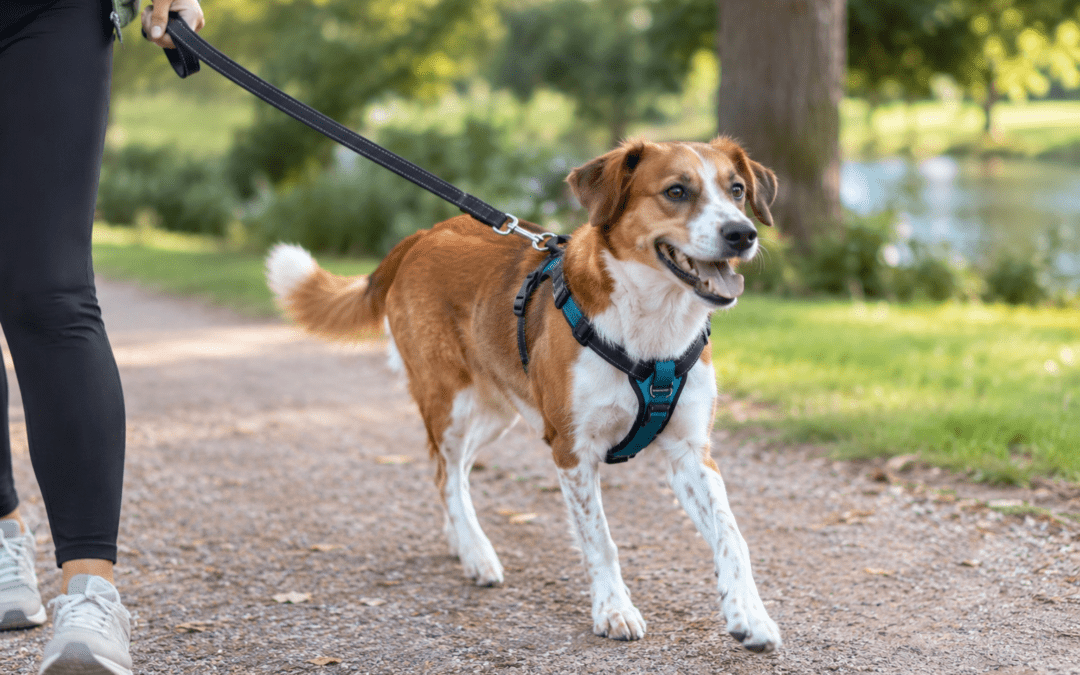
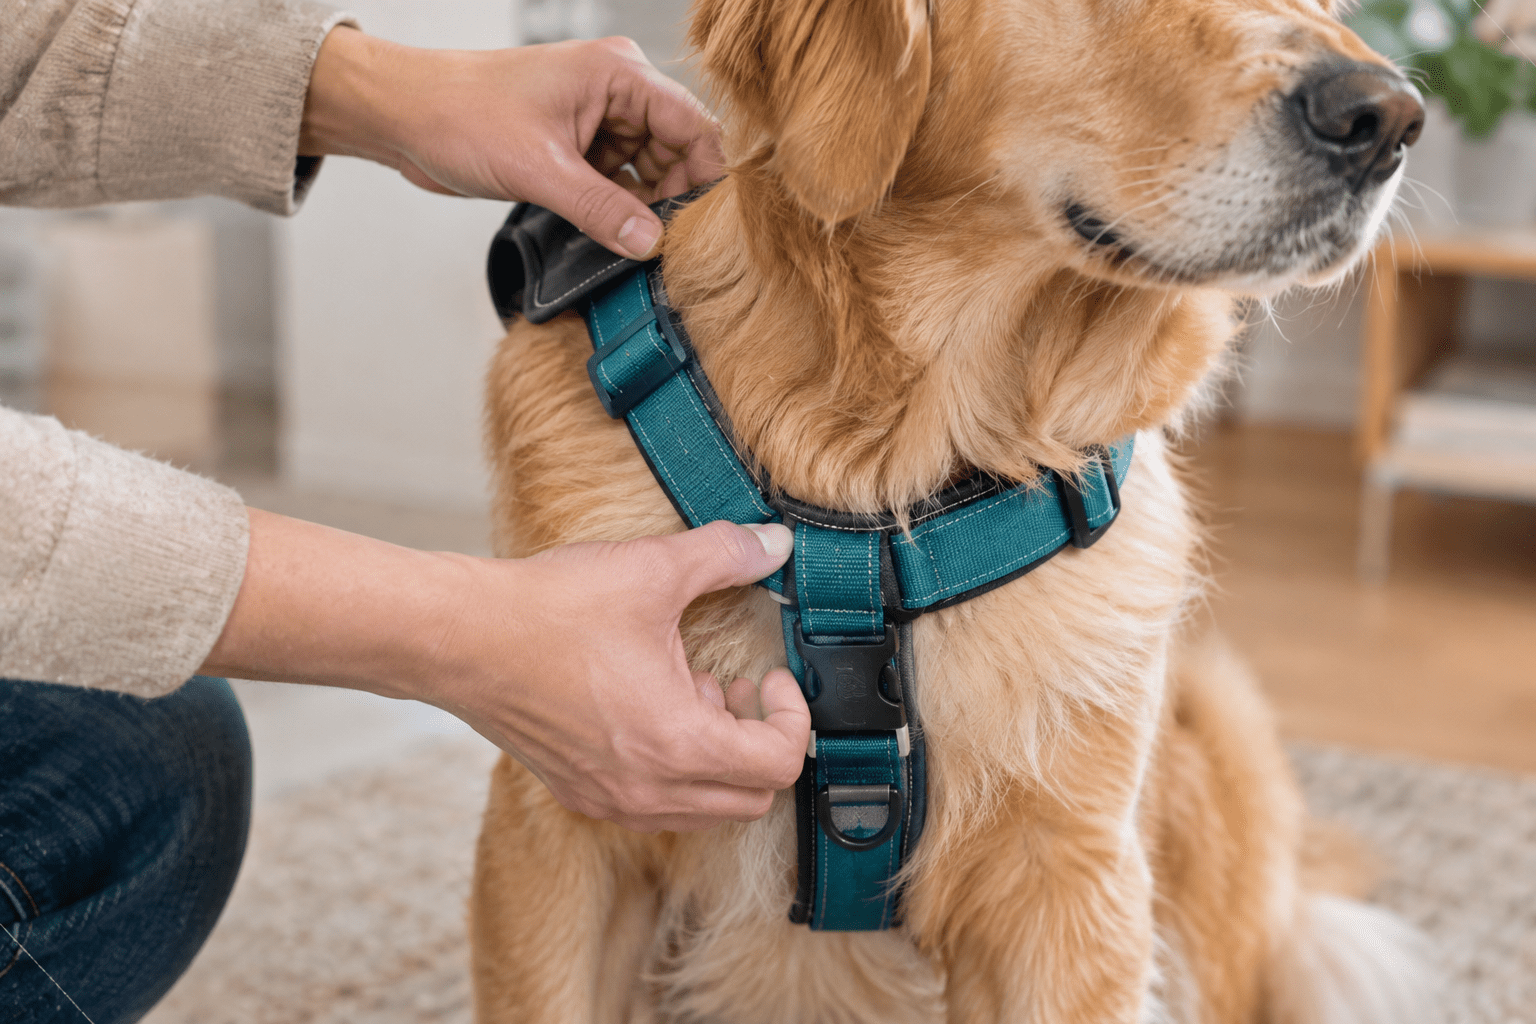
Best harness for dogs that pull on walks

Best harness for dogs that pull on walks

Quick Answer: A front-clip harness is usually the best starting point for a dog that pulls, because it interrupts the instinct to lean into pressure rather than reinforcing it the way a back-clip harness or collar can. From there, the right choice depends on your dog’s size and breed (small dogs prone to tracheal issues need pressure off the neck entirely), how well the harness actually fits, and whether you’re using it as a permanent fix or a bridge while leash training progresses.

Best harness for dogs that pull on walks

Most “best harness” roundups hand you a ranked list of products and a two-finger fit test, then move on. What they skip is the actual reasoning: why front-clip designs work at all, what a bad-fitting harness does to your dog’s movement over time, which dogs face a genuinely higher safety stake than others, and what to do when the harness alone isn’t solving the pulling. This guide is built around that reasoning rather than a product ranking, so you can apply it to whatever’s actually available to you.

Key Takeaways

  • Front-clip harnesses work by interrupting a dog’s instinct to lean into pressure — a well-documented behavioral pattern often called the opposition reflex — rather than by physical restraint alone.
  • Harness shape affects shoulder movement, but recent gait research complicates the common “Y-shaped is more shoulder-friendly” assumption — no single design has been shown to be universally better.
  • Small and toy breeds prone to tracheal collapse have a genuinely higher stake in getting neck pressure off entirely, not just a general preference for harnesses.
  • A harness is a tool to make walks manageable, not necessarily a permanent fix — pairing it with leash training gives you somewhere to go if pulling doesn’t improve.
  • “Escape-proof” is a marketing term more often than a guarantee — fit and design details determine whether a dog can actually back out of a harness.

Why Dogs Pull, and Why Harness Design Actually Matters

Dogs have a well-documented instinct to lean into steady pressure rather than away from it — commonly referred to as the opposition reflex. When a collar or back-clip harness applies pressure to a dog’s neck or back as it pulls forward, that pressure can trigger more pulling rather than less, since the dog’s instinct is to push back against whatever’s resisting it.

A front-clip harness changes the physics of that interaction: pressure from the leash comes from the front and pulls the dog sideways rather than adding resistance in the direction it’s already moving. According to VCA Animal Hospitals, this lets an owner use “gentle leash pressure to turn the dog away from a distraction or back toward the handler” — redirecting rather than fighting the pull. That’s the actual mechanism behind why front-clip designs tend to outperform back-clip ones for a dog that pulls, not just a manufacturer’s design choice.

The Main Harness Types, Compared

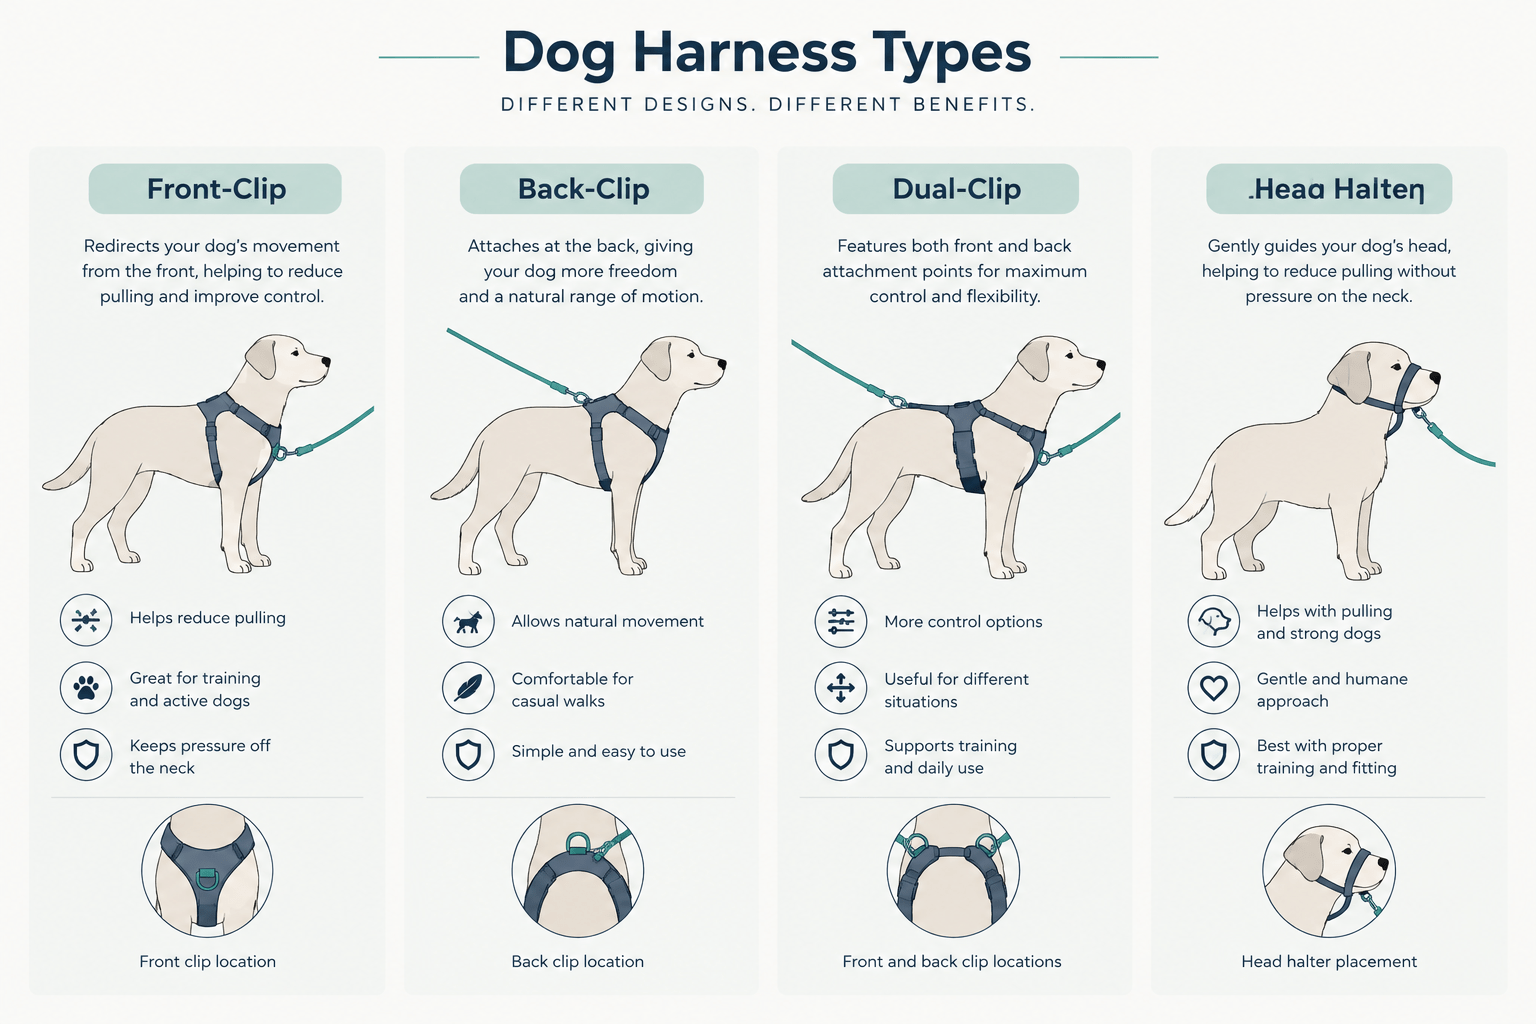
Type

How it works

Best fit for

Back-clip

Leash attaches at the shoulders; simple, comfortable for non-pullers

Dogs that already walk well on a loose leash

Front-clip

Leash attaches at the chest; redirects a pulling dog sideways

Most dogs that pull, as a starting point

Dual-clip

Offers both front and back attachment points

Dogs needing more control than front-clip alone, or transitioning between training stages

Head halter

Fits around the muzzle and behind the ears; controls head direction

Strong pullers needing more control than a harness provides, used alongside training

Per VCA Animal Hospitals, head halters carry their own escape consideration — some dogs can back out of them, so a head halter is generally recommended in combination with a harness or buckle collar rather than as the sole attachment point.

front clip vs back clip harness

Fit Isn’t Just Comfort — It’s About Movement, Too

A harness that doesn’t fit correctly can restrict how freely a dog moves its front legs, and recent veterinary gait research shows this is more complicated than the common wisdom suggests. A detailed 3D motion-capture study of dogs wearing different harness designs found that harnesses altered gait parameters in roughly two-thirds of measurements taken, with the front legs’ movement affected most. Notably, the research found that so-called “non-restrictive” Y-shaped harnesses were not consistently more shoulder-friendly than straight-chest designs — in some conditions, the Y-shaped design actually showed more shoulder restriction, contradicting the common assumption that shape alone determines freedom of movement. The researchers found no single harness design that was universally superior across dogs.

The practical takeaway isn’t “avoid a specific shape” — it’s that proper fit and your individual dog’s build matter more than a harness’s marketing description. Watch your dog’s front leg during a walk: it should be able to extend forward freely without the harness’s chest strap visibly catching or limiting that motion. If a harness looks like it’s stopping the leg partway through its natural stride, that’s a fit or design problem worth addressing regardless of what the harness is labeled.

Collars, Harnesses, and the Trachea: What the Risk Actually Is

The “harnesses are safer than collars” advice you’ll see everywhere has real anatomical grounding, but it matters more for some dogs than others. According to Cornell University’s College of Veterinary Medicine, tracheal collapse — a weakening of the cartilage rings that hold the airway open — is common in toy and small breeds such as Yorkshire Terriers, Pomeranians, and Toy Poodles, particularly as they reach middle age. Pressure on the neck is specifically listed among the factors that can worsen symptoms in affected dogs, alongside stress, heat, and physical exertion.

VCA Animal Hospitals recommends a body harness specifically for dogs with tracheal disease or neck pain, since it “puts minimal pressure on delicate tissue.” For a small-breed puller — especially one from a breed prone to tracheal issues — getting pressure off the neck entirely isn’t just a comfort preference, it’s a genuine risk-reduction step. For larger, sturdier breeds without this predisposition, the case for a harness is still strong for pulling control, just without the same anatomical urgency.

no pull harness for small dogs

Fit Troubleshooting: Beyond the Two-Finger Test

The standard “two fingers should fit under the strap” test catches harnesses that are obviously too tight or loose, but it doesn’t diagnose most real-world fit problems.

Chafing near the front legs usually means the chest strap sits too low or the harness is a size too small, putting pressure directly on the armpit area during movement.

Twisting during walks typically points to a harness that’s too loose overall, or one with a back-clip design on a dog that pulls hard enough to rotate it out of position.

Riding up over the shoulders often means the girth strap (the one running under the belly) isn’t snug enough to hold the harness in its intended position, or the harness is sized too large for the dog’s chest depth.

Rechecking fit after the first few walks — not just at purchase — catches problems that only show up once a harness has been worn during actual movement.

The Harness Is a Bridge, Not a Fix

A front-clip or dual-clip harness makes walks manageable, but it’s worth thinking of it as a tool that supports leash training rather than a permanent substitute for it. As a dog’s leash manners improve, many owners find they need less correction from the harness’s redirect mechanism — loose-leash walking starts happening because the dog has learned it, not just because the harness is preventing forward pulling in the moment.

There’s no fixed timeline for this, and plenty of dogs do fine on a front-clip harness indefinitely without it being a problem. The distinction matters mainly if pulling isn’t improving at all over time despite consistent walks — that’s a sign to look at training technique or professional help, rather than simply concluding a stronger harness is needed.

What “Escape-Proof” Actually Means

Per VCA Animal Hospitals, a dog can back out of a body harness “if the harness is not correctly fitted” — meaning escape resistance comes down to fit and design details, not a label. Features that genuinely reduce escape risk include a martingale-style loop that tightens slightly under leash tension, a properly snug girth strap, and sizing that keeps some adjustment room rather than maxing out the smallest or largest setting. A harness marketed as “escape-proof” without these features, fitted loosely, offers the same escape risk as any other loose harness — the marketing claim doesn’t override fit.

Special Situations

Senior dogs with joint issues: A harness that puts pressure across the chest and shoulders can be more comfortable than neck pressure for a senior dog with arthritis, but check that the fit doesn’t restrict the same joints that are already compromised.

Dogs recovering from surgery: Depending on the procedure and location, some harness designs may need to be avoided entirely during recovery — this is a case where checking with your vet about specific pressure points is worth doing before choosing equipment.

Brachycephalic breeds: Short-nosed breeds already carry breathing considerations independent of the trachea-specific risk covered above, making pressure-free harness options a sensible default rather than a collar.

When to Escalate: A Simple Decision Path

If a front-clip harness alone isn’t reducing pulling after consistent use alongside basic leash training, a dual-clip design gives you a second attachment point for more control without switching equipment entirely. If pulling remains difficult to manage even with a dual-clip harness, a head halter (used alongside a harness or collar per the escape-risk guidance above) offers more direct control over head direction. If none of these are making a meaningful difference, or if pulling comes with other behavioral concerns like reactivity or lunging, that’s a reasonable point to bring in a professional trainer rather than continuing to cycle through equipment.

Common Mistakes Owners Make

Choosing a harness based on marketing terms like “escape-proof” or “no-pull” without checking the actual design features behind the claim. Treating a harness as a permanent solution and never addressing the underlying leash-training gap. Not rechecking fit after the first few real walks, when problems like chafing or twisting actually show up. And using a standard flat collar on a strong-pulling small breed without factoring in tracheal risk.

Practical Examples

A Yorkshire Terrier that pulls hard on walks: given the breed’s documented tracheal-collapse risk, a well-fitted front-clip harness that keeps pressure entirely off the neck is the more urgent choice here, not just a preference.

A dog whose “non-restrictive” Y-shaped harness is causing visible shoulder chafing: per the gait research above, shape alone doesn’t guarantee shoulder freedom — this is a fit and individual-conformation issue worth addressing directly rather than assuming the harness type is automatically fine because of its label.

A dog that’s stopped improving on a front-clip harness despite months of consistent walks: this fits the escalation path above — time to consider a dual-clip design, a head halter, or a session with a professional trainer rather than simply trying another front-clip product.

FAQ

Do no-pull harnesses actually work? 

Front-clip designs generally help by redirecting a dog sideways instead of adding to the pressure it’s pulling against, which is a real behavioral mechanism — but they work best paired with leash training rather than as a standalone fix.

Front-clip or back-clip — which is better for pulling? 

Front-clip is generally the better starting point for a dog that pulls, since back-clip designs can reinforce the instinct to lean into pressure; back-clip works fine for dogs that already walk well on a loose leash.

Can a harness hurt my dog’s shoulders? 

A poorly fitted harness can restrict natural shoulder movement regardless of its shape — recent gait research found no single design is universally shoulder-friendly, so fit and checking your dog’s actual leg extension matter more than the label.

Is a collar ever safer than a harness for a dog that pulls? 

Generally no for a dog that pulls — a harness distributes pressure away from the neck, which matters most for small and toy breeds prone to tracheal collapse, per veterinary guidance.

What’s the difference between a harness and a head halter? 

A harness distributes pressure across the chest and shoulders; a head halter controls direction via the head and muzzle and generally offers more control for strong pullers, but should be used alongside a harness or collar since some dogs can back out of it.

How do I know if my harness fits correctly? 

Beyond the two-finger test, watch for chafing near the front legs, twisting during walks, or the harness riding up over the shoulders — each points to a specific, fixable fit issue.

Will my dog need this harness forever? 

Not necessarily — many dogs need less correction from the harness as leash training improves, though plenty of dogs also do fine on a front-clip harness long-term without it being a problem.

What does “escape-proof” actually mean on a harness?

It’s often a marketing term rather than a guarantee — actual escape resistance comes from a properly snug girth strap, a martingale-style tightening loop, and correct sizing, not the label alone.

Sources & References

Written by the Pets Store Home Team — pet care writers and researchers who cross-check every behavioral and health claim against the veterinary and research sources cited above, rather than other blogs. This article has not yet been reviewed by a named, credentialed veterinary or canine-behavior professional; add one here before publishing if genuinely available. Last reviewed: September 2026

Conclusion

The right harness for a dog that pulls isn’t the one at the top of a review list — it’s the one matched to why your dog pulls, how urgent the anatomical stakes are for their size and breed, and whether it actually fits their individual build. Start with a front-clip design for the behavioral mechanism, take breed-specific tracheal risk seriously if it applies, check fit against your dog’s real movement rather than a label, and treat the harness as one part of a plan that includes training — not the whole plan by itself.

how to clean a fish tank without killing fish

how to clean a fish tank without killing fish

Quick Answer: Fish usually get hurt by cleaning not because the tank was dirty, but because the cleaning disturbed the bacteria that process fish waste, or because untreated or mismatched-temperature water shocked them. The safe approach: change water in moderation rather than all at once, use a dechlorinator matched to your water supply, clean filter media gently in removed tank water, match new water’s temperature, and let water test results tell you when your routine needs to change.

Quick Decision Box

  • Ammonia or nitrite reading detected → investigate immediately and take corrective action based on the reading (see the emergency table below).
  • Parameters stable and tank visibly fine → stick to your regular routine maintenance; there’s no benefit to cleaning more than that.
  • Fish showing distress (gasping, erratic swimming) → test the water right away and increase surface agitation/aeration.
  • Adding tap water → condition it for what your water utility actually treats with.
  • Cleaning filter media → rinse gently in removed tank water to preserve the biological colony living on it.

How to Clean a Fish Tank Without Killing Fish

Ten different care guides will give you ten different water-change percentages, from 10% to 75%. That disagreement isn’t really about safety — it’s that most guides skip the mechanism behind fish deaths after cleaning and default to a memorized number instead. This guide starts with that mechanism — where the bacteria that process fish waste actually live, and what genuinely disturbs them — then builds a safe process, an emergency response plan, and a “what not to do” checklist around it.

Key Takeaways

  • Cleaning problems usually trace back to disturbed biofiltration capacity or chemical/temperature shock — not simply “not cleaning enough.”
  • The bacteria that process ammonia live mainly on surfaces — filter media, substrate, decor — not dissolved in the water itself, which changes what actually puts them at risk.
  • Use a regular maintenance routine as your baseline, and let water-test results tell you when that routine needs to change.
  • Not every water utility disinfects the same way, and not every dechlorinator is formulated for the same disinfectant — check what you’re actually treating for.
  • Copper from old plumbing is a real risk, especially for invertebrates, but there’s no single guaranteed fix — it depends on your specific water source.

The Mechanism: Where Fish Waste Actually Goes

Fish release ammonia directly through their gills into the surrounding water. According to the Merck Veterinary Manual, unionized ammonia is toxic at very low concentrations — a level around 0.05 mg/L is enough to cause measurable gill damage, and concentrations near 2 mg/L are lethal to many fish outright.

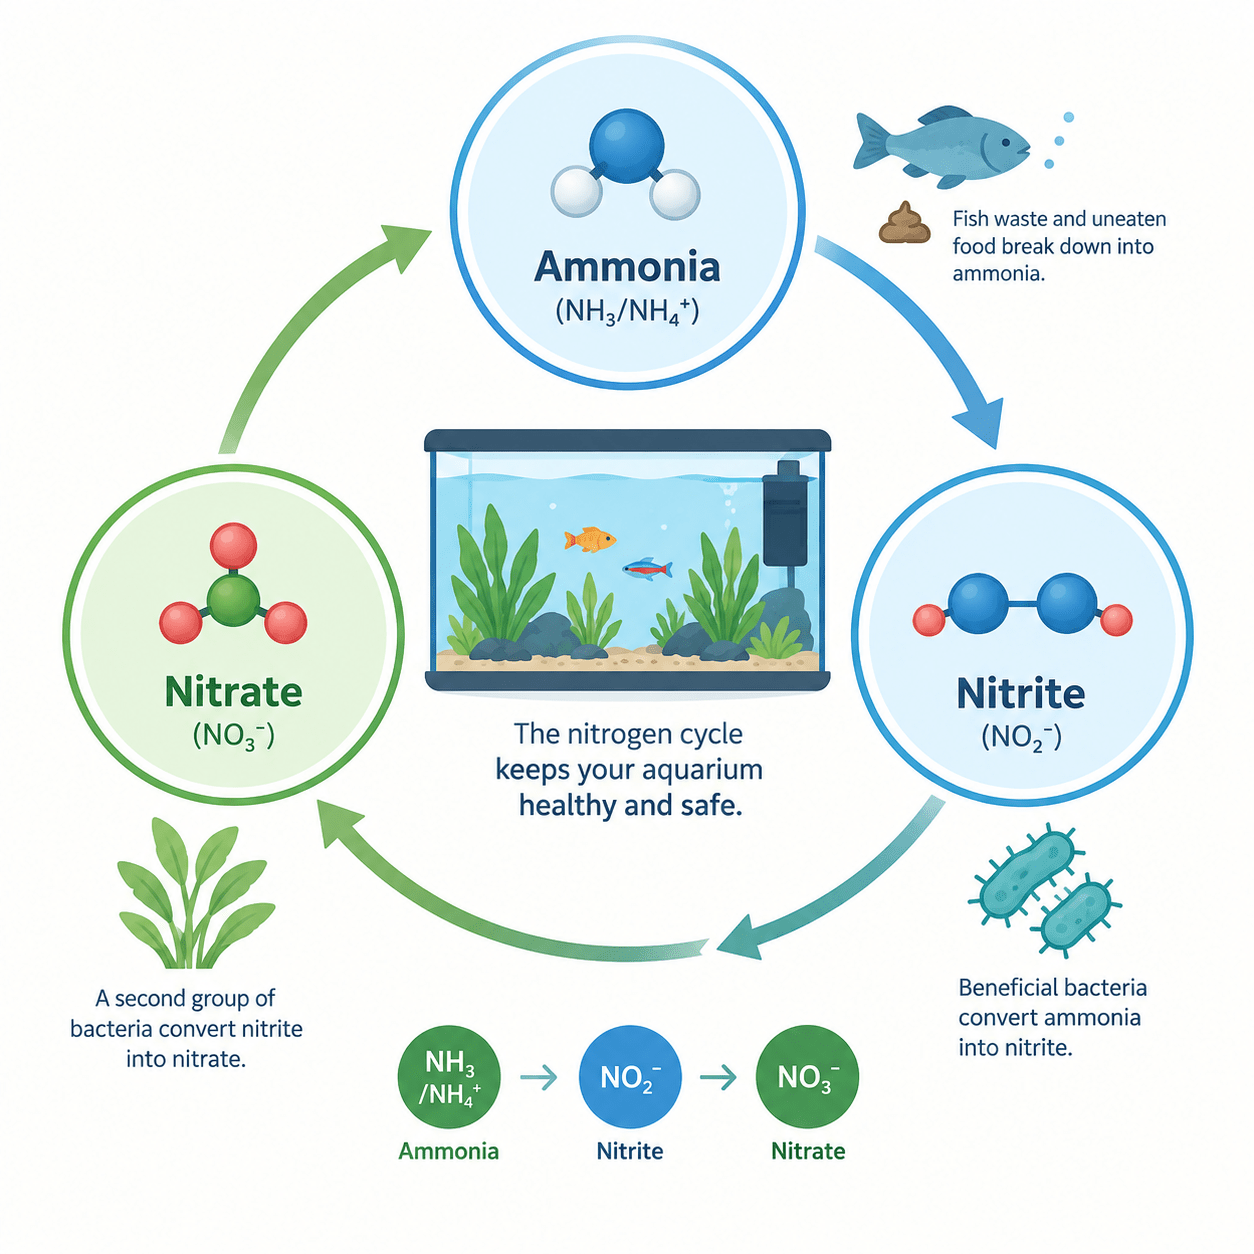
In an established aquarium, that ammonia doesn’t just accumulate — a chain of naturally occurring bacteria processes it: fish waste → ammonia → nitrite (via one group of bacteria) → nitrate (via a second group) → removed through routine water changes or uptake by live plants. This is the nitrogen cycle, and it’s the actual reason “beneficial bacteria” matters.

Here’s the detail most cleaning guides get wrong: those bacteria colonize surfaces — filter media and substrate especially — they aren’t suspended in the water column itself. That distinction matters because it means the water you remove during a routine change isn’t where most of the bacterial colony lives.

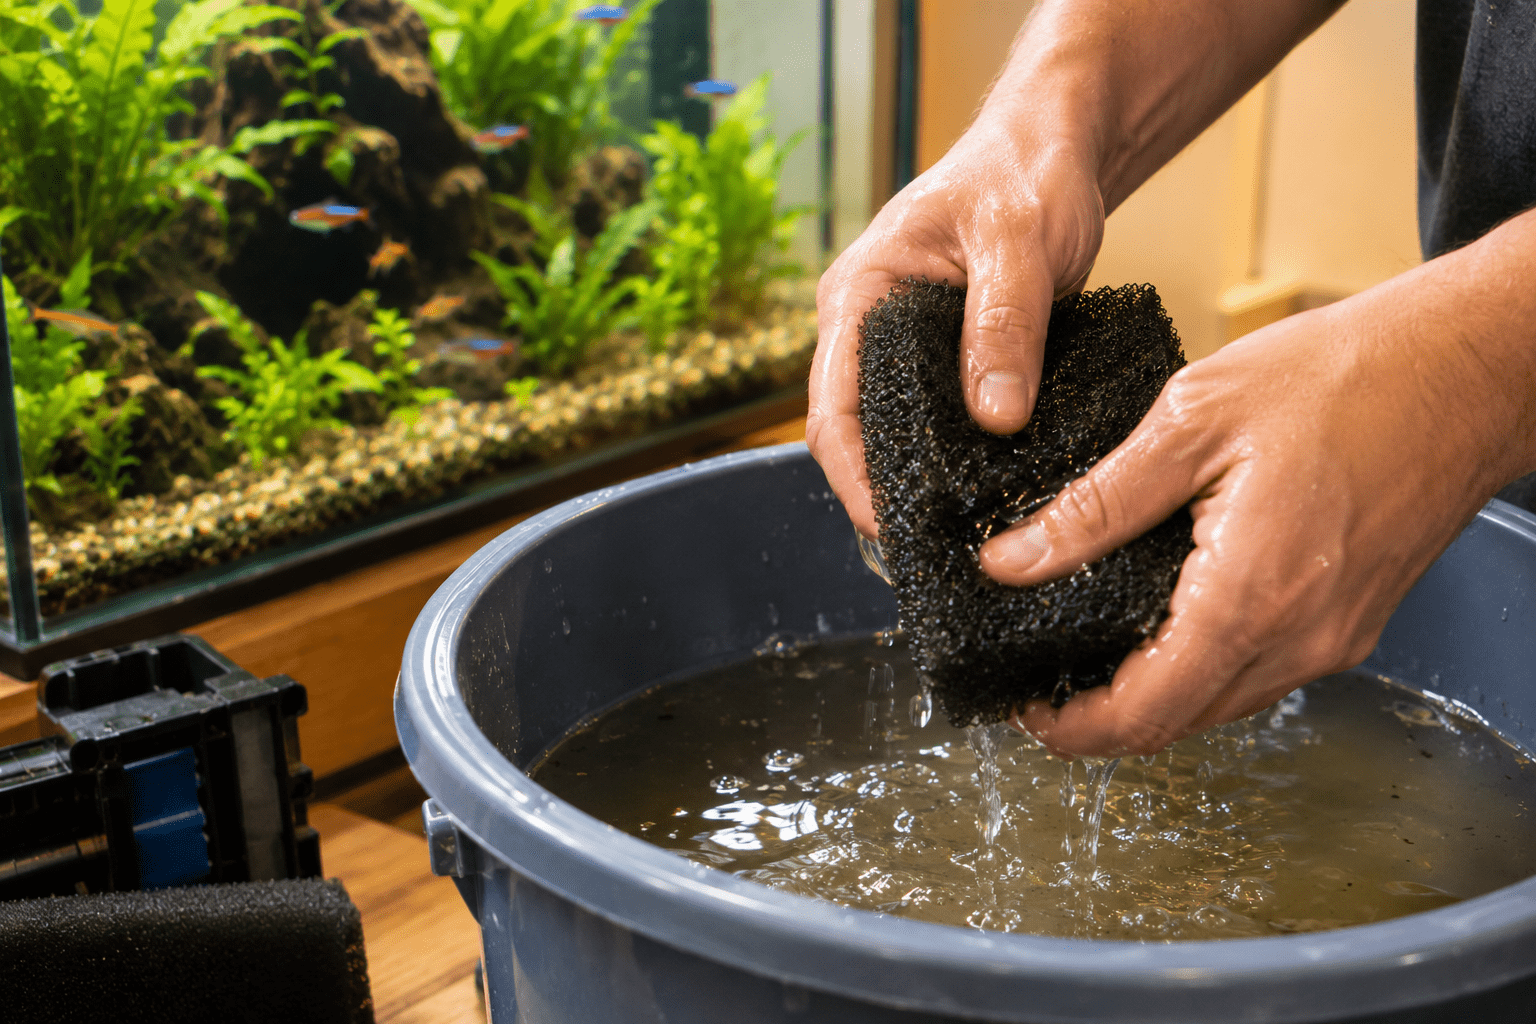
What actually threatens that colony is disturbing or damaging the surfaces they live on: rinsing filter media under hot tap water, replacing all your filter media at once, or using antimicrobial chemicals near the filter. The Merck Veterinary Manual notes that a biofilter takes roughly six to eight weeks to become fully established, and that a damaged filter’s bacterial population needs a similar span to recover — which is why aggressive media cleaning, not water changes on their own, is the more direct route to an ammonia or nitrite spike.

A very large or complete water change carries its own, different risks — mainly losing the water’s existing chemical stability and buffering capacity, and a bigger jump in temperature or pH if the replacement water isn’t closely matched. Those are real concerns worth avoiding, but they’re a distinct issue from “wiping out the bacteria,” which is mostly a filter-media and substrate-disturbance problem.

why did my fish die after water change

Routine Maintenance vs. an Ammonia/Nitrite Emergency

These are two different situations, and treating them the same way is where a lot of cleaning advice goes wrong.

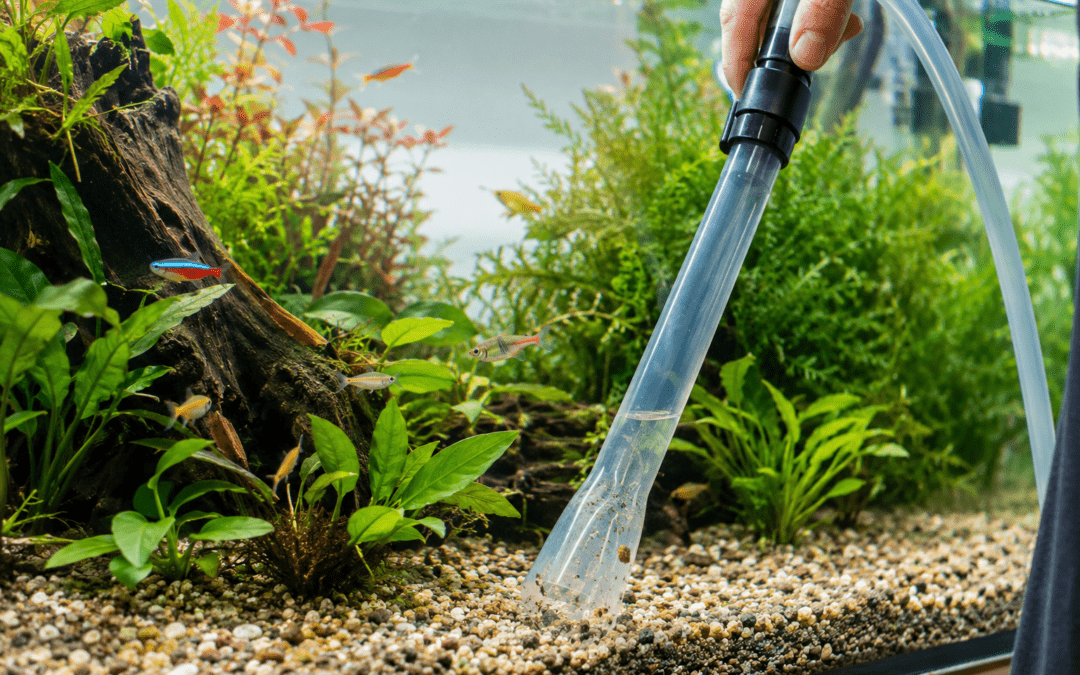
Routine maintenance is what you do on a regular schedule when your tank is stable: a partial water change sized to your specific tank (more on the variables below), gentle substrate vacuuming, and occasional gentle rinsing of filter media in removed tank water.

An ammonia or nitrite emergency is a different situation with a different response. If a test shows a detectable ammonia or nitrite reading, that’s a signal to investigate immediately and take corrective action based on what the reading actually shows — not necessarily a fixed percentage, and not something to leave for your next scheduled cleaning day.

Per the Merck Veterinary Manual, a substantial water change (50% or more) is a reasonable emergency response once high ammonia is confirmed, provided the replacement water itself doesn’t introduce more ammonia or chloramine. The right size of an emergency response depends on how high the reading is and how your tank is set up, which is a good reason to have a plan (and, ideally, a vet or experienced aquatics source to consult) rather than a fixed number memorized in advance.

Use a Routine, But Let Testing Tell You When to Adjust It

A fixed cleaning calendar — weekly, biweekly, whatever a guide recommends — is a reasonable starting baseline. The mistake is treating that calendar as fixed regardless of what’s actually happening in the tank. The more reliable framing: use a regular maintenance routine as your baseline, and let water-test results tell you when that routine needs to change. Stable, low ammonia and nitrite readings mean your current routine is working.

A detectable ammonia or nitrite reading means it’s time to investigate and respond, regardless of where you are in the calendar. Rising nitrate between changes, with ammonia and nitrite both at zero, is what your next scheduled routine change is for.

How Much Water Should I Change? The Real Variables

There’s no single universal percentage that’s correct for every tank, which is why care guides disagree so much. What actually determines the right amount for routine maintenance includes: how mature and established the tank is, stocking level, how much you’re feeding, how heavily planted the tank is, filtration capacity, and your current ammonia, nitrite, and nitrate readings, along with the chemistry of your source water.

A lightly stocked, mature, well-planted tank with stable readings can typically get by with smaller, less frequent changes than a heavily stocked or newly established one.

This is separate from the emergency response covered above, where the size of the change is driven by how high a confirmed ammonia or nitrite reading actually is, not by these routine-maintenance variables.

Chlorine vs. Chloramine: Check What Your Water Utility Actually Uses

Every care guide agrees you need a water conditioner before adding tap water, but not every water utility disinfects the same way, and that affects which conditioner is appropriate. According to the EPA, chloramines are formed when ammonia is added to chlorine during water treatment, specifically because the combination provides longer-lasting disinfection as water travels through pipes to consumers, compared to chlorine alone, which dissipates more quickly.

This is a difference in how the two are formed and how long they persist — it’s worth finding out which one your local utility uses and choosing a conditioner labeled for that specific disinfectant, rather than assuming any dechlorinator handles both equally.

Copper and Other Heavy Metals: A Risk Without One Guaranteed Fix

Standard dechlorinators are formulated to neutralize chlorine and chloramine — they aren’t designed to remove dissolved metals. The Merck Veterinary Manual lists copper concentrations above roughly 0.2 mg/L, particularly combined with low water alkalinity, as capable of causing sudden fish mortality, and copper is generally more dangerous to invertebrates like shrimp and snails than to many fish at comparable levels.

Old household plumbing with copper pipes or solder is a common source, but there isn’t one guaranteed fix that eliminates the risk. Running the tap briefly before filling a bucket may reduce copper picked up from standing water in the pipes, but it isn’t a verified or complete solution on its own. If you keep shrimp, snails, or other copper-sensitive invertebrates and have older plumbing, testing your tap water for copper and using a conditioner or additive specifically formulated to bind heavy metals is a more reliable approach than tap-flushing alone.

What Your Water Test Results Actually Mean

  • Ammonia — should not be detectable in a properly cycled, stable aquarium; any reading above zero is worth investigating.
  • Nitrite — same standard as ammonia: should not be detectable once a tank is established, and any reading calls for a look at what’s changed.
  • Nitrate — useful mainly as a trend indicator of accumulating nitrogen waste over time between water changes, rather than a single number with one universal “safe” threshold across every tank and species.
  • pH and temperature — sudden shifts in either can matter for fish even when ammonia and nitrite both read as acceptable, which is part of why matching temperature during water changes (covered in the checklist below) is worth doing carefully rather than approximately.

The Ultimate Safe-Cleaning Checklist

  1. Test the water before you start.
  2. Prepare and treat replacement water with an appropriate conditioner.
  3. Match the new water’s temperature to the tank’s.
  4. Unplug any equipment that shouldn’t run dry (heater, filter).
  5. Remove only the intended amount of water for today’s routine.
  6. Vacuum the substrate gradually, section by section.
  7. Clean glass and decorations without soap, detergent, or household chemicals.
  8. Rinse reusable filter media gently in the removed aquarium water, not tap water.
  9. Refill slowly with the prepared, treated, temperature-matched water.
  10. Restart equipment and verify normal flow and heating.
  11. Observe your fish for a few minutes after restarting.
  12. Retest later if readings or fish behavior indicate a problem.

Emergency Troubleshooting

Problem

What to Do

Forgot conditioner

Treat the water according to your conditioner’s instructions as soon as you notice

Fish gasping at the surface

Increase aeration/surface agitation and test water immediately

Ammonia detected

Investigate the cause and respond with a corrective water-quality action sized to the reading

Nitrite detected

Same as above — investigate and respond based on the reading, not a fixed percentage

Temperature shock suspected

Stabilize temperature gradually rather than making another sudden change

Filter media rinsed under tap water

Monitor ammonia and nitrite closely over the following days

Full or near-full water change done

Monitor water chemistry closely and avoid heavy feeding for a few days

Not All Fish Tolerate Cleaning the Same Way

Community fish — most hardy, commonly kept species generally tolerate standard partial water changes reasonably well.

Sensitive or scaleless species — some fish are more prone to stress from abrupt chemistry or temperature shifts and benefit from more gradual changes than a generic routine assumes.

Shrimp and snails — invertebrates warrant particular attention to copper exposure and rapid parameter swings, given the sensitivity covered above; this doesn’t mean a single fixed percentage applies to all shrimp or snail species, since sensitivity varies, but it does mean applying a fish-tank routine unmodified to an invertebrate tank is worth reconsidering.

Never Do These During Routine Cleaning

❌ Use soap or detergent on glass, decorations, or equipment ❌ Replace all filter media at once ❌ Rinse biological filter media under untreated tap water ❌ Add untreated tap water directly to the tank ❌ Make a large, sudden temperature change during a water change ❌ Deep-clean every surface (substrate, decor, filter media, glass) in a single session ❌ Assume one fixed percentage applies to every aquarium ❌ Ignore a detectable ammonia or nitrite reading because it’s not your scheduled cleaning day

how much water to change in fish tank<br />

When You Should Not Clean More

If the tank looks visually clean and your water test results are stable, there’s no benefit to deep-cleaning simply because the calendar says it’s time. Over-cleaning — disturbing filter media and substrate more than necessary — is itself a route to the ammonia/nitrite risk covered earlier. A tank that’s testing well doesn’t need a more aggressive routine; it needs the same routine, at the same pace, until the readings say otherwise.

If You Already Made a Mistake

You did a full or near-full water change: Monitor ammonia and nitrite closely over the following days, since the tank’s chemical stability has been disrupted. Avoid heavy feeding during this window, and be ready to respond with a corrective water-quality action if readings climb.

You forgot the dechlorinator: Treat the water according to your conditioner’s instructions as soon as you notice, and test water quality once it’s had time to circulate.

Your fish are gasping or clearly distressed right after cleaning: Increase surface agitation or aeration right away, test ammonia and nitrite immediately, and respond with an appropriately sized corrective water change using properly treated, temperature-matched water if a problem is confirmed.

After You Clean: A Timeline for What to Watch

First few hours: Watch for gasping at the surface, erratic or darting swimming, hiding, or loss of color — per the Merck Veterinary Manual’s reference signs of illness in fish, these (along with lethargy and rapid or labored breathing) are worth taking seriously if they appear shortly after a cleaning.

Next 24-48 hours: Monitor ammonia and nitrite if you did a larger-than-routine change or suspect any disturbance to the filter, feed conservatively rather than heavily, and keep an eye on general behavior.

Following days: Return to your normal monitoring routine, and adjust your maintenance schedule only if test results actually indicate a change is needed — not simply because time has passed.

Common Mistakes Owners Make

Doing a full or near-full water change to “really” clean the tank, which disrupts chemical stability more than a partial change would. Rinsing filter media or decorations under a tap instead of in removed tank water. Adding new water without checking that its temperature is close to the tank’s. Cleaning more aggressively than test results call for, simply because of the calendar. And using soap, detergent, or general household cleaning products anywhere near the tank, its equipment, or decorations.

Practical Examples

A lightly stocked, well-planted, established tank with consistently stable test readings: a modest routine partial change on a regular schedule is likely sufficient, and there’s no benefit to cleaning more aggressively than the readings call for.

A newly set up tank showing detectable ammonia between scheduled changes: this points to an incompletely established biofilter rather than a cleaning-frequency problem, and calls for the emergency-response approach above rather than simply waiting for the next scheduled cleaning.

A tank with shrimp that previously held only fish: the owner’s old fish-only routine, including any copper-containing products used in the past, is worth re-evaluating against the more cautious approach the species-sensitivity section above describes.

FAQ

Why did my fish die after I cleaned the tank? 

The most common causes are a disturbance to the bacteria that process ammonia (often from aggressive filter-media cleaning), or a chemical or temperature shock from untreated or mismatched-temperature replacement water — investigate both if this happens.

How much water should I change at once? 

For routine maintenance, it depends on your tank’s maturity, stocking, feeding level, and current test readings rather than one universal number; a confirmed ammonia or nitrite emergency calls for a separate, larger corrective response as covered above.

Can I clean the filter and do a water change on the same day? 

Yes, but avoid rinsing all your filter media aggressively and doing a large water change at the same time — space out how much you disturb the biological colony and the water chemistry in a single session.

Do I need a water conditioner every time I add tap water? 

Yes, and the specific conditioner should match what your water utility actually treats with — chlorine or chloramine.

How do I know if my fish are stressed after cleaning? 

Watch for gasping at the surface, erratic or darting swimming, hiding, or loss of color in the hours following a cleaning, and test your water right away if you see any of these.

Is it safe to remove all the water and start over? 

Generally not recommended for routine maintenance — a full water change disrupts the tank’s chemical stability and risks a bigger temperature or pH swing than a partial change, on top of losing whatever buffering the established water was providing.

How often should I really clean my fish tank? 

Use a regular routine as your baseline, and let water test results tell you when that routine needs to change — a detectable ammonia or nitrite reading calls for investigation regardless of the calendar.

Can a 100% water change kill fish? 

It can contribute to fish loss, mainly through temperature/chemistry shock and the loss of the tank’s existing chemical stability, rather than through “losing the bacteria” specifically, since most of the bacterial colony lives on filter media and substrate rather than in the water itself.

Should I remove my fish while cleaning the tank? 

For most routine maintenance, no — removing fish adds its own handling stress, and standard cleaning steps (partial water change, gentle vacuuming, gentle media rinsing) are designed to be done with fish in the tank.

Can I clean the filter and change water together? 

Yes, but do it gently rather than aggressively on both fronts at once — a full media replacement combined with a large water change compounds disturbance to both the bacterial colony and the water chemistry in a single session.

Why are my fish gasping after a water change? 

This can indicate low dissolved oxygen, a temperature or chemistry mismatch in the new water, or an ammonia/nitrite issue — increase aeration and test the water immediately rather than waiting to see if it passes.

Written by the Pets Store Home Team — pet care writers and researchers who cross-check every medical or water-chemistry claim against the veterinary and regulatory sources cited inline and above, rather than other blogs. Fact-checked/reviewed by: Not yet reviewed by a named, credentialed aquatic professional — add one here before publishing if genuinely available. No credential is listed in the meantime, since we don’t fabricate reviewer names. Last reviewed: September 2026

Conclusion

The bacteria that keep a tank safe live mostly on filter media and substrate, not in the water itself — which is why aggressive media cleaning and abrupt temperature or chemistry changes are the real risks, more than “not cleaning enough.”

Use a steady routine as your baseline, let test results tell you when to deviate from it, match your dechlorinator to your actual water supply, and treat copper as a real but not fully solved risk if you keep invertebrates or have older plumbing. Get those pieces right, and “without killing your fish” stops being a worry and starts being the default outcome.

can dogs eat scrambled eggs every day

can dogs eat scrambled eggs every day

Quick Answer: For most dogs, no — daily scrambled eggs as an unsupervised extra on top of regular food usually push past the standard 10%-of-daily-calories treat guideline once you actually do the math for your dog’s size. Eggs can be a daily component for some dogs, but only inside a vet- or nutritionist-formulated diet that accounts for the calcium balance eggs affect — not as a casual daily add-on. And for dogs with pancreatitis history, kidney disease, obesity, or an egg allergy, the answer is more cautious regardless of the math.

Can Dogs Eat Scrambled Eggs Every Day?

Every major pet-nutrition site agrees on roughly the same answer to this question: not daily, stick to a couple of times a week, and follow the “10% of daily calories” treat rule. What almost none of them show you is the actual arithmetic behind that rule — so the advice lands as a number to memorize rather than something you can check for your own dog. This guide walks through that math with a real example, explains the specific situation where daily eggs genuinely are fine, and covers the health conditions and life-stage factors that change the answer.

Key Takeaways

  • The “10% rule” isn’t a fixed number of eggs — it’s a calorie calculation, and doing it for your own dog’s weight tells you whether daily scrambled egg fits or not.
  • Daily eggs can be appropriate, but usually only as part of a vet- or nutritionist-formulated homemade diet that accounts for how eggs affect calcium balance — not as an everyday extra on top of regular food.
  • Cooking matters medically, not just for taste: raw egg whites contain a protein that blocks biotin absorption, a risk that scrambling eliminates.
  • Dogs with a history of pancreatitis, kidney disease, obesity, or a known egg allergy need a more cautious answer than the general “10% rule” provides.
  • Puppies and seniors don’t fit the same size-based bucket adult dogs do — growth needs and weight-gain risk both change the calculation.

Why “It Depends on the Math” Is the Real Answer

Most guides answer this question with a size chart: extra-small dogs get a quarter egg, extra-large dogs get up to two. That’s a reasonable starting point, but it skips the actual reasoning, which is more useful because it works for any food, not just eggs.

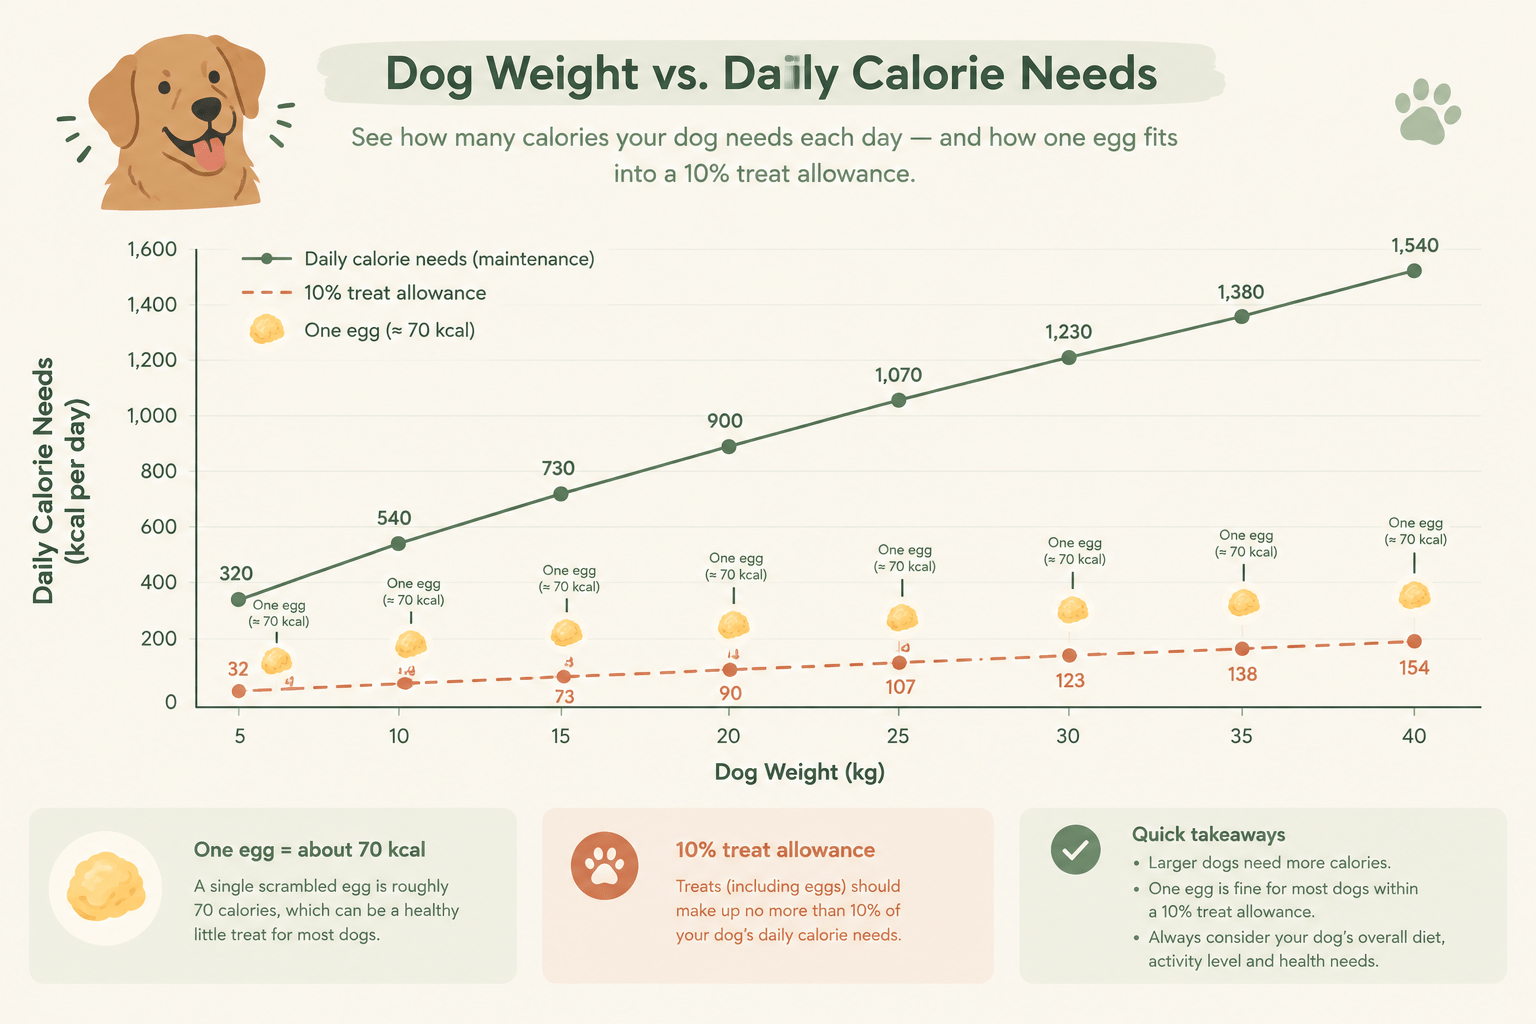
Veterinary nutrition guidance calculates a dog’s baseline daily energy need — called Resting Energy Requirement, or RER — using the formula RER (kcal/day) = 70 × (body weight in kg)^0.75, per the Merck Veterinary Manual. This is a resting baseline, not the dog’s full daily calorie allowance; actual daily needs (called Maintenance Energy Requirement, or MER) are typically higher than RER once you account for a dog’s activity level and life stage, and can vary meaningfully between individual dogs even at the same weight.

Here’s what that looks like for a roughly 20kg (44lb) adult dog: RER = 70 × 20^0.75 ≈ 70 × 9.46 ≈ 662 kcal/day. A single large scrambled egg runs about 70-75 calories. Measured against just the RER baseline, that’s already close to 10-11% — right at or slightly over the treat-calorie ceiling before you’ve even accounted for the dog’s actual, higher daily calorie budget.

For a moderately active dog whose real daily allowance sits comfortably above RER, one egg typically lands somewhat under 10% of total calories. For a sedentary, overweight, or calorie-restricted dog — whose realistic daily allowance sits closer to the RER baseline — that same single egg can tip past 10% on its own, before any other treats or table scraps.

The takeaway isn’t a specific number of eggs to memorize. It’s that “how many calories does my dog actually need in a day” is the question that determines the answer, and it changes dog to dog, not just size-bucket to size-bucket.

What the 10% Treat Rule Actually Means (and Its Limits)

The widely used guidance that treats and extras — anything outside a complete, balanced dog food — should stay under about 10% of a dog’s total daily calories exists to prevent nutritional imbalance: dog foods are formulated to hit specific vitamin and mineral targets, and Merck Veterinary Manual guidance on treat and topper feeding notes this limit is meant to keep the base diet’s nutritional balance from being diluted.

That 10% figure assumes eggs are functioning as a treat or topper on top of an otherwise complete diet — which is the situation almost every pet owner asking “can I feed this every day” is actually in. It’s a different situation from eggs being deliberately built into the diet itself, which is the exception covered next.

can dogs eat eggs every day<br />

The Exception: When Daily Eggs Are Actually Fine

Daily egg feeding does show up in some dogs’ diets without being a problem — but almost always inside a homemade diet formulated by a veterinarian or veterinary nutritionist, not as an unsupervised daily topper.

The reason this distinction matters nutritionally: eggs affect a diet’s calcium-to-phosphorus balance, and getting that ratio wrong over a long period is a real nutritional risk in homemade feeding, particularly for growing puppies and large-breed dogs. A formulated diet that includes daily egg accounts for this by balancing calcium elsewhere in the recipe; an ad hoc daily egg added to commercial kibble at home does not.

In practice, that means “my vet said eggs are fine for my dog” often refers to a specific, calculated diet plan — not a blanket green light to add a daily scrambled egg to whatever the dog is already eating. If you’re feeding a complete commercial diet and want to add egg regularly, the calorie math above, not the diet-formulation exception, is the relevant rule.

Cooked vs. Raw: Why It Changes the Daily-Feeding Calculus

This guide assumes cooked, scrambled eggs, and that distinction matters more for a daily-feeding question than it does for an occasional one.

Raw egg whites contain a glycoprotein called avidin, which binds biotin and prevents its absorption — the Merck Veterinary Manual lists this among the antinutritional factors in raw food that cooking destroys. An occasional raw egg is unlikely to cause a problem, but regular, ongoing raw feeding without accounting for this creates a real, if slow-building, risk of biotin deficiency, which can show up as poor coat and skin condition, or in more severe cases, more significant health effects.

Cooking — including simply scrambling the eggs — deactivates avidin and removes this risk entirely, which is one practical reason scrambled eggs are the safer default for anything approaching daily feeding.

Raw eggs also carry the ordinary Salmonella risk associated with raw poultry products. If you’re scrambling eggs in a kitchen where you’re also preparing your own food, treat the raw egg and its shell like you would for your own cooking: wash hands and surfaces after handling, and don’t let raw egg residue cross-contaminate other food prep areas.

Does Egg Cholesterol Actually Matter for Dogs?

Eggs are relatively high in dietary cholesterol, which sometimes worries owners drawing on general human-health advice. Canine lipid metabolism doesn’t map directly onto human cardiovascular risk in the same way, and veterinary sources generally treat elevated blood lipids (hyperlipidemia) in dogs as being driven primarily by overall dietary fat content, genetics, and underlying conditions rather than dietary cholesterol specifically.

VCA Animal Hospitals notes that triglyceride levels commonly rise for several hours after any meal — more so with a high-fat diet — and that certain breeds (Miniature Schnauzers among them) are genetically predisposed to elevated lipids regardless of diet.

In practice, this means egg cholesterol itself isn’t the primary daily-feeding concern for most healthy dogs — total calorie and fat load is. That distinction doesn’t disappear for dogs with a diagnosed lipid or pancreatic condition, covered next, where fat content specifically becomes the limiting factor.

how many eggs can a dog eat daily

Dogs Who Should Not Have Daily Eggs, Regardless of Size

The calorie math above assumes a generally healthy dog. A few conditions change the answer regardless of weight or breed size:

Pancreatitis history: The Merck Veterinary Manual identifies dietary fat as a central factor in managing pancreatitis, with a low-fat diet recommended for dogs recovering from or prone to the condition — and VCA Animal Hospitals notes fat specifically demands more pancreatic secretion and slows digestion, which is exactly what a recovering pancreas doesn’t need. A whole egg’s fat content, fed daily, works against that management goal.

Kidney disease: Dogs with kidney disease are typically managed on protein- and phosphorus-controlled diets, and eggs are a concentrated protein and phosphorus source — daily egg feeding should only happen as part of a vet-directed renal diet plan, not as an independent addition.

Obesity or active weight management: For a dog on a calorie-restricted plan, the RER-based math above skews unfavorably fast — a dog eating close to its resting energy requirement has far less calorie headroom for daily extras of any kind, eggs included.

Known egg allergy: This is a separate issue from moderation entirely — a dog with a diagnosed or suspected egg allergy shouldn’t have eggs in any amount, let alone daily, and should be evaluated by a vet before reintroducing egg in any form.

Life Stage Matters Too

Size-based feeding charts also miss meaningful differences by age.

Puppies are growing, which means both higher calorie needs relative to body weight and more sensitivity to nutritional imbalance — particularly around the calcium-phosphorus ratio that eggs can affect, which matters more during a growth phase than in a stable adult. Daily egg for a puppy is more of a “check with your vet first” situation than for a healthy adult.

Senior dogs often have lower activity levels and a higher baseline risk of weight gain, which — following the same RER logic covered earlier — means their realistic daily calorie allowance may sit closer to their resting energy requirement, leaving less room for daily extras before crossing the 10% threshold.

Adults are the baseline case the worked example above covers directly.

How to Scramble Eggs for Frequent Feeding, Safely

If the math works out for your dog, preparation still matters:

Cook the eggs fully and plain — no oil, butter, salt, or seasoning, all of which add unnecessary fat, sodium, or (in the case of some seasonings like onion or garlic powder) genuine toxicity risk. A dry non-stick pan or a small amount of water instead of oil works well for scrambling. Let the eggs cool before serving.

Portion according to your dog’s actual calorie allowance from the RER/MER calculation above, not a generic size bucket — a food scale is more reliable than eyeballing a portion. And if you’re preparing eggs for your dog alongside your own breakfast, keep raw-egg handling separate from other food prep to avoid cross-contamination, the same way you would cooking for yourself.

Simple Decision Framework: Should Your Dog Have Eggs Today?

Run through this before adding egg to today’s meal:

Is your dog at a healthy weight, without a pancreatitis, kidney disease, or diagnosed lipid disorder history? Does your dog have no known egg allergy? Have you checked that today’s portion, added to everything else your dog is eating, stays within roughly 10% of their actual daily calorie needs (not just their RER baseline)? If the answer to all three is yes, a scrambled egg is a reasonable addition. If any answer is no, skip it that day, or ask your vet whether a specific amount fits your dog’s individual health plan.

Common Mistakes Owners Make

Treating “10% rule” as a fixed number of eggs rather than a percentage of your specific dog’s calories — a rule that shrinks fast for a small or sedentary dog. Assuming a vet’s approval of eggs in a formulated homemade diet also applies to adding daily egg on top of regular kibble, which is a different nutritional situation.

Ignoring a pancreatitis or kidney diagnosis because eggs are perceived as a “natural” or “healthy” food. And feeding raw eggs regularly without accounting for the biotin/avidin issue that cooking eliminates.

Practical Examples

A healthy, moderately active 20kg adult dog with no health conditions: the RER-based math above suggests a daily scrambled egg is likely to fit comfortably within a 10% treat allowance, though checking against their specific food’s calorie content is worth the extra step.

An overweight dog on a vet-directed weight-loss plan: their reduced calorie budget sits close to RER, meaning a daily egg could use up a disproportionate share of their allowance — better treated as an occasional addition, or skipped in favor of a lower-calorie approved treat.

A dog on a vet-formulated homemade diet that already includes daily egg as a planned ingredient: no separate calculation needed, since the calcium balance and total calories were already accounted for when the diet was designed — the concern in this guide applies to unsupervised additions, not planned diet components.

FAQ

How many calories are in one scrambled egg? 

A large egg is roughly 70-75 calories before any added fat from cooking oil or butter, which is why cooking it plain matters for the calorie math.

Can eggs replace a meal for my dog? 

No — a single egg or even a few eggs don’t provide the balanced nutrition (complete vitamin and mineral profile) of a formulated dog food, and shouldn’t substitute for a regular meal unless specifically built into a vet-formulated diet.

Is raw egg ever safe to feed daily? 

Regular raw egg feeding carries both a Salmonella exposure risk and a biotin-absorption risk from avidin in the raw white, both of which cooking resolves — daily raw egg specifically is the situation where that risk compounds most, so cooked is the safer choice for frequent feeding.

Can puppies eat scrambled eggs every day? 

It’s worth checking with your vet first — puppies’ higher sensitivity to calcium-phosphorus balance during growth makes daily egg more of a case-by-case decision than it is for a healthy adult.

Do eggs cause allergies in dogs? 

Egg is a recognized potential food allergen in dogs. A dog with a suspected or diagnosed egg allergy shouldn’t be fed egg in any amount, and any allergy suspicion should be worked up by a vet before reintroducing it.

Can dogs with pancreatitis ever have eggs? 

Only under veterinary guidance — since fat content is the central concern in pancreatitis management, and a whole egg’s fat works against a low-fat management plan, this is a conversation to have with your vet rather than a default yes or no.

Will daily eggs affect my dog’s cholesterol? 

Egg cholesterol specifically isn’t generally considered the primary concern for healthy dogs the way it is in human cardiovascular health; overall dietary fat, genetics, and underlying conditions are the bigger drivers of elevated blood lipids in dogs, per veterinary guidance on canine hyperlipidemia.

What’s the safest way to prepare eggs for a dog? 

Fully cooked, plain, no oil/butter/salt/seasoning, cooled before serving, and portioned against your dog’s actual calorie allowance rather than a generic size chart.


Written by the Pets Store Home Team — pet care writers and researchers who cross-check every medical or nutritional claim against the veterinary and academic sources cited above rather than other blogs. This article has not yet been reviewed by a credentialed veterinarian; add a named DVM or veterinary nutritionist reviewer here before publishing if one is available. Last reviewed: September 2026

Conclusion

The real answer to “can dogs eat scrambled eggs every day” isn’t a number to memorize — it’s a calculation worth running for your own dog: their actual daily calorie needs, checked against what one egg actually costs. For most healthy adult dogs eating a complete commercial diet, that math tends to land in “occasional, not daily” territory once you account for the full 10% treat ceiling.

Daily eggs genuinely work for some dogs, but almost always inside a diet a vet or nutritionist has specifically built around them — and for dogs with pancreatitis, kidney disease, obesity, or an egg allergy, the health condition matters more than the math. Run the calculation, check your dog’s specific situation against it, and that “every day” question has a real answer instead of a rule of thumb.

signs a bearded dragon is stressed

signs a bearded dragon is stressed

Quick Answer: A stressed bearded dragon usually shows a darkened or fully black beard, glass surfing (pacing and clawing at the enclosure walls), reduced appetite, dulled color, and reduced activity. Most of these signs are mild and resolve once the cause — usually temperature, enclosure size, handling, or a new environment — is corrected within a few days. Signs that don’t improve within 3-5 days, or that come with weight loss, discharge, or labored breathing, need a reptile-experienced veterinarian rather than home troubleshooting.

Signs a Bearded Dragon Is Stressed

Most guides to bearded dragon stress hand you a list of symptoms and stop there. The harder — and more useful — question is what to do with that list: which signs are genuinely urgent, which ones are just a lizard adjusting to a Tuesday, and how you tell true stress apart from brumation or a normal shed, both of which mimic it closely. This guide organizes stress signs by how urgently they matter, maps them to the part of the body they show up in, and separates them from the two conditions owners most often confuse them with.

Key Takeaways

  • Stress signs exist on a spectrum — a darkened beard on day one in a new home is different from a black beard that persists for two weeks, and treating every sign as an emergency (or dismissing every sign as nothing) both lead to worse outcomes.
  • Stress marks and beard darkening are not always emotional distress; according to VCA Animal Hospitals, they can also reflect temperature regulation, shedding, or normal social signaling.
  • Reduced appetite and lethargy are the two symptoms most often confused between stress, brumation (seasonal dormancy), and genuine illness — and the difference matters for how you respond.
  • Life stage changes the picture: juveniles pace and explore more than adults as a normal part of development, and gravid females show nesting-related restlessness that isn’t stress in the usual sense.
  • Persistent appetite loss, labored or open-mouth breathing, discharge, or weight loss are not stress signs to manage at home — they call for a reptile veterinarian.

Why Bearded Dragons Show Stress Signs at All

A bearded dragon can’t tell you something is wrong, so its body does the talking instead. Visible signs like beard darkening, color changes, and pacing are outward signals of an internal stress response — the same general category of physiological reaction (elevated heart rate, altered hormone levels, changes in immune function) that most vertebrates experience under threat or discomfort.

In reptiles specifically, environmental stress is also linked to disease risk. The Merck Veterinary Manual notes that environmental stress is a contributing factor in septicemia (a serious bloodstream bacterial infection) and other illness in captive reptiles, alongside trauma and parasites. That’s the practical reason stress signs are worth taking seriously rather than waiting out indefinitely — chronic, unresolved stress doesn’t just look unpleasant, it can raise the risk of the animal getting sick.

The Stress Severity Scale: From Normal Adjustment to Emergency

Not every sign on this page means the same thing. A useful way to sort them is by how long they last and what else comes with them.

Mild / normal adjustment — Expected during a home change, a cage rearrange, or the first few days after purchase. Includes brief glass surfing, a temporarily darker beard, or a day of reduced appetite. Often settles within 24-72 hours as the dragon adjusts, though timing varies by individual.

Moderate / needs a fix, not a vet — A sign that persists for several days and points to something correctable: a black beard that doesn’t lift after a week, appetite loss lasting several days without illness signs, or repeated daily glass surfing. This tier calls for troubleshooting temperature, lighting, enclosure size, or handling frequency — covered later in this guide.

Severe / contact a vet — Weight loss, lethargy that doesn’t improve with correct husbandry, or any sign from the next section’s “illness” list can point to genuine illness rather than ordinary stress, and are worth a veterinary evaluation rather than more at-home troubleshooting. VCA Animal Hospitals is direct on this point: any behavioral or physical change from a bearded dragon’s normal baseline is cause for concern and warrants veterinary evaluation,

since several serious diseases (including atadenovirus infection and metabolic bone disease) can present initially with the same appetite loss and lethargy as ordinary stress. A few signs are more urgent than “contact a vet soon” — labored or open-mouth breathing, nasal or mouth discharge, seizures, or a gravid female straining without laying should be treated as same-day emergencies, not something to monitor for a few more days.

Stress Signs by Body Region

Rather than one long list, it helps to know where on the dragon’s body to look.

Beard: Puffing (a normal display, not necessarily distress) and darkening to gray or black are the most recognizable signs. A dark or black beard can signal stress, temperature regulation, or — in males especially — a normal territorial or breeding-season display, so context (does it happen only around other dragons, or constantly and alone?) matters more than the color change by itself.

Body and skin: Overall color dulling, and “stress marks” — darker striped or blotchy patterns most visible on the chin and belly, usually most noticeable in the morning. These marks can appear from cooler-than-ideal temperatures or an unfamiliar environment without reflecting deep emotional distress, so they’re a prompt to check husbandry rather than an alarm on their own.

Posture and limbs: Flattening the body against the substrate (“pancaking”) to absorb more heat or appear less visible, and arm waving — a slow, deliberate lifting and lowering of one front leg. VCA Animal Hospitals notes arm waving is generally read as a submission signal toward a dominant animal or reflection, not exclusively a stress behavior.

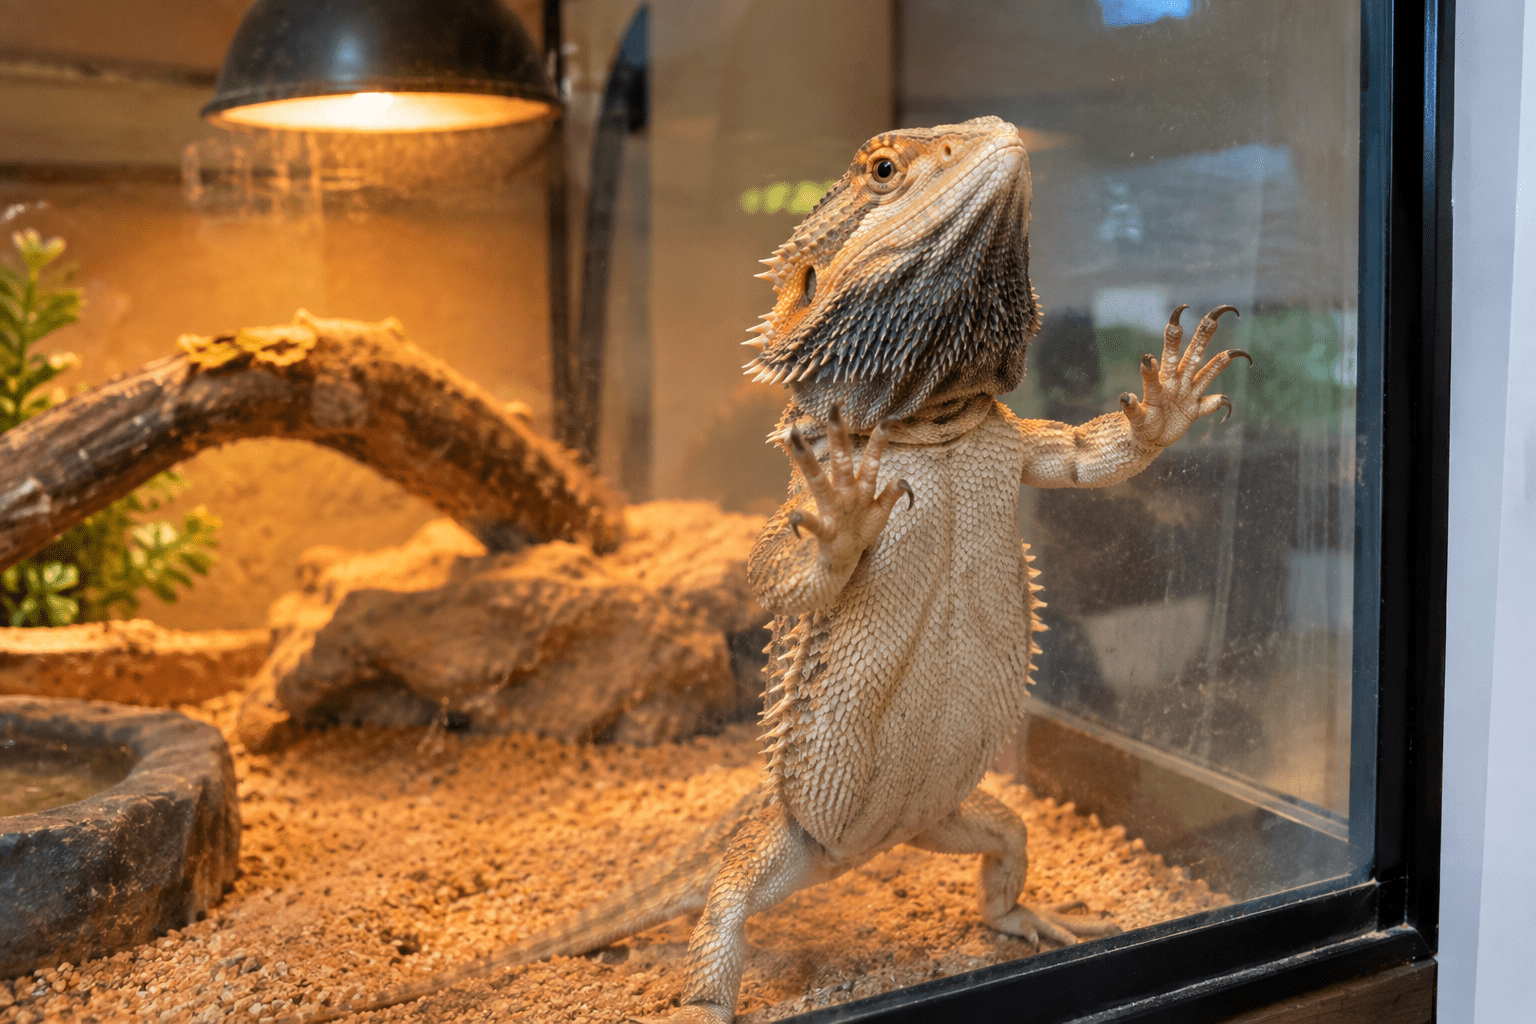
Movement: Glass surfing — repeatedly pushing against and pacing along the enclosure walls — and, less commonly, clawing or head-pressing at the glass. Reduced movement and lethargy are the opposite-direction version of the same problem: a normally active dragon that goes quiet.

Eyes and mouth: Open-mouth “gaping” for thermoregulation is normal in a healthy, active dragon. Open-mouth breathing that looks labored, combined with discharge from the eyes, nose, or mouth, is not a stress sign — per the Merck Veterinary Manual, these are hallmark signs of respiratory infection and need same-week veterinary attention.

Appetite and behavior: Refusing food, hiding more than usual, and increased defensiveness or biting when previously calm.

Is It Stress, Brumation, or Shedding? The Confusion Most Owners Run Into

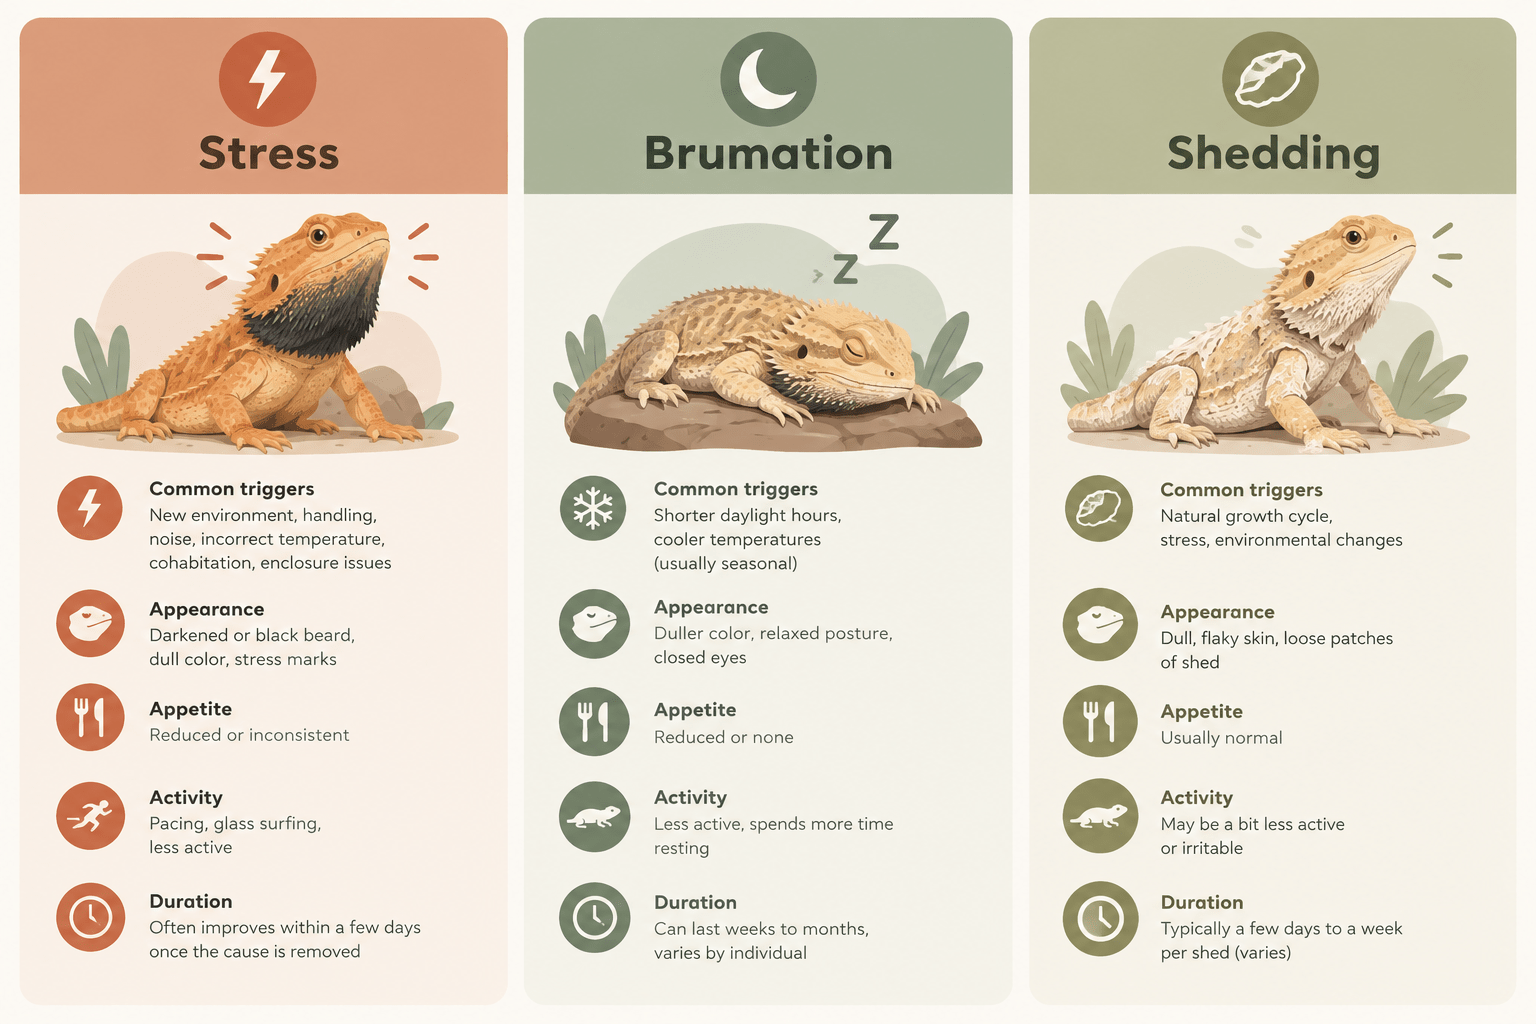
Three very different conditions — stress, brumation, and shedding — can all produce the same surface picture: reduced appetite, lower activity, and darker coloring. Telling them apart changes what you should actually do.

| Category | Stress | Brumation | Shedding |\n| — | — | — | — |\n| Typical trigger | New environment, handling, cohabitation, incorrect husbandry | Cooler temperatures, shorter daylight, usually seasonal | Natural growth/skin cycle |\n| Appetite | Reduced, tied to the trigger | Reduced or absent | Mildly reduced, brief |\n| Activity | Glass surfing/pacing, or lethargy | Sluggish, may still move and drink occasionally |

Roughly normal to slightly reduced |\n| Color | Darkened beard or stress marks | Darker overall coloring | Dulled, patchy just before the shed |\n| Typical duration | Improves once the trigger is fixed | Weeks to a few months | Days |\n| Worth a vet check when… | Signs persist despite husbandry fixes | Happens outside a cool, seasonal context, or continues beyond a couple of weeks | Doesn’t resolve once the shed completes |\n

Brumation is a bearded dragon’s natural seasonal slowdown, not true hibernation — VCA Animal Hospitals notes dragons may still move around occasionally and seek water during it. It’s typically triggered by cooler ambient temperatures and shorter daylight, most often in adults over a year old, and can last anywhere from a couple of weeks to a few months (see our bearded dragon brumation guide for a fuller seasonal timeline).

Ambient temperature is a helpful clue here, not a strict diagnostic rule: VCA Animal Hospitals notes that natural brumation is closely tied to genuinely cool conditions, so a dragon that goes off food and gets sluggish while its enclosure and room stay at a normal, comfortably warm temperature is less likely to be brumating. Temperature alone doesn’t confirm or rule out illness, though — any appetite loss that’s prolonged or doesn’t fit the seasonal pattern is worth discussing with a reptile veterinarian regardless of room temperature.

Shedding causes a temporary dulling of skin color and sometimes mild irritability or reduced appetite in the day or two before old skin lifts, but it doesn’t typically cause the sustained black-beard or glass-surfing pattern seen with stress, and it resolves as soon as the shed completes.

Stress, by contrast, is usually tied to an identifiable trigger — a recent move, a new enclosure-mate, incorrect temperatures, overhandling — and tends to improve once that trigger is addressed, rather than resolving on a seasonal or shedding timeline.

If appetite loss and lethargy last beyond what fits any of these patterns, or show up alongside weight loss, respiratory signs, or discharge, treat it as a possible illness rather than any of the above.

bearded dragon stress signs

What Actually Causes Bearded Dragon Stress

Enclosure and environment: Undersized housing is a common and correctable cause — general veterinary husbandry guidance recommends an enclosure at least three times the dragon’s total body length, with two hiding spots (one warm, one cool) and a defined basking area (see our full bearded dragon enclosure size and setup guide for exact dimensions and setup).

Incorrect temperature gradients and inadequate UVB lighting are close behind; a dragon that can’t reach its preferred basking range or properly regulate day/night cycles is under chronic low-grade stress even without an obvious trigger.

Handling: Both too much handling and handling done incorrectly (grabbing rather than scooping, handling right after feeding, or handling a dragon that’s actively trying to retreat) can push a normally docile dragon into defensive behavior.

Social and territorial factors: Seeing its own reflection, or the presence of another dragon, can trigger territorial beard-darkening and aggression, since bearded dragons are naturally solitary-leaning animals outside of breeding.

Life-stage and hormonal factors: Breeding-season behavior in males and nesting-related restlessness in gravid females (covered next) are hormonally driven and distinct from ordinary environmental stress.

Illness and pain: Underlying disease — respiratory infection, parasites, or metabolic bone disease — produces stress-like signs as a symptom rather than a cause, which is exactly why signs that don’t resolve with husbandry fixes need veterinary evaluation rather than more troubleshooting at home.

Age Matters: Juveniles, Adults, and Gravid Females

A one-size-fits-all reading of stress signs misses real differences by life stage.

Juveniles are naturally more active and exploratory than adults — some pacing and investigating of enclosure boundaries is a normal part of a young dragon’s development rather than a reliable stress signal on its own. Juveniles also need more frequent calcium supplementation and faster-growing bodies mean husbandry mistakes show up faster, so persistent stress signs in a young dragon are worth correcting quickly.

Adults have a more stable behavioral baseline, which actually makes deviations more meaningful — a normally calm adult dragon that suddenly starts glass surfing or refusing food is a clearer signal than the same behavior in a juvenile.

Gravid (egg-carrying) females commonly show increased digging, restlessness, and reduced appetite in the days before laying eggs, which can look like stress or even illness to an owner unfamiliar with the pattern. This is a normal reproductive behavior tied to nest-site seeking, not a welfare problem by itself — though a female showing prolonged straining without successfully laying eggs (a condition called egg binding, or dystocia) does need prompt veterinary care.

Multi-Dragon Households: Cohabitation Stress

Veterinary guidance on housing multiple bearded dragons together is genuinely mixed. VCA Animal Hospitals notes that dragons can share a cage if space is sufficient and they get along, with the caveat that only one adult male should ever be present since adult males will fight.

The Merck Veterinary Manual takes a more cautious general position on reptile husbandry broadly, advising that ideally only a single species — and by extension, often a single individual — be kept per enclosure to minimize competition and stress. In practice, most cohabitation problems show up as one dragon consistently dominating the basking spot or food, tail-nipping, or one animal visibly losing condition compared to the other.

If you notice these signs, separate the dragons into individual enclosures rather than waiting to see if it resolves. Monitor each dragon’s appetite, weight, and basking behavior independently afterward — the subordinate animal often improves in activity and appetite once housed alone, which can help confirm that cohabitation was a factor. Recovery time varies by individual, though, and any dragon that doesn’t noticeably improve after separation should still be evaluated by a vet rather than assumed to just need more time.

Transport and Vet-Visit Stress

Car travel and unfamiliar environments are a common but under-discussed stress trigger. A secure, appropriately sized carrier with substrate the dragon is used to, a stable temperature (a towel-wrapped heat pack in cold weather, never direct sunlight through a car window in warm weather), and a short, direct trip all reduce the load.

Some glass surfing, darkened coloring, or reduced appetite in the 24-48 hours after a car trip or a vet visit is common and typically resolves on its own; it’s the same “new environment” stress response covered earlier, just condensed into a shorter window. If appetite hasn’t returned and activity hasn’t normalized within two to three days of returning home, treat it the same as any other persistent stress sign.

bearded dragon black beard stress

How to Calm a Stressed Bearded Dragon

Start with the environment, since incorrect temperature, humidity, or lighting is the most common underlying cause. Verify basking and cool-zone temperatures with an actual thermometer rather than judging by feel, confirm the UVB bulb is within the manufacturer’s recommended distance from the basking spot and hasn’t exceeded its replacement window, and check that the enclosure meets the minimum size and hide-spot guidance covered earlier. If a reflection or a cage-mate is the likely trigger, add a background to the glass or separate the dragons.

Reduce handling to short, calm sessions during a stress episode rather than skipping it entirely — brief, gentle interaction can help some dragons acclimate, while lengthy or forceful handling of an already-stressed animal usually backfires (our bearded dragon supliments tips for beginners guide covers proper technique). Offer food as usual rather than trying to entice with unusual treats (see our bearded dragon diet and feeding guide for feeding ratios by age), and make sure fresh water is available daily, since dehydration can compound stress-related appetite loss.

Tracking Whether It’s Working

Rather than relying on a general impression that your dragon “seems better,” track a few concrete markers day to day: how quickly it returns to basking after a disturbance, whether daily food offered is being eaten (and how much), and how often glass surfing happens per day. A simple daily log for a week is enough to show a real trend — steadily shortening recovery times and returning appetite are good signs that your fix is working, while flat or worsening numbers after several days of correct husbandry are a signal to involve a vet rather than keep adjusting on your own.

When to Contact an Exotic Veterinarian

How quickly to act depends on which signs you’re seeing, per Merck Veterinary Manual and VCA Animal Hospitals guidance on reptile illness.

Same-day emergency — don’t wait:

  • Open-mouth breathing that looks labored, wheezing, or nasal/mouth discharge or bubbles
  • Seizures or loss of muscle control
  • A gravid female straining to lay eggs without success
  • Sudden, significant weight loss

Contact a vet soon (within a few days):

  • Appetite loss that persists after temperature, lighting, and enclosure size are confirmed correct
  • Lethargy that doesn’t improve once husbandry is corrected
  • Swelling, unusual skin spots, or incomplete shedding with skin discoloration
  • Any sudden behavior change in a previously stable adult dragon

Common Mistakes Owners Make

Assuming every stress mark or darkened beard means serious emotional distress, when it’s often a normal temperature-regulation or social response that resolves on its own. Confusing brumation with illness (or the reverse) by not checking ambient temperature first. Increasing handling to “comfort” a stressed dragon, which frequently prolongs the stress response instead of shortening it. Waiting weeks on a cohabitation problem hoping the dragons “work it out,” rather than separating early. And treating appetite loss as automatically minor, when it’s one of the symptoms most likely to also indicate genuine illness.

Practical Examples

A newly purchased juvenile paces and glass-surfs for its first three days home, with a beard that darkens on and off. Temperatures check out correctly and the behavior fades by day four — normal adjustment, no action needed beyond patience.

An adult dragon that has eaten well for two years suddenly refuses food for over a week in mid-winter, with the room running around 65°F. Given VCA’s brumation guidance, this pattern (cool ambient temperature plus seasonal timing) points toward brumation rather than stress or illness, though a baseline vet check is still reasonable for an older dragon before assuming it.

Two adult dragons housed together for a month; one has stopped basking and lost visible body condition while the other looks fine. This is a cohabitation-stress pattern, not a shared-cause issue — separate immediately and monitor the subordinate dragon’s recovery.

FAQ

What does a black beard mean on a bearded dragon? 

It can indicate stress, but also temperature regulation, shedding, or a normal territorial/breeding display in males — context (does it happen constantly, or around triggers like other dragons) matters more than the color alone.

Are stress marks permanent? 

No. According to veterinary sources, they’re typically temporary and fade once the underlying temperature or environmental factor is corrected.

How long does it take a bearded dragon to adjust to a new home? 

It varies by individual, but many dragons show reduced stress signs within a few days to about a week when husbandry (temperature, UVB, enclosure size) is correct from the start. Some take longer, and signs that persist beyond two weeks are worth discussing with a vet.

Can stress make a bearded dragon sick? 

Indirectly, yes — the Merck Veterinary Manual notes environmental stress is a contributing factor in serious infections like septicemia in reptiles, which is why prolonged, unresolved stress shouldn’t be ignored.

Is glass surfing always a bad sign? 

Brief glass surfing during a home change or enclosure rearrange is common and usually temporary. Persistent daily glass surfing after the dragon has had time to settle points to an ongoing issue — usually enclosure size, temperature, or a reflection — that needs addressing.

How do I know if it’s brumation and not stress or illness? 

Ambient temperature is a useful clue, not a hard rule. Per VCA Animal Hospitals, natural brumation is closely tied to cooler conditions, so it’s less common in a home kept at a normal, comfortably warm temperature. But temperature alone can’t confirm or rule out illness — if your dragon is lethargic and off food, it’s worth a vet check regardless of room temperature, especially if it continues beyond a week or two.

Should I handle my bearded dragon more or less if it seems stressed? 

Less, and more gently — short, calm sessions rather than none at all, avoiding lengthy or forceful handling until the underlying cause is resolved.

Can two bearded dragons live together without stress? 

It’s possible with enough space and no more than one adult male, but veterinary opinion on cohabitation is mixed, and most owners see fewer stress-related problems housing dragons individually.

Written by the Pets Store Home Team — pet care writers and researchers who base exotic-pet guides on veterinary and academic sources rather than other blogs; every medical or husbandry claim above is cross-checked against a cited source (Merck Veterinary Manual, VCA Animal Hospitals, or a university veterinary teaching hospital) rather than stated from general knowledge. Last reviewed: September 2026


Conclusion

Most bearded dragon stress signs aren’t emergencies — they’re information. A darkened beard on day one in a new enclosure and a black beard that persists for two weeks are not the same event, even though they look identical in a photo. Sort what you’re seeing by how long it’s lasted and what else comes with it, rule out brumation and shedding before assuming stress, and reach for a reptile veterinarian only when signs are severe or simply won’t resolve with correct husbandry. That framework — not a longer list of symptoms — is what actually tells you what to do next.