
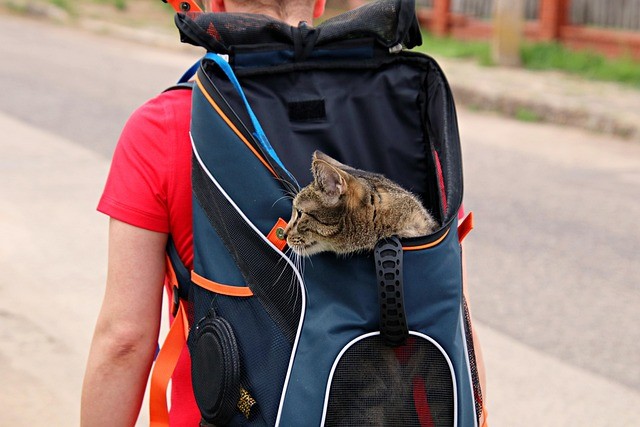
How to Get a Cat Used to Its Carrier

How to Get a Cat Used to Its Carrier

For most cats, the carrier only comes out right before something unpleasant happens: a car ride, a vet visit, a stressful trip. It’s no wonder so many cats bolt at the first sight of it. But a carrier doesn’t have to mean panic. With the right approach, most cats can learn to walk into their carrier calmly, or at least tolerate it without a full-blown struggle, which makes every future vet visit and trip considerably less stressful for both cat and owner.

This guide covers how to choose a carrier cats actually tolerate better, how to build a positive association with it well before it’s needed, and what to do on the day of an actual trip to keep stress as low as possible.

Quick Answer: Get a cat used to its carrier by leaving it out year-round as a familiar object, feeding meals near and eventually inside it, and gradually practicing closed-door confinement and short carries before ever needing it for a real trip. Most cats improve within two to three weeks of consistent, low-pressure practice.

Key Takeaways

  • Leaving the carrier out permanently, rather than storing it away, is the single most effective change most owners can make.
  • Top-loading carriers or carriers with removable tops are generally less stressful for cats and easier for vet exams.
  • Build comfort gradually: exploration, feeding near then inside, brief closed-door practice, then short carries.
  • Covering the carrier and keeping it level during transport reduces visual stress on actual trip days.
  • Cats with a strong negative history may take six to eight weeks or longer of patient, gradual work.

Why Trust This Guide?

This guide is written and researched by the Pets Store Home editorial team. We cross-check our cat behavior guidance against established veterinary and feline behavior sources, and this article is reviewed periodically to keep it accurate and current. It’s intended as general information; a veterinary behaviorist can help if a cat’s carrier anxiety is severe or prevents necessary veterinary care.

Why Cats Fear the Carrier

Cats build associations quickly, and if the carrier only appears immediately before a stressful car ride or an uncomfortable vet exam, it doesn’t take many repetitions for a cat to learn that carrier equals bad things happening. Beyond the learned association, the carrier itself can feel inherently threatening to a cat: it’s an enclosed space with limited visibility, it moves unpredictably when carried, and it’s often stored out of sight most of the year, making its sudden appearance itself a signal that something unusual is about to happen.

Choosing a Carrier Cats Tolerate Better

Top-loading carriers allow a cat to be lowered in from above rather than pushed through a small front opening, which is considerably less stressful for many cats and also makes vet exams easier, since some carriers allow the top half to be removed entirely, letting a cat stay in the bottom half during the exam itself.

Carriers with removable tops offer this same benefit and are increasingly common; ask about this feature specifically when shopping for a new carrier.

Size matters. A carrier should be large enough for a cat to stand, turn around, and lie down comfortably, but not so large that the cat feels exposed and lacks a sense of secure enclosure once inside.

Hard-sided vs soft-sided carriers each have advantages; hard-sided carriers are easier to clean and more secure for anxious cats prone to pushing at the sides, while soft-sided carriers are lighter and can be more comfortable to carry, though a truly determined cat may be able to scratch through the fabric.

Making the Carrier Part of Everyday Life

The single most effective change most owners can make is leaving the carrier out permanently in a room the cat spends time in, rather than storing it away and only bringing it out for trips. Add a soft blanket or bed inside, and let the cat investigate and use it on its own terms, with no expectation of going anywhere. Over time, many cats begin using an always-available carrier as a regular napping or hiding spot, which fundamentally changes the association from something threatening to something familiar and safe.

Step-by-Step: Building a Positive Carrier Association

Step 1: Leave the carrier out with the door open (or removed). Let the cat explore at its own pace over several days to weeks, with no pressure to enter.

Step 2: Make the inside appealing. Place a familiar-smelling blanket, favorite toy, or occasional treats inside to encourage voluntary exploration.

Step 3: Feed meals near, then inside, the carrier. Start with the food bowl just outside the carrier, then gradually move it closer and eventually just inside the doorway over a series of days.

Step 4: Practice brief, door-open confinement. Once a cat is comfortable eating inside the carrier, practice closing the door for just a few seconds while the cat is calm, then opening it again, gradually building duration over many short sessions.

Step 5: Practice carrying the closed carrier briefly. Pick up the carrier with the cat inside and walk a few steps around the room, then set it down and open it, rewarding calm behavior throughout.

Step 6: Practice short car rides with no destination. Once carrying is tolerated well, a few short, uneventful car rides that end back at home (rather than always at the vet) help decouple car travel from stressful outcomes.

Using Treats and Calm Praise Throughout

Reward generously at every stage: for approaching the carrier, for eating near it, for stepping inside, and for tolerating the door closing. High-value treats reserved specifically for carrier practice help build a strong, specific positive association tied to this particular training.

Pheromone Products and Calming Aids

Synthetic feline facial pheromone sprays, applied to the inside of the carrier about fifteen minutes before use, can help reduce stress for some cats, and pheromone diffusers used in the room where the carrier lives may support the broader desensitization process. These aren’t a substitute for the gradual training approach, but they can meaningfully take the edge off for anxious cats.

Making Vet Trips Themselves Less Stressful

Beyond carrier training, a few habits reduce overall trip stress: covering the carrier with a light towel during transport to reduce visual stimulation, keeping the carrier still and level rather than swinging it while walking, choosing a “fear free” certified veterinary clinic if one is available locally, and asking the clinic about direct-to-exam-room scheduling to minimize time spent in a stressful waiting room around other animals.

What to Do If a Cat Refuses to Enter

For cats that won’t approach the carrier even with encouragement, try tipping the carrier vertically with the door facing up, and gently, calmly lowering the cat in from above rather than trying to push it through a horizontal opening, which many cats resist more strongly. A thick towel wrapped snugly around the body (sometimes called a “cat burrito”) can also help calm and safely maneuver a highly resistant cat during a genuine emergency, though this shouldn’t replace the longer-term desensitization work for routine trips.

Multi-Cat Households and Carrier Training

In homes with more than one cat, train each cat with its own individual carrier and its own practice sessions, since cats can pick up on each other’s stress, and a negative carrier experience with one cat can inadvertently affect how a housemate perceives the process. If cats need to travel together, only combine them in a single carrier once each is independently comfortable with carrier confinement.

What to Pack Alongside the Carrier

For longer trips or appointments where a cat might need to wait, packing a few extras alongside the carrier itself helps manage stress: a familiar-smelling small blanket to line the bottom, a few high-value treats for the waiting room, and a lightweight cover (even a large towel works) to drape over the carrier in busy or loud waiting areas, reducing visual stimulation from other animals and unfamiliar people passing by.

Introducing a New Carrier to an Already-Trained Cat

If an old, familiar carrier is being replaced, don’t assume the positive association will transfer automatically to a new one. Run through an abbreviated version of the same desensitization steps, feeding near and then inside the new carrier, before relying on it for an actual trip, since even carrier-savvy cats can be wary of a completely unfamiliar object at first.

How Long Carrier Training Typically Takes

Cats with mild carrier aversion often show meaningful improvement within two to three weeks of consistent, positive exposure. Cats with a strong negative history, particularly those who’ve had frightening past experiences, may take six to eight weeks or longer of patient, gradual work. As with most behavior training, consistency across many short sessions produces better results than occasional long ones.

Carrier Training for Kittens

Introducing carrier association during kittenhood, well before it’s ever needed for a real trip, tends to prevent the fear response from developing in the first place. Kittens that regularly explore and rest in an always-available carrier from a young age often grow into adult cats with little to no carrier anxiety at all, making this one of the more valuable early investments in a kitten’s long-term comfort with routine veterinary care.

Airline-Approved vs Standard Carriers

For cats that travel by air, airline-approved carriers meet specific size and ventilation requirements set by individual carriers, and it’s worth checking the exact dimensions allowed under the seat of the specific airline being used well before travel, since requirements vary. For cats that only travel by car or to local appointments, a standard, well-ventilated carrier without airline certification works perfectly well and often offers more interior room for the same overall footprint.

Carrier Training for Senior or Medically Anxious Cats

Older cats, or cats with a history of chronic illness requiring frequent vet visits, sometimes develop particularly strong negative carrier associations simply due to the sheer number of past stressful trips. For these cats, the gradual desensitization process described above still applies, but often needs to move even more slowly, with smaller steps and longer periods at each stage before advancing. Extra patience here pays off, since these are often the cats who need the most frequent veterinary care going forward, making a calmer carrier experience especially valuable long term.

Choosing a Carrier Based on Cat Personality

Confident, curious cats often adapt fastest to carriers with more visibility, like mesh-sided soft carriers that let them see out and stay oriented to their surroundings. More anxious or easily overwhelmed cats often do better with a more enclosed, den-like hard carrier that limits visual stimulation and feels more like a secure hiding spot. There’s no single best carrier type for every cat; matching the carrier’s openness to the individual cat’s temperament can meaningfully improve tolerance.

Cleaning and Maintaining the Carrier

A carrier that smells like a previous stressful event, from anxiety-related urination or vomiting during past trips, can undermine training on its own. Thoroughly cleaning the carrier after any accident, and periodically refreshing bedding inside even without an obvious accident, helps ensure the carrier’s scent profile stays associated with comfort rather than past stress.

Signs a Cat’s Carrier Anxiety Needs Professional Support

If a cat shows extreme, prolonged panic (heavy panting, drooling, complete refusal to calm down even well after a trip ends) despite consistent gradual training, or if carrier-related stress is severe enough to prevent necessary veterinary care altogether, a veterinary behaviorist can offer additional strategies, including in some cases short-term anti-anxiety medication prescribed specifically to support travel, alongside the behavioral training.

Carrier Placement and Household Location

Where the carrier lives day to day matters almost as much as the training itself. A quiet corner of a room the cat already frequents, away from loud appliances, foot traffic, or a resident dog’s usual path, gives a cat the confidence to investigate at its own pace. Avoid placing it near the litter box or food and water, since cats generally prefer these areas kept separate, and a carrier associated with either can pick up unwanted negative or overly casual associations that work against the calm, secure feeling you’re trying to build.

Carrier Training Alongside Other Behavioral Work

For cats already working through unrelated anxiety, such as noise sensitivity or a recent house move, it’s often more effective to let carrier training settle in on its own rather than layering it on top of an already stressful adjustment period. Starting carrier desensitization during a calmer stretch, once other stressors have eased, tends to produce faster, more reliable progress than trying to tackle everything simultaneously.

What to Expect Immediately After a Trip

Once home, resist the urge to immediately let a stressed cat out of the carrier into a busy household. Set the carrier down in a quiet room, open the door, and let the cat emerge and decompress on its own timeline rather than pulling it out. Offering a favorite treat once it’s out, and giving it space to retreat somewhere familiar, helps close out the trip on a calmer note, which supports the broader positive-association work over time.

Common Mistakes That Undermine Carrier Training

Only bringing the carrier out immediately before a stressful trip, rather than keeping it available year-round, is the single most common setback. Chasing a cat around the house to force it into the carrier at the last minute reinforces exactly the fear response the training is meant to prevent. And skipping the gradual steps entirely, going straight from an unfamiliar carrier to a car ride, sets a cat up to associate the carrier with panic rather than safety from the very first real-world use.

Involving the Whole Household in Carrier Training

If multiple people handle the cat day to day, make sure everyone follows the same approach: leaving the carrier accessible, rewarding calm investigation, and never using it as a way to trap or startle the cat for unrelated reasons like grooming or medicating. A cat that occasionally gets scooped up and shoved into the carrier by one household member, even rarely, can undo weeks of careful positive-association work built by everyone else.

Related Reading

Frequently Asked Questions

Should I leave the carrier out all the time?
Yes, this is one of the most effective changes you can make. A carrier that’s always available and non-threatening becomes a familiar part of the environment rather than a signal that something stressful is about to happen.

What if my cat hisses or scratches when I try to put it in the carrier?
This is a sign the training needs to move more slowly. Back up to an earlier step, like feeding near the carrier, and rebuild positive associations before attempting confinement again.

Are soft carriers or hard carriers better?
Both work well for most cats. Hard-sided, top-loading carriers tend to be easier for anxious or resistant cats and for vet exams, while soft carriers are lighter and easier to store.

How far in advance should I start carrier training before a planned trip?
Ideally several weeks, though even a few days of focused positive association work is better than none if time is limited.

Can pheromone sprays alone fix carrier anxiety?
They can help reduce stress but work best alongside gradual positive-association training rather than as a standalone fix.

Is it normal for an older cat to still be scared of the carrier?
Yes, especially if the carrier has mostly been associated with stressful trips throughout its life. Older cats can still improve with consistent, patient retraining.

A Note on Patience

Carrier training rarely feels dramatic while it’s happening; progress shows up as small, easy-to-miss improvements rather than a single breakthrough moment. Trusting the gradual process, even when a cat still seems wary after several weeks, tends to pay off with a noticeably calmer cat by the time the next trip actually arrives.

Final Thoughts

A cat’s fear of the carrier is almost always learned through repeated association with stressful trips, which means it can also be unlearned through the opposite: repeated, low-pressure, positive exposure. Leaving the carrier out as a normal part of the home, building comfort gradually through feeding and short practice sessions, and making actual trips as calm as possible all add up over time. Most cats, even those with a long history of carrier fear, show real improvement with a few weeks of consistent, patient practice.

How to Stop a Dog From Pulling on the Leash

How to Stop a Dog From Pulling on the Leash

A dog that pulls on the leash isn’t being defiant. It’s simply moving at its natural pace toward things it finds interesting, and walking politely at a human’s slower, meandering speed is a learned skill, not an instinct. The good news is that leash pulling is one of the most fixable everyday dog behaviors, and most dogs show real improvement within a few weeks of consistent practice, regardless of age or how long the habit has been going on.

This guide covers why dogs pull, the equipment that makes training easier, and a step-by-step method for teaching loose-leash walking, along with how to handle the specific triggers, like squirrels or other dogs, that tend to undo progress if left unaddressed.

Quick Answer: Stop leash pulling by rewarding a loose leash and pausing forward movement the moment the leash goes tight, using a front-clip harness or head halter to make training easier, and practicing consistently across real walks. Most dogs show noticeable improvement within two to four weeks.

Key Takeaways

  • Pulling is reinforced every time it “works,” so consistency in stopping forward motion on a tight leash is the core training principle.
  • Front-clip harnesses and head halters make training easier but work best alongside, not instead of, actual training.
  • The stop-and-wait method is simple and effective: freeze the moment the leash tightens, move again only once it slackens.
  • Specific triggers like other dogs or wildlife need their own dedicated practice, not just general loose-leash walking.
  • Most dogs improve within two to four weeks of consistent daily practice, though strong pullers may take longer.

Why Trust This Guide?

This guide is written and researched by the Pets Store Home editorial team. We cross-check our dog training guidance against established veterinary behavior and force-free training sources, and this article is reviewed periodically to keep it accurate and current. It’s intended as general information; a certified professional dog trainer can help if pulling is paired with lunging, reactivity, or aggression.

Why Dogs Pull on the Leash

Pulling happens because it works. From a dog’s perspective, pulling forward gets them to the interesting smell, the other dog, or the end of the walk faster, and that reward reinforces the behavior every single time it happens, even if the owner is actively resisting. Dogs also naturally walk faster than most humans, especially on the way out when they’re fresh and excited, which creates constant tension on the leash by default unless specifically trained otherwise. Breed energy levels play a role too; high-drive working and sporting breeds often pull more persistently simply because they have more physical energy looking for an outlet.

Choosing the Right Equipment

Front-clip harnesses attach the leash at the chest rather than the back, which gently redirects a pulling dog sideways rather than allowing it to drive forward with full body weight. This is one of the most popular tools for reducing pulling without any training at all, though it works best alongside actual training rather than as a permanent substitute.

Head halters fit over the muzzle similar to a horse halter and give very precise control over head direction, which naturally follows the body. They require a proper introduction period since many dogs initially paw at their face when first wearing one, but they’re highly effective for strong pullers once a dog is acclimated.

Back-clip harnesses are the most comfortable for a dog and fine for dogs that don’t pull much, but they actually make pulling easier for a dog that does, since the connection point lines up with its center of gravity and full pulling power.

Standard collars are best reserved for dogs that already walk politely, since sustained pulling against a plain collar puts pressure on the neck and throat.

Avoid retractable leashes during training. The constant tension and variable length make it very difficult to teach a consistent loose-leash habit. A standard four-to-six-foot leash gives far more control and consistency.

The Core Principle: Forward Motion Is the Reward

The entire loose-leash training method rests on one idea: a dog only gets to keep moving forward when the leash is loose. The instant the leash goes tight, forward motion stops. This teaches a dog, through repetition, that pulling is the one thing that never gets it anywhere, while a loose leash is what actually makes the walk continue.

Step-by-Step: Teaching Loose-Leash Walking

Step 1: Start in a low-distraction environment. A quiet hallway, yard, or driveway works better than a busy street for the first several sessions, since fewer competing distractions make it easier for a dog to succeed early and often.

Step 2: The instant the leash tightens, stop walking. Plant your feet and simply stand still. Don’t pull back, don’t say anything yet, just stop being a source of forward motion.

Step 3: Wait for slack to return. Most dogs will turn back, sit, or simply stop pulling once forward motion stops being available. The moment the leash goes slack, even briefly, mark it with a calm “yes” or a clicker.

Step 4: Resume walking only when the leash is loose. This is the critical piece: forward motion is the reward, and it should only be available on a loose leash, every single time, without exception.

Step 5: Repeat consistently. Early sessions might involve stopping every few steps, which is normal and expected. The pattern becomes clear to most dogs within the first few sessions, and the stopping frequency drops noticeably from there.

Step 6: Add verbal cues once the pattern is established. Once a dog reliably slows or turns back when the leash tightens, pairing this with a cue word like “easy” or “let’s go” gives you a way to communicate the expectation before the leash even goes tight.

Using Treats to Reinforce Position

Alongside the stop-and-wait method, rewarding a dog for walking in the desired position (typically beside or slightly behind the handler) with a treat delivered at your side reinforces exactly where you want the dog to be. Deliver the treat at hip height rather than down low, so the dog doesn’t need to lunge or reach forward to get it, which would undercut the loose-leash lesson.

Handling Specific Triggers

Other dogs. Increase distance from the trigger as soon as you notice a dog fixating, rather than waiting until it’s already pulling hard, and reward calm attention on you before re-engaging with the walk.

Squirrels and wildlife. Prey drive triggers are some of the hardest to override with training alone. Anticipate common spots where wildlife appears and increase distance or redirect attention proactively before the dog spots the trigger itself.

Smells. Allowing scheduled “sniff breaks” on a loose leash, where the dog is explicitly permitted to investigate, can reduce overall pulling by giving the dog planned opportunities to engage with the environment rather than needing to pull to get any of it.

The start of the walk. Many dogs pull hardest in the first few minutes simply from built-up excitement. A few minutes of loose-leash practice in the yard or driveway before heading out on the main walk can take the edge off this initial burst.

Training on a Long Line for More Freedom

Once basic loose-leash skills are solid on a standard leash, a long line (typically 15 to 30 feet) used in a safe, open space gives a dog more freedom to explore while still allowing the same stop-and-wait principle to apply if it hits the end of the line pulling. This bridges the gap between structured leash walking and eventual off-leash reliability for dogs and environments where that’s appropriate.

Common Mistakes That Slow Down Progress

A few patterns show up repeatedly in leash training that stalls: continuing to walk even when the leash is tight (which teaches a dog that pulling does work, just slowly), inconsistent enforcement where pulling is sometimes tolerated and sometimes corrected, yanking or jerking the leash as a correction (which can create anxiety or leash reactivity rather than teaching the desired behavior), and expecting a fully loose leash in high-distraction environments before the skill is solid in easier settings.

How Long Loose-Leash Training Typically Takes

Most dogs show noticeable improvement within one to two weeks of consistent daily practice, and a fairly reliable loose-leash habit within four to eight weeks. Dogs with a long-established pulling habit, or particularly high-energy breeds, sometimes take longer and benefit from shorter, more frequent training walks rather than expecting the regular daily walk to double as a full training session from day one.

Training in Different Environments

A dog that walks beautifully in the backyard or a quiet cul-de-sac may fall apart completely on a busy street corner, and this isn’t a sign the earlier training failed; it simply means the skill hasn’t yet generalized to a higher-distraction environment. Deliberately practicing in a range of settings, starting easy and gradually working up to busier, more stimulating locations, helps a dog apply loose-leash skills consistently rather than only in the specific place where training first happened.

Group Walks and Dog-Walking Services

If a dog is regularly walked by a dog walker or in a group setting, it’s worth making sure whoever is handling the leash uses the same consistent approach, since inconsistent handling between different people undoes progress quickly. Sharing the specific cues and stop-and-wait method with anyone else who walks the dog keeps the training consistent across every walk, not just the ones the primary owner personally handles.

Exercise Needs and Pulling

A dog that isn’t getting enough physical and mental exercise for its breed and age is often harder to train for loose-leash walking simply because it has excess energy looking for an outlet. Pairing leash training with adequate daily exercise, through play, structured training sessions, or a securely fenced area to run, tends to make the walking-specific training go noticeably faster.

Training Puppies vs Adult Dogs

Puppies have the advantage of no established pulling habit to undo, so introducing loose-leash expectations from the very first walks tends to produce a solid habit relatively quickly. Adult dogs with years of pulling can absolutely still learn, but the timeline is often longer since an established, well-reinforced habit takes more consistent repetition to override. In both cases, the training method itself is identical; only the pace of expected progress differs.

Multi-Dog Walks

Walking two or more dogs on leash at once adds complexity, since each dog may have a different level of leash skill and different triggers. Training loose-leash walking with each dog individually before attempting to walk them together significantly improves the odds of a manageable multi-dog walk, and even after individual training, extra vigilance and shorter initial joint walks help prevent one dog’s pulling from triggering the other.

Comparing Different Leash Training Approaches

The stop-and-wait method described above is simple, requires no special equipment beyond a standard leash, and works well for most dogs, though it can feel slow-going in the first few sessions since progress depends entirely on consistency.

The “be a tree” variation is essentially the same principle applied more rigidly: the handler stops completely and becomes entirely unresponsive, not even looking at the dog, until the leash slackens. Some trainers prefer this because it removes any accidental reinforcement from eye contact or talking during the pause.

The direction-change method has the handler turn and walk the opposite way the moment the leash tightens, rather than simply stopping. This teaches a dog to actively watch the handler’s movement rather than assuming forward is always the direction of travel, and many trainers find it produces faster engagement than stopping alone.

Clicker-based shaping can be layered onto any of these methods, marking the exact moment of a loose leash with a click followed by a treat, which some dogs learn from more quickly than a verbal marker alone due to the clicker’s consistent, distinct sound.

Leash Manners Beyond the Basic Walk

Loose-leash skills also apply to situations many owners don’t initially think to train for: waiting calmly at curbs before crossing streets, passing other dogs or people on narrow sidewalks without cutting across their path, and settling calmly when the walk pauses, such as while chatting with a neighbor. Practicing these specific scenarios, not just straight-line walking, rounds out a dog’s overall leash manners and prevents pulling from resurfacing in situations that weren’t part of the original training.

Pulling Toward Home

Some dogs pull hardest not toward exciting distractions but on the way back home, especially if the walk is winding down and the dog anticipates the return. The same stop-and-wait principle applies here just as it does outbound; consistency in enforcing loose-leash expectations for the entire walk, not just the first half, prevents this specific pattern from becoming its own separate habit.

When to Consider a Professional Trainer

If leash pulling is paired with lunging, reactivity, or aggression toward people or other dogs, or if consistent practice over several weeks hasn’t produced any improvement, a certified professional trainer can offer hands-on guidance and identify what specifically isn’t working in the approach. This is particularly worth considering for strong, large-breed dogs where pulling poses a genuine physical safety concern for the handler.

Leash Training in Bad Weather and Low-Visibility Conditions

Rain, snow, and early darkness during winter months can make consistent leash training harder to maintain, and interrupted routines are a common reason progress stalls seasonally. Shorter, more frequent indoor or covered-area training sessions during bad weather help maintain consistency even when full outdoor walks aren’t practical, and reflective gear for both dog and handler becomes especially important for maintaining safe control during low-visibility walks.

Leash Training on Different Surfaces and Terrain

Pulling can intensify on unfamiliar terrain, such as trails with interesting scents, sand that shifts underfoot, or grassy areas versus a dog’s usual paved route. Rather than treating each new surface as a training setback, expect a brief adjustment period any time the walking environment changes significantly, and be prepared to fall back to simpler reinforcement in these new contexts before expecting the same reliability the dog shows on familiar ground.

Aging Dogs and Leash Pulling

Older dogs that pulled consistently for years sometimes continue the habit out of sheer muscle memory even as their physical stamina declines, which can pose a real injury risk given more fragile joints and reduced balance. Revisiting loose-leash training with a senior dog, using the same gentle stop-and-wait principles, is worthwhile even late in life, both for physical safety and for making walks more comfortable and predictable for both dog and handler.

Related Reading

Frequently Asked Questions

Do I need special equipment to stop leash pulling?
Not strictly, though a front-clip harness or head halter makes the process considerably easier while the underlying training is still developing.

Is it okay to let my dog pull sometimes and not other times?
Inconsistency slows training significantly. If pulling is tolerated in some situations, a dog has a harder time learning the rule applies every time.

My dog is already an adult with years of pulling. Is it too late?
No. Adult dogs can absolutely learn loose-leash walking; it typically just takes more consistent repetition than it would with a puppy starting fresh.

Should I use a training collar like a prong or choke chain?
These tools are controversial and can cause physical harm or increase anxiety if used incorrectly. Reward-based methods with the right harness are generally the safer, more effective starting point.

How long should training walks be?
Shorter, more frequent sessions (ten to fifteen minutes) focused specifically on loose-leash practice often produce faster results than expecting a full-length daily walk to double as training from the start.

What if my dog pulls only toward other dogs, not in general?
This is common and usually responds well to increasing distance from the trigger dog and rewarding calm attention on you before it escalates into pulling.

Final Thoughts

Loose-leash walking is a learnable skill for virtually any dog, regardless of age, breed, or how entrenched the pulling habit currently is. The core method, stopping the moment the leash tightens and rewarding forward motion only when it’s loose, works because it removes the payoff pulling has always provided. Combined with the right equipment and consistent daily practice, most dogs show real, lasting improvement within a matter of weeks.

Leash Training High-Drive Herding Mixes

Herding breeds and their mixes are some of the most likely dogs to pull hard on a leash, since their instinct is to track and control movement rather than walk calmly beside you. Our guide to the Blue Heeler Corgi mix (Cowboy Corgi) covers what that herding drive looks like day to day and how it affects training.

Leash Manners for Large, Strong Breeds

Big, powerful, independent breeds are often the hardest to leash train simply because their size makes pulling harder to physically manage. Our guide to Akita dog adoption covers what to expect from one such breed, including its exercise needs and strong-willed temperament.

How to Socialize a Shy or Fearful Puppy

A shy or fearful puppy doesn’t need to be pushed into the world to become confident. In fact, pushing too hard, too fast is one of the most common reasons early fearfulness turns into a lasting behavioral issue rather than something a puppy grows out of. Socialization works best as a slow, controlled process of building positive associations, one small experience at a time, rather than a single overwhelming exposure to everything at once.

The window between roughly three and fourteen weeks of age is often called the critical socialization period, when puppies are naturally more open to new experiences and less likely to react with fear. But a puppy that missed much of that window, whether due to being born in a shelter, a difficult early start, or simply a naturally more cautious temperament, can still make real progress with the right approach at any age. This guide covers how to socialize a shy or fearful puppy safely, at whatever age you’re starting.

Quick Answer: Socialize a shy or fearful puppy slowly: keep initial distance from anything new, pair novelty with treats, and let the puppy choose when to approach rather than forcing interaction. Keep sessions short and end on a good note. Mild shyness often improves within a few weeks; more entrenched fear can take several months of consistent, gentle exposure work.

Key Takeaways

  • Never force interactions — forcing a fearful puppy into contact usually deepens fear rather than resolving it.
  • Start new exposures from a comfortable distance and let the puppy choose when to approach.
  • Pair novelty with high-value treats to build positive associations with new people, dogs, and environments.
  • Learn early stress signals (tucked tail, lip licking, whale eye) so you can step back before a puppy is overwhelmed.
  • Progress isn’t linear — expect good weeks and setback weeks, and seek professional help if fear doesn’t improve after several weeks.

Why Trust This Guide?

This guide is written and researched by the Pets Store Home editorial team. We cross-check our socialization guidance against established canine behavior sources, and this article is reviewed periodically to keep it accurate and current. It’s intended as general information; a certified trainer or veterinary behaviorist can help if a puppy’s fear seems disproportionate or includes defensive aggression.

Understanding Shyness vs Fear in Puppies

Shyness and fear sit on a spectrum rather than being entirely separate things. A shy puppy might hang back initially in new situations but warms up with a little time and encouragement. A fearful puppy shows a stronger, more persistent stress response, things like trembling, trying to flee, freezing completely, or defensive growling or snapping when it feels cornered. Recognizing where your puppy falls on this spectrum helps calibrate how slowly to move and whether professional support might be worth bringing in alongside the socialization work itself.

Why Forcing Interactions Backfires

It’s tempting to think that more exposure, faster, will help a shy puppy “get used to” the world. In practice, forcing a fearful puppy into a situation it isn’t ready for, holding it still for a stranger to pet it, or letting an unfamiliar dog approach despite clear signs of distress, usually deepens the fear response rather than resolving it. Each forced negative experience adds to the puppy’s existing anxiety, making the fear response stronger and more entrenched the next time a similar situation comes up. The building block of confidence is choice: letting the puppy approach or retreat from something new at its own pace, so it learns that it has some control over frightening situations.

Setting Up Successful Socialization Sessions

Keep initial distance generous. Start any new exposure, whether it’s a person, dog, or object, from far enough away that the puppy notices it but doesn’t show strong stress signals. This distance is different for every puppy and every trigger, and it’s fine to start further away than seems necessary.

Pair new things with something the puppy loves. High-value treats, a favorite toy, or calm praise delivered the moment the puppy notices something new (without being asked to interact with it) builds a positive association with novelty itself, not just with the specific object or person.

Let the puppy set the pace of approach. Rather than leading the puppy toward something new, let it choose when and whether to move closer, rewarding any voluntary curiosity or approach.

End sessions on a good note. Stop before the puppy becomes overwhelmed or tired, ideally while it’s still calm and engaged, so each session reinforces confidence rather than depleting it.

Keep sessions short and frequent. Several five- to ten-minute sessions across a week tend to build confidence more reliably than one long outing that risks overwhelming the puppy.

Socializing With People

For a shy or fearful puppy, instruct visitors and strangers to ignore the puppy initially rather than approaching, bending down, or reaching out to pet it, all of which can feel confrontational from a small dog’s perspective. Let the puppy approach a new person on its own terms, and have the person toss a treat gently to the side rather than reaching toward the puppy directly. Over repeated positive encounters like this, most puppies gradually build comfort with unfamiliar people at their own pace.

Expose the puppy gradually to different types of people too: people wearing hats or sunglasses, people using mobility aids, children (always with careful supervision on both sides), and people with different builds, voices, and movement styles. A puppy that’s only ever met one type of person can generalize fear to anyone who looks or moves differently.

Socializing With Other Dogs

Choose calm, well-socialized adult dogs or appropriately matched puppies for early introductions, rather than boisterous, high-energy dogs that could overwhelm a shy puppy. Parallel walking, similar to introducing two resident dogs, works well here too, letting the puppy observe another dog from a comfortable distance before any direct interaction happens. Puppy classes specifically designed for socialization, run by an experienced trainer who manages pairings thoughtfully, can be valuable, but it’s worth confirming the class caters to a range of temperaments rather than assuming a fearful puppy will simply adjust to a chaotic group setting.

Socializing With Sounds, Surfaces, and Environments

Beyond people and other animals, broader environmental socialization matters too: different sound (traffic, vacuum cleaners, thunderstorm recordings played quietly at first), different surfaces underfoot (grass, gravel, tile, metal grates), and different environments (car rides, busy versus quiet streets, elevators). As with all socialization work, introduce these gradually and at a volume or intensity the puppy can handle without a strong fear response, building up slowly over repeated, brief exposures.

Reading Your Puppy’s Stress Signals

Learning to recognize early stress signals lets you intervene before a puppy tips into full-blown fear. Watch for a tucked tail, ears pinned back, lip licking or yawning outside a normal context, whale eye (where the whites of the eyes become visible), trembling, trying to hide behind you or under furniture, and freezing in place. Catching these early signs and creating more distance from the trigger, rather than waiting for a puppy to bolt or snap, keeps sessions productive rather than traumatic.

Using Counter-Conditioning for Specific Fears

For a puppy with a strong, specific fear (of the vacuum cleaner, a particular type of person, car rides, or similar), counter-conditioning pairs the trigger, at a very low intensity, consistently with something wonderful, until the association shifts. For example, with vacuum fear, this might start with the vacuum turned off and stationary, treats delivered near it, gradually working up over many sessions to the vacuum running briefly at a distance, then closer, then for longer, always keeping the puppy under its stress threshold throughout the process.

How Long Building Confidence Typically Takes

Timelines vary enormously depending on the individual puppy and the severity of the initial fear. Mildly shy puppies often show meaningful improvement within a few weeks of consistent, gentle exposure work. Puppies with more entrenched fear, particularly those who missed much of the critical socialization window, can take several months of steady work to build reliable confidence, and some level of caution in entirely new situations may remain part of their personality even with excellent management. Progress is rarely linear; expect good weeks and setback weeks along the way.

Puppy Socialization Classes: What to Look For

A good socialization class for a shy or fearful puppy should offer small group sizes, an instructor who actively manages pairings and intervenes at early stress signs rather than letting puppies “work it out,” a mix of structured exercises and supervised free time, and the flexibility to let a hesitant puppy observe from a distance before joining in. Avoid classes that pressure every puppy into the same level of interaction regardless of temperament.

When Professional Help Is Worth Considering

If a puppy’s fear seems disproportionate to the situation, doesn’t improve at all despite several weeks of careful, gradual work, or includes defensive aggression like snapping when startled, it’s worth consulting a certified professional dog trainer or veterinary behaviorist rather than continuing to manage it alone. Early intervention with a professional tends to produce better long-term outcomes than waiting to see if a puppy simply grows out of significant fear on its own.

Common Mistakes That Undermine Progress

A few well-meaning approaches consistently slow down or reverse progress with a shy puppy: comforting a puppy with soothing baby talk during a fear response, which can inadvertently reinforce the anxious state rather than helping the puppy move past it (calm, matter-of-fact energy tends to work better); flooding the puppy with an overwhelming new environment in the hope that it will “just get over it”; allowing well-meaning strangers to insist on petting a puppy that’s clearly retreating, out of politeness rather than the puppy’s actual comfort; and giving up on socialization work after a single setback, when consistency over weeks and months is what actually produces change.

Genetics and Individual Temperament

Some puppies are simply born more cautious than others, independent of how they were raised or socialized in early weeks. Breed tendencies play a role too; some breeds and lines are generally bred for a more watchful, reserved temperament around novelty, while others lean toward bold and outgoing by default. Recognizing that a naturally cautious temperament isn’t a problem to fully eliminate, but a trait to work with, helps set realistic expectations. The goal for a naturally reserved puppy isn’t necessarily to become the most outgoing dog in the room; it’s to build enough confidence and coping skills that everyday life, vet visits, and new situations don’t feel overwhelming.

Puppy Play Groups vs One-on-One Sessions

Group puppy play sessions can be valuable for confident, well-matched puppies, but they’re not always the right starting point for a shy or fearful puppy. A single, calm, appropriately matched playmate often builds more genuine confidence early on than a group setting, where a nervous puppy can easily become overwhelmed or overlooked. As confidence grows through one-on-one experiences, gradually introducing small, well-managed group settings tends to go more smoothly than starting there directly.

Tracking Progress Over Time

Because progress with a fearful puppy is often gradual and easy to lose track of day to day, it can help to keep brief notes on specific triggers and how the puppy responds over time, for example, noting the distance at which a puppy first notices a stranger without stress signals, and watching that distance shrink over weeks. This kind of tracking makes slow, incremental improvement more visible and can also help identify triggers that aren’t improving as expected, which may be worth flagging to a trainer or behaviorist.

Building Confidence Through Everyday Life

Beyond dedicated socialization sessions, everyday choices support a shy puppy’s confidence: giving it a predictable daily routine, providing a safe retreat space it can access whenever it needs a break from stimulation, avoiding situations you already know will overwhelm it until more groundwork has been laid, and celebrating small wins, like a puppy that sniffs a new object for the first time, rather than only noticing big, dramatic breakthroughs.

Vet Visits and Grooming for a Fearful Puppy

Vet clinics and grooming appointments are often among the most stressful environments for a shy or fearful puppy, combining unfamiliar people, handling, sounds, and smells all at once. Where possible, ask about “fear free” or low-stress handling certified clinics, which use specific techniques to reduce anxiety during exams. Practice at-home mimics of common vet handling, gently touching ears, paws, and mouth, paired with treats, so these aren’t entirely novel sensations during an actual appointment. Some clinics also welcome brief, low-pressure “happy visits,” where a puppy comes in simply to get treats and pets from staff without any actual procedure, purely to build a positive association with the location itself before it’s ever needed for something more invasive.

Related Reading

Frequently Asked Questions

Is my puppy’s shyness my fault?
Not necessarily. Genetics, early experiences before you had the puppy, and individual temperament all play a role, and shyness in an otherwise well-cared-for puppy usually isn’t a sign of anything done wrong.

Will my puppy grow out of being fearful?
Some mild shyness does soften naturally with maturity and continued positive experience, but more significant fear usually needs active, gradual socialization work rather than simply waiting it out.

Should I force my puppy to meet new people so it “gets used to it”?
No. Forced exposure tends to deepen fear rather than resolve it. Let the puppy set the pace of any interaction.

Is it too late to socialize an older puppy or adult dog that missed the critical window?
No, though progress may be slower and more gradual than with a young puppy still in the primary socialization period. Careful, consistent work still produces real improvement at any age.

How many new experiences should I introduce per week?
Quality matters more than quantity. A few calm, positive, well-managed sessions per week generally build confidence better than trying to expose a puppy to many new things all at once.

What if my puppy shows fear around only certain types of people?
This is common and usually responds well to gradual, targeted counter-conditioning specifically focused on the type of person or situation involved, rather than general socialization alone.

Final Thoughts

A shy or fearful puppy can absolutely grow into a confident, comfortable adult dog, but the process rewards patience over pace. Letting the puppy choose when to approach something new, keeping sessions short and positive, and reading stress signals closely enough to intervene before a puppy is overwhelmed all build genuine, lasting confidence rather than a puppy that simply tolerates situations it’s still afraid of. Progress often looks slow week to week, but consistent, gentle exposure over months tends to produce real, durable change.

Socializing an Adopted Adult Dog

These techniques aren’t just for puppies. A newly adopted adult dog, especially an independent or reserved breed, benefits from the same gentle, patient approach. Our guide to Akita dog adoption covers what a realistic adjustment period looks like for a breed known for taking time to settle in.

How to Trim a Dog’s Nails Without Cutting the Quick

How to Trim a Dog’s Nails Without Cutting the Quick

The quick is the pink, blood-supplied core running through the center of a dog’s nail, and cutting into it is the single biggest fear stopping owners from trimming their own dog’s nails at home. It hurts the dog, it bleeds more than expected, and it can set back trust in the whole process for weeks. The good news is that hitting the quick is almost entirely preventable with the right technique, the right tools, and a bit of patience, and once you know how to read a nail properly, home trims become a quick, low-stress routine rather than something to dread.

This guide covers how to identify the quick on both light and dark nails, the trimming technique that minimizes risk, what to do if you do nick it, and how to build a dog’s tolerance for nail trims if they’re currently anxious or resistant about the process.

Quick Answer: On light nails, cut about two millimeters in front of where the visible pink quick ends. On dark nails, trim tiny amounts at a time and stop as soon as the cut surface shows a grey or pink dot instead of dry, chalky white. Keep styptic powder on hand, and go slowly with an anxious dog by trimming just one nail per session if needed.

Key Takeaways

  • On light nails, the quick is visible as a pink line — cut about two millimeters beyond where it ends.
  • On dark nails, trim small amounts at a time and watch for a color change in the cut surface as your signal to stop.
  • Always have styptic powder ready before you start; a nicked quick usually stops bleeding within minutes with pressure.
  • For anxious dogs, build tolerance gradually with paw handling and treats before ever introducing clippers.
  • Most dogs need a trim every three to four weeks, depending on activity level and the surfaces they walk on.

Why Trust This Guide?

This guide is written and researched by the Pets Store Home editorial team. We cross-check our grooming and care guidance against established veterinary sources, and this article is reviewed periodically to keep it accurate and current. It’s intended as general information; a groomer or vet can help if nail trims consistently cause significant stress or if a nail is already infected or damaged.

Why Regular Nail Trims Matter

Overgrown nails aren’t just a cosmetic issue. Long nails change how a dog’s foot makes contact with the ground, pushing the toes back and altering posture and gait in ways that can contribute to joint strain over time, particularly in the wrists and shoulders. Nails that are allowed to grow especially long can eventually curl and grow into the pad itself, causing pain and infection. Regular trims, roughly every three to four weeks for most dogs, keep nails at a length that supports normal, comfortable movement.

Understanding the Quick

The quick contains both blood vessels and nerve endings, which is why cutting into it causes both bleeding and pain. In dogs with light or white nails, the quick is usually visible as a pink area running through the center of the nail, making it relatively easy to judge where to cut. In dogs with black or dark nails, the quick isn’t visible from the outside, which is the main reason dark nails are considered harder to trim safely and require a more cautious, incremental approach.

As a dog’s nails grow longer over time without trimming, the quick actually grows longer too, extending further down the nail. This is why nails that have been neglected for a long time are especially hard to bring back to a short length quickly. It generally has to be done gradually, trimming a small amount every couple of weeks, allowing the quick to slowly recede as the nail is kept consistently shorter.

Tools You’ll Need

Guillotine-style clippers work well for small to medium nails and give a clean, quick cut, though some dogs dislike the sound they make.

Scissor-style (plier) clippers tend to handle thicker nails on larger dogs better and offer slightly more control over the exact cutting angle.

A nail grinder gradually files down the nail rather than cutting it in one motion, which some owners and dogs both find less stressful, and it allows for very fine, controlled adjustments, especially useful on dark nails where guessing the exact cut point is harder.

Styptic powder or a styptic pencil should be on hand before you start, regardless of which tool you use, in case the quick is nicked and needs quick, effective bleeding control.

Step-by-Step: Trimming Light or White Nails

Step 1: Get a clear, well-lit view of the nail. Hold the paw gently but firmly, and use good lighting to clearly see the pink quick running through the nail.

Step 2: Identify the safe cutting zone. Aim to cut about two millimeters in front of where the pink quick ends, leaving a small margin of white nail beyond the quick.

Step 3: Cut at a slight angle. Position the clipper so the cutting edge angles slightly, following the natural curve of the nail rather than cutting straight across, which helps avoid an overly blunt or uneven edge.

Step 4: Trim in small increments if unsure. If you’re not fully confident where the quick ends, take off a small sliver at a time rather than committing to one larger cut, checking the cut surface after each pass for a small dot at the center, which signals you’re getting close to the quick.

Step 5: Smooth the edge. A quick pass with a nail file or grinder after clipping removes any sharp edges left by the cut.

Step-by-Step: Trimming Black or Dark Nails

Step 1: Look for the early warning sign. As you trim small amounts at a time, watch the cut cross-section closely. A dry, chalky white center indicates you’re still safely clear of the quick.

Step 2: Stop as soon as you see a change. Once the center of the cut surface starts to look slightly darker, softer, or shows a small grey or pink dot, stop trimming that nail entirely. That change signals you’re approaching the quick.

Step 3: Take off tiny amounts per session. With dark nails, it’s often safer to trim a very small amount every one to two weeks rather than attempting a single larger cut, gradually working the nail shorter over time as the quick naturally recedes.

Step 4: Consider a grinder for more control. Because grinding removes material more gradually than clipping, it can reduce the risk of an unexpected cut into the quick on nails where the internal structure can’t be seen.

What to Do If You Nick the Quick

It happens even to experienced owners occasionally, and it’s rarely as serious as it looks or feels in the moment. Apply styptic powder directly to the tip of the nail with firm, gentle pressure for about thirty seconds, which typically stops the bleeding quickly. If styptic powder isn’t available, cornstarch or a bar of soap pressed against the nail tip can work as a temporary substitute. Keep the dog calm and still for a few minutes afterward, since movement can dislodge the clot before it’s fully set. A nicked quick usually stops bleeding within a few minutes and doesn’t require a vet visit unless the bleeding is unusually heavy or doesn’t stop within about ten minutes.

Building Tolerance for Nail Trims in an Anxious Dog

Start with paw handling alone. Before ever introducing clippers, spend several short sessions simply touching, holding, and gently pressing on each paw, pairing this with treats and calm praise, until the dog is relaxed about paw handling on its own.

Introduce the tool without using it. Let the dog see, sniff, and hear the clipper or grinder (turned on, if using a grinder) without any nail actually being touched, again pairing this with treats, over several short sessions.

Trim one nail per session if needed. For a genuinely anxious dog, doing a single nail at a time across several days, rather than attempting all of them in one sitting, keeps each individual session short and manageable, and prevents the whole process from becoming an extended, stressful ordeal.

Use high-value treats throughout. Something the dog rarely gets otherwise, kept exclusively for nail trim sessions, helps build a strong positive association specifically tied to this activity.

Watch for the dog’s threshold and stop before it’s crossed. Ending a session while the dog is still calm, even if that means only one or two nails get done, builds trust faster than pushing through to finish all nails while the dog is visibly stressed.

How to Tell If Nails Are Too Long

A simple check: if you can hear a clicking sound as the dog walks across a hard floor, the nails are likely due for a trim. Nails that touch the ground when the dog is standing normally, rather than staying slightly elevated, are also a sign they’ve gotten too long. For dogs with dewclaws (the nail higher up on the inside of the leg that doesn’t touch the ground), these need separate attention since they don’t wear down naturally through walking and can grow into a curl if neglected.

How Often Nails Actually Need Trimming

Most dogs need a trim every three to four weeks, though this varies based on activity level and surface. Dogs that walk regularly on concrete or pavement wear their nails down naturally to some degree, needing less frequent trims than dogs that spend most of their time on grass, carpet, or soft ground. Puppies and senior dogs sometimes need more frequent, smaller trims to keep pace with growth or to avoid overwhelming a dog with reduced tolerance for longer handling sessions.

Alternatives to Clipping at Home

If home trims consistently go badly despite a gradual, careful approach, regular walks on abrasive surfaces like concrete can help naturally file nails down between professional trims. Many groomers and veterinary clinics also offer quick, affordable nail trim services on their own, without requiring a full grooming appointment, which can be a reasonable option for dogs that tolerate a groomer’s handling better than an owner’s.

Starting Early: Nail Trims for Puppies

Introducing paw handling and short, gentle nail trims during puppyhood makes the process dramatically easier for the rest of a dog’s life. Puppy nails are usually thinner and softer than an adult dog’s, so the actual trimming carries lower risk, but the real value of starting early is behavioral: a puppy that experiences calm, positive nail trims from a young age rarely develops the fear or resistance that makes trims stressful for adult dogs. Even a few seconds of handling and a single nail trimmed per short session, repeated regularly, builds a foundation of tolerance that lasts.

Do Diet and Supplements Affect Nail Health?

Overall nail health and growth rate are influenced by general nutrition, though there’s no special diet that eliminates the need for regular trims. Nails that are unusually brittle, cracked, or slow to grow can sometimes point to a broader nutritional gap or an underlying health issue, and it’s worth mentioning persistent nail quality problems to a vet rather than assuming they’re purely cosmetic. For most dogs on a balanced, complete diet, nail health isn’t something that needs separate management beyond the trimming routine itself.

When to Let a Vet or Groomer Handle It Instead

Some dogs, regardless of how gradually and positively trims are introduced, remain consistently distressed by the process at home. In these cases, there’s no harm in outsourcing nail trims to a professional groomer or veterinary technician, who often have handling techniques and experience that reduce stress in ways an owner working alone can’t always replicate. This is also the safer route for dogs with a bleeding disorder, nails that are already infected or damaged, or dewclaws that have grown into the pad and need careful, possibly medical, attention rather than a routine home trim.

Common Mistakes to Avoid

Cutting too much at once out of a desire to finish quickly, restraining a dog too tightly in a way that increases rather than decreases anxiety, skipping the styptic powder prep step and scrambling to find a solution mid-bleed, and punishing or scolding a dog that pulls its paw away, which tends to increase resistance to future trims rather than reducing it, are all common missteps that make nail trims harder than they need to be.

Nail Differences Across Sizes and Breeds

Larger breeds generally have thicker, harder nails that require sturdier scissor-style clippers, since smaller guillotine-style tools can struggle to cut cleanly through and may crush rather than slice the nail. Small and toy breeds often have thinner nails that are easier to cut but can also make the quick harder to judge precisely because everything is proportionally smaller. Breeds with naturally fast-growing nails, or those that spend most of their time on soft surfaces like carpet and grass, tend to need trims slightly more often than the standard three-to-four-week guideline, so it’s worth adjusting the schedule to what you observe in your own dog rather than following a fixed interval strictly.

Related Reading

Frequently Asked Questions

How often should I trim my dog’s nails?
Roughly every three to four weeks for most dogs, though activity level and the surfaces a dog regularly walks on can shift this in either direction.

Is it normal for nails to bleed a little during a trim?
A small nick that stops within a few minutes with styptic powder is common and not usually a serious problem. Heavy or prolonged bleeding warrants a call to your vet.

Should I use a clipper or a grinder?
Both work well. Grinders offer more gradual, controlled removal, which some owners and dogs find less stressful, particularly on dark nails, while clippers are faster for dogs that tolerate the sound and sensation well.

My dog hates having paws touched. Where do I start?
Begin with paw handling alone, no tools involved, paired with treats, over several short sessions before ever introducing a clipper or grinder.

Can I use human nail clippers on my dog?
No. Dog nails have a different shape and thickness, and human clippers can crush or splinter the nail rather than making a clean cut. Use clippers or grinders designed specifically for dogs.

What if my dog’s nails are already very long and overgrown?
Trim a small amount every couple of weeks rather than attempting to bring them to a short length in one session, allowing the quick to gradually recede over time.

Final Thoughts

Nail trims don’t have to be a battle. Most of the fear around doing them at home comes from uncertainty about where the quick actually is, and that uncertainty resolves quickly once you know what to look for on both light and dark nails. Go slow, especially with an anxious dog or with nails that have been neglected for a while, keep styptic powder on hand just in case, and prioritize ending each session calmly over finishing all the nails at once. With a consistent routine, most dogs come to tolerate, and some even genuinely relax through, regular nail trims at home.

Good technique matters, but so does having the right equipment on hand. Our guide to professional dog grooming equipment covers clippers, nail tools, and everything else worth having in a well-rounded grooming kit.

What If the Nail Was Cut Too Short Instead?

Trimming carefully is the best way to avoid the quick altogether, but accidents still happen even with a steady hand. If you’ve already cut a nail too short, this guide on walking your dog after cutting the quick covers how to stop the bleeding, how long to wait before activity, and the signs that mean it’s time to call the vet.

How to Crate Train an Adult Rescue Dog

Crate training an adult rescue dog is a different process than crate training a puppy, and treating it the same way is one of the most common reasons it goes wrong. A puppy usually has no history with a crate at all, good or bad, so training starts from a blank slate. A rescue dog might have no crate experience either, but it might also carry a negative association from a shelter kennel, a previous owner who used the crate as punishment, or simply months or years of never needing one. Some rescue dogs also carry general anxiety or past trauma that makes any small enclosed space feel unsafe at first, regardless of the crate itself.

None of that means crate training won’t work. It just means it usually needs to move slower, with more attention paid to the individual dog’s stress signals, and with realistic expectations about timeline. This guide walks through a step-by-step approach built specifically for adult rescue dogs, including how to handle the setbacks that are common with this group and when they’re a sign to change approach entirely.

Quick Answer: Crate train an adult rescue dog slowly: let the dog explore the open crate on its own terms, build positive associations with food and treats, then gradually introduce short door closures before working up to full departures. Never use the crate for punishment, and expect the process to take anywhere from one to eight weeks depending on the dog’s history.

Key Takeaways

  • Let the dog investigate the crate voluntarily first — never force or lure a rescue dog inside.
  • Build positive associations by feeding meals and tossing treats near, then inside, the crate.
  • Introduce closed-door time in tiny increments, starting with just a few seconds before opening again.
  • Watch for stress signals like panting, pacing, or whining, and slow down if you see them.
  • Never use the crate as punishment — it can undo weeks of positive association-building instantly.

Why Trust This Guide?

This guide is written and researched by the Pets Store Home editorial team. We cross-check our training guidance against established dog behavior and veterinary sources, and this article is reviewed periodically to keep it accurate and current. It’s intended as general information; a certified dog trainer can help if a rescue dog shows signs of genuine separation anxiety or persistent distress around the crate.

Why Crate Train an Adult Rescue Dog At All

A properly introduced crate gives a dog a secure, den-like space that’s entirely its own, which many dogs come to genuinely prefer over an open room once they’re used to it. Beyond the emotional benefit, crates are useful for house training reinforcement (many rescue dogs arrive with inconsistent or unknown house training history), safe confinement during travel, a controlled space during vet visits or recovery from illness or surgery, and a manageable way to introduce a new dog to a multi-pet household without full free access from day one.

Understanding Why Some Rescue Dogs Struggle With Crates

A dog that resists a crate isn’t being stubborn. It’s communicating that the crate currently feels unsafe, and that feeling usually comes from one of a few sources: past use of a crate as punishment or prolonged confinement, general anxiety that makes any small space feel trapping, lack of any prior positive association with crates at all, or simply not yet trusting the new home enough to feel comfortable being separated from people or other pets, even briefly. Recognizing which of these might be at play helps shape how slowly and carefully the training needs to move.

Choosing the Right Crate

Size matters more than most owners expect. The crate should be large enough for the dog to stand up without ducking, turn around fully, and lie down stretched out, but not so large that it stops feeling like a defined, secure space. For a rescue dog with unknown crate history, wire crates and covered plastic crates both work, though many anxious dogs do better initially with a covered crate or a wire crate with a cover draped over three sides, since the enclosed feel can be calming rather than exposing.

Placement also matters. A crate in a busy, central part of the home, like a living room corner, generally works better than one tucked away in an isolated room, since dogs are naturally drawn to be near their people rather than isolated from them.

Step-by-Step: Introducing the Crate

Step 1: Let the dog investigate on its own terms. Set the crate up with the door open (or removed entirely if possible) and let the dog approach, sniff, and enter or ignore it at its own pace over the first several days. Don’t force or lure the dog in during this stage.

Step 2: Make the crate the source of good things. Start feeding meals near the crate, then just inside the doorway, then further inside over the course of several days as the dog gets comfortable. Toss high-value treats inside periodically throughout the day, unprompted, so the dog discovers rewards there on its own.

Step 3: Add a comfortable bed and familiar scent. A soft bed, and ideally something that already smells like the dog or the household, like a used blanket, helps the space feel established and safe rather than sterile and new.

Step 4: Practice short, door-open sessions. Once the dog is voluntarily entering the crate for food or treats, start encouraging longer stays with the door still open, using a stuffed chew or long-lasting treat to extend the time spent calmly inside.

Step 5: Introduce brief door closures. With the dog calm and engaged with a treat or chew inside the crate, close the door for just a few seconds, then open it again before the dog shows any sign of distress. Gradually extend this over many short sessions across several days.

Step 6: Build up to longer confinement with you present. Slowly extend the time with the door closed while you remain in the room, going about normal activities, so the dog learns that a closed door doesn’t mean isolation.

Step 7: Practice brief departures. Once the dog tolerates closed-door time with you present, start leaving the room for a few seconds, then a minute, gradually building toward longer absences.

Step 8: Work up to normal departures. Only after the previous steps are solid should you use the crate during an actual departure from the house, starting with short trips and extending gradually.

Reading Stress Signals During Crate Training

Watch for panting, drooling, pacing, whining, scratching at the crate door, or a fixed, wide-eyed stare, all of which suggest the dog is past its comfort threshold and the process needs to slow down. A calm dog will typically settle within a few minutes of being in the crate, especially with a chew or toy; a stressed dog will continue showing signs of agitation well beyond that window. If you see genuine distress, don’t wait it out. Open the door, let the dog exit calmly, and go back a step or two in the process before trying again.

What to Do If the Dog Refuses to Enter

Some rescue dogs won’t approach the crate voluntarily even with encouragement. In these cases, it often helps to remove the crate door entirely for the first week or two, so there’s no risk of accidental closure, and to feed every meal at or near the crate regardless of whether the dog fully enters. Scattering a trail of treats leading into and through the crate, without any expectation the dog will linger, can also help build positive associations passively over time, without any pressure attached.

Never Use the Crate for Punishment

It bears repeating on its own: never put a dog in the crate as a consequence for unwanted behavior, and never use a stern or frustrated tone when guiding a dog toward the crate. Doing so, even occasionally, can undo weeks of careful positive association-building almost immediately, particularly with a rescue dog that may already carry some crate-related baggage from before you knew them.

How Long Crate Training an Adult Rescue Dog Usually Takes

Timelines vary enormously based on the individual dog’s history and temperament. A rescue dog with no negative crate history might reach full comfort within one to two weeks using the steps above. A dog with genuine past trauma around confinement can take six to eight weeks, or longer, of slow, careful work. Rushing the process is the most common reason it fails or has to be restarted from scratch, so building in more time than feels necessary is almost always the better approach.

Setting Up a Crate Training Schedule

Short, frequent sessions spread across the day tend to work better than one long session. A practical daily structure during the early weeks might include a morning session tied to breakfast, a midday session with a stuffed chew during downtime, and an evening session before bed, each lasting only as long as the dog remains comfortable. Consistency in timing helps the dog anticipate and settle into the routine faster than an irregular schedule would.

Managing Separation Anxiety Alongside Crate Training

For rescue dogs with diagnosed or suspected separation anxiety, crate training needs to move even more conservatively, and in some cases a crate isn’t the right tool at all until the underlying anxiety has been addressed with a trainer or veterinary behaviorist. Signs that separation anxiety, rather than simple crate unfamiliarity, is driving the resistance include panic that continues well beyond a typical adjustment period, destructive behavior specifically tied to the owner’s departure rather than confinement itself, and self-injury attempts to escape. These cases benefit from professional guidance rather than a standard crate training timeline.

Crate Alternatives for Dogs That Never Adjust

Not every dog needs to be fully crate trained, and for some rescue dogs with a strong negative history, a safely dog-proofed room or an exercise pen setup achieves similar goals, like safe confinement and house-training support, without the specific trigger a traditional crate represents. This is a reasonable long-term solution for dogs that show persistent, unresolvable distress despite a careful, gradual introduction.

Common Mistakes That Slow Down Crate Training

A handful of well-intentioned missteps show up repeatedly in crate training that stalls: closing the door too soon, before the dog has built any real comfort inside with it open; using the crate only during departures, so the dog only ever associates it with being left alone; letting a distressed dog out mid-whine in a way that inadvertently rewards the distress rather than calm behavior (timing the release for a brief pause in the fussing avoids reinforcing the wrong moment); and skipping the open-door groundwork entirely because the dog “seems fine,” only to discover genuine anxiety once the door actually closes.

Adjusting Crate Location Over Time

Many households start with the crate in a central, busy area so the dog doesn’t feel isolated during the early bonding period, then gradually relocate it to a quieter spot, like a bedroom, once the dog is fully comfortable and confident with the crate itself. This shift should happen only after the dog is settling well in the original spot, and even then it’s worth reintroducing the crate in its new location with a few short, low-pressure sessions rather than assuming the comfort will transfer automatically.

Crate Training Alongside Other Pets in the Home

In households with existing pets, a rescue dog’s crate can also serve as a useful management tool during the broader adjustment period, giving every animal a break from novelty and stimulation. Feeding the new dog in its crate while other pets eat elsewhere reduces the chance of resource-guarding conflicts, and having a crate available gives you a safe way to separate animals if introductions need to pause and restart more slowly than planned.

Traveling With a Crate-Trained Rescue Dog

Once a dog is comfortable with its crate at home, that same crate (or a smaller, travel-specific version) tends to make car trips, vet visits, and overnight stays away from home considerably less stressful, since the dog carries a familiar, secure space with it rather than facing an entirely new environment with no safe base. It’s worth practicing a few short car trips with the crate before relying on it for a longer journey, since motion adds a new variable even for a dog that’s fully settled with the crate at home.

Signs of Success

A dog that has genuinely adjusted to its crate will often start entering it voluntarily to rest, even with the door open, seek it out during moments of household stress like loud noises, and settle within a few minutes of being confined with minimal fuss. These signs typically show up gradually rather than all at once, and small improvements week over week are a better measure of progress than expecting a single breakthrough moment.

Related Reading

Frequently Asked Questions

How big should the crate be for an adult dog?
Large enough to stand, turn around, and lie down fully stretched out, but not so large it loses the secure, den-like feel that makes crates effective.

Is it cruel to crate an adult dog?
Not when it’s introduced properly and used appropriately. A dog that’s been trained gradually and positively typically views its crate as a safe retreat rather than a punishment.

What if my rescue dog came from a shelter that used crates constantly?
Move especially slowly, and consider starting with the crate door removed entirely for the first couple of weeks to eliminate any risk of feeling trapped during the reintroduction process.

Should I ignore whining once the dog is in the crate?
Brief settling whines are normal and usually pass within a few minutes. Prolonged, escalating distress is different and should prompt you to let the dog out and slow the process down rather than waiting it out.

Can an adult dog be crate trained as fast as a puppy?
Sometimes, but not always. Adult dogs often have established habits and, in the case of rescues, sometimes a history that puppies don’t carry, which can extend the timeline in either direction depending on the individual dog.

Do all rescue dogs need to be crate trained?
No. It’s a useful tool for many households, but dogs that are reliably house trained and don’t need travel or safety confinement can do well without ever using a crate.

Final Thoughts

Crate training an adult rescue dog is less about following a fixed timeline and more about reading the individual dog in front of you. Some adjust within a couple of weeks; others need two months of patient, incremental work. What matters most is moving at the dog’s pace, never using the crate as punishment, and treating setbacks as information rather than failure. With consistency, the large majority of rescue dogs come to see their crate as a genuinely safe, comfortable space of their own.

Rescue dogs adjusting to a new crate routine sometimes vocalize more than expected during the transition. If that vocalizing turns into ongoing barking, our guide on what to do about constant dog barking can help.