Best Harness for Dogs That Pull on Walks: Safe Fit Guide

Best Harness for Dogs That Pull on Walks: Safe Fit Guide

The best harness for dogs that pull on walks is usually a well-fitted, non-tightening harness with a front (chest) clip, used alongside reward-based loose-leash training. It should leave the shoulders free, avoid rubbing behind the front legs, and fit securely enough that your dog can’t back out. A harness can give you more control and take pressure off your dog’s neck, but no harness automatically teaches a dog to stop pulling.

There’s no single “best” harness for every dog. The right choice depends on your dog’s size, body shape, health, and walking behavior, and on how safely you can manage your dog. This guide compares harness types, shows you how to measure and fit one, flags features to avoid, and explains how to train a calmer walk.

Key takeaways

  • A 2025 research review suggests trying a non-tightening front-clip harness first for dogs that pull, combined with reward-based training.
  • No harness design is perfect; studies show all harnesses change a dog’s movement to some degree, so fit matters.
  • Choose a harness that leaves the shoulders free and doesn’t rub behind the elbows.
  • Be cautious with tightening or pressure-based “no-pull” designs.
  • VCA notes most dogs need several months of regular practice to master loose-leash walking.

Best Harness for Dogs That Pull on Walks: Which Type Works?

Current evidence suggests a non-tightening front-clip harness is a sensible first option for many dogs that pull. A 2025 review in the journal Animals by Cavalli and Protopopova examined studies on collars, harnesses, and head collars. The authors concluded there is no one-size-fits-all device, and suggested considering non-tightening front-clip harnesses first for dogs that pull, alongside reward-based training.

The same review found that all harnesses altered dogs’ gait to some degree, and no single design was clearly superior. That’s why the best harness for dogs that pull on walks is really the one that fits your individual dog well and lets it move comfortably. The research also has limits: many studies were small, and the authors note a lack of data on real-world injuries.

Front-Clip vs. Back-Clip Harnesses (and Other Designs)

Here’s how the main harness types compare. The “May suit” column is a general guide, not a guarantee for every dog.

Harness type How it works May suit Watch for
Front-clip Leash clips at the chest; gentle pressure turns the dog back toward you Dogs that pull, during loose-leash training Straps over the shoulder joints; rubbing; leash tangling
Back-clip Leash clips on the back Calm walkers; dogs that need to avoid neck pressure Less steering control for strong pullers
Dual-clip Front and back rings Training and changing situations Follow the maker’s instructions for each clip
Y-shaped or H-style Straps form a Y or H across the chest, away from the shoulder front Many body shapes, if well fitted The label alone doesn’t guarantee a good fit
Tightening “no-pull” Tightens slightly when the dog pulls Use with caution, ideally with professional advice Pressure, discomfort, restricted movement

Based on VCA Animal Hospitals, the AKC, and Cavalli & Protopopova (2025).

Front-clip harness

VCA explains that with a front-clip dog harness, gentle leash pressure can turn the dog away from a distraction or back toward you. It’s a useful harness for leash training. But VCA also warns that some front-clip designs rest directly over the shoulder joints, which can restrict movement. In one study cited in the 2025 review, a front-clip Y-shaped harness had the largest impact on joint movement, so check how your dog moves in any model you choose.

Back-clip harness

The AKC describes back-clip harnesses as suited to well-trained dogs, and the leash clips on quickly. They keep pressure off the neck, which can help dogs with neck or airway concerns, but they give less directional control if your dog pulls hard. Fit and construction still matter.

Dual-clip harness

A dual-clip harness has both a chest ring and a back ring. The AKC suggests starting with the front clip while your dog learns, then switching to the back clip as walking improves. VCA notes that clipping to both rings can give extra control in urgent situations. Always follow the manufacturer’s instructions.

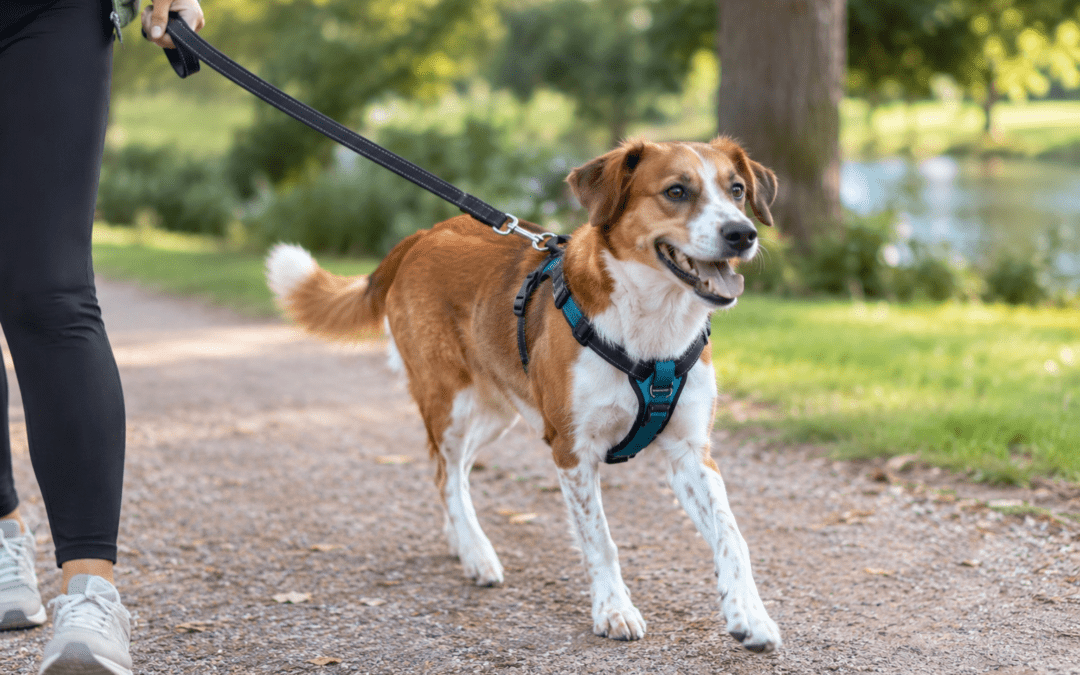
Brown Boxer wearing a padded body harness, standing alert in an outdoor park
The best harness for dogs that pull on walks fits snugly around the chest and leaves the shoulders free to move. Photo: Marcus Christensen / Pexels.

What to Look for in a No-Pull Dog Harness

When people search for the best no-pull dog harness, they often focus on the label. To find the best harness for dogs that pull on walks, focus on the design instead. VCA’s guide to controlling pulling on walks recommends an H-style or Y-style harness that:

  • Is easy to put on and take off
  • Doesn’t chafe
  • Leaves the shoulders free to move, with no strap across the front of the shoulder
  • Has two clip points: one on the back and one on the chest

VCA adds that deep-chested dogs may need a double-H design, and that a good body harness is adjustable in every dimension. Other features to consider for a comfortable harness for dogs:

  • Material: the AKC notes nylon is light and durable but can trap heat; mesh is breathable but less durable; neoprene is padded but can trap heat and moisture.
  • Style of fastening: the AKC notes step-in harnesses suit dogs that dislike things going over their head, while over-the-head styles may not.
  • Visibility: the AKC points out that reflective strips can help on early-morning or evening walks.
  • Sturdy hardware: strong stitching, buckles, and rings matter most for a dog harness for strong pullers.

How to Measure and Fit a Dog Harness

Even the best harness for dogs that pull on walks won’t work if it fits poorly. A properly fitting dog harness is secure, comfortable, and doesn’t restrict breathing or movement. Use this checklist:

  1. Measure first. The AKC recommends measuring the base of the neck where it meets the shoulders and the widest part of the chest, usually just behind the front legs. Measure any other points the manufacturer lists.
  2. Use the product’s own size chart. Sizes vary between brands, so don’t rely on breed or weight alone.
  3. Adjust the straps. Aim for snug but not tight. The harness shouldn’t rub, pinch, or press on the throat.
  4. Check behind the front legs and over the shoulders. VCA warns a harness shouldn’t rub behind the elbow, and straps shouldn’t sit across the shoulder joints.
  5. Test for escape. The AKC suggests gently pulling the harness in different directions and stepping backward to see if it can slide over your dog’s head. If it can, tighten it.
  6. Test in motion. Watch your dog stand, walk, turn, and sit. Movement should look natural.
  7. Recheck regularly. The AKC advises rechecking fit after grooming or weight changes. Inspect stitching, buckles, rings, and straps for wear.

You may hear the “two-finger rule.” The AKC’s veterinary expert suggests you should have to squeeze two fingers under the straps, but not so tightly that it’s uncomfortable. Treat that as a rough check only. Follow the manufacturer’s fit instructions, and ask your vet or a professional trainer if you’re unsure.

Pet Care Tip: If your dog is nervous about a harness, introduce it slowly. VCA recommends introducing new gear gradually in a quiet, safe space. Let your dog sniff it, reward calm behavior with treats, and put it on for short periods before your first walk. VCA also advises removing a harness when your dog isn’t supervised, to avoid tangling.

Harness Features and Equipment to Avoid

Some equipment marketed as the best harness for dogs that pull on walks relies on pressure or discomfort. Watch out for:

  • Straps across the front of the shoulders: VCA cautions that some “no-pull” styles can injure the shoulder joint.
  • Tightening designs: the AKC describes some no-pull harnesses with a ring that tightens slightly when the dog pulls. The 2025 review recommends using tightening harnesses and head collars with caution, as a last resort rather than a first choice.
  • Painful training collars: VCA advises against slip, choke, prong, and electronic collars, which work by causing pain and can increase fear or aggression.
  • Flat collars on flat-faced dogs: the 2025 review concludes that flat collars should not be used on brachycephalic dogs.
  • Retractable leashes: VCA recommends avoiding them and suggests a 6- to 10-foot leash instead. Our guide to retractable leash injuries explains the risks.

Head collars (halters) can help some handlers control a strong dog, but VCA says they need a slow, positive introduction and aren’t right for every dog. The 2025 review found some dogs showed stress signs while wearing them. If you use one, VCA suggests clipping a second leash to a harness or collar as a backup.

Special Considerations for Small, Large, and Flat-Faced Dogs

The best harness for dogs that pull on walks varies with your dog’s body and health. Keep these points in mind:

  • Strong pullers: choose secure, well-made equipment you can handle safely, and pair it with a structured training plan. A front-clip or dual-clip harness is a reasonable starting point.
  • Small dogs: avoid gear that puts pressure on the neck or throat. The AKC explains that a harness helps distribute pressure around the chest and shoulders instead.
  • Flat-faced breeds: in the AKC’s harness guide, veterinarian Dr. Amy Attas recommends harnesses for wide-necked breeds such as Bulldogs, French Bulldogs, and Pugs, and for dogs with breathing issues. Make sure nothing presses on the throat, and ask your vet if you’re unsure.
  • Dogs with neck, tracheal, spinal, or orthopedic conditions: VCA calls a body harness an excellent choice for dogs with tracheal disease or neck pain. Ask your veterinarian which equipment suits your dog’s condition.
  • Escape-prone dogs: focus on correct fit. The AKC notes properly fitted step-in harnesses can help escape artists. Some owners add a second safety connection, such as a short leash clipped to a well-fitted collar. Only use one if it’s fitted and attached safely.
  • Dogs that lunge, bark, or react strongly: pulling may come from fear, excitement, or reactivity. A harness can help you manage the walk, but it won’t address the cause.

Pulling alone doesn’t tell you whether a dog has a behavioral or medical problem. If your dog’s walking suddenly changes, or it seems sore, see your vet.

How to Stop a Dog From Pulling on Walks: Training Still Matters

Even the best harness for dogs that pull on walks is a management aid, not a substitute for training. VCA explains that dogs pull to get where they are going, and pulling works because it gets them there. Teaching loose-leash walking changes that. Before you start, VCA suggests meeting your dog’s exercise and sniffing needs with play or exploration on a long line.

  1. Start somewhere quiet. Begin indoors or in your yard. Stand still with treats, and the moment the leash goes slack, say “Yes!” and reward.
  2. Take a few steps. Walk one or two steps, then reward again while the leash stays loose. VCA suggests holding treats near your dog’s nose and rewarding every 2 to 3 seconds at first.
  3. Add a cue. Once your dog walks reliably on a loose leash, pair it with a cheerful phrase such as “Let’s go!”
  4. Handle pulling calmly. If your dog pulls toward something, stand still or step away, wait for any slack, then reward. If your dog can’t refocus, move farther from the distraction.
  5. Change direction when safe. Calmly turning the other way, then rewarding your dog for catching up on a loose leash, also helps.
  6. Add distractions gradually. Practice near more interesting things only as your dog improves.
  7. Keep sessions short and consistent. Everyone who walks your dog should use the same method.

Never jerk the leash, deliberately cause pain, or use intimidation. VCA notes that pain can become linked with whatever the dog was approaching, which may increase fear or aggression. Be patient: VCA says most dogs need several months of regular practice. For more step-by-step help, see our guide on how to stop a dog from pulling on the leash.

When to Ask a Veterinarian or Professional Trainer for Help

Choosing the best harness for dogs that pull on walks is only part of the solution. Ask for help if pulling is severe, dangerous, or tied to fear or aggression. VCA recommends that dogs who lunge, bark, or try to chase other animals, people, cars, or bikes see a veterinarian for a referral to a professional behavior consultant and trainer. VCA adds that group classes with a professional trainer can help with timing and distractions; look for one who uses reward-based methods.

See your vet first if your dog seems stiff, limps, avoids having the harness put on, or shows rubbing, hair loss, or sores where the straps sit. Our guide on how to stop a dog from chasing cars, bikes, and joggers covers related walking problems.

Quick harness fit test

Check Good sign Warning sign
Standing Straps lie flat; nothing on the throat Strap pressing the windpipe or across the shoulders
Walking Natural, full stride Shortened steps or odd gait
Turning Harness stays centered Harness twists or slides sideways
Sitting No pinching behind the front legs Straps dig in behind the elbows
After the walk Skin and coat look normal Redness, rubbing, or hair loss

Example Scenario (illustrative)

Jordan in Texas adopts a 70-lb mixed-breed dog who pulls hard toward squirrels. Searching for the best harness for dogs that pull on walks, he measures the dog’s neck base and chest, then picks a non-tightening dual-clip harness using the brand’s size chart. He clips the leash to the front ring, practices loose-leash steps in the backyard for 5 minutes a day, and checks for rubbing after each walk. After several weeks, walks are calmer, though the squirrels are still a work in progress.

Before you buy: quick checklist

  1. Does the harness leave the shoulders free, with no strap across the front?
  2. Does it have a front clip, or both front and back clips?
  3. Does it adjust at several points, and does the size chart match your measurements?
  4. Is it non-tightening?
  5. Are the buckles, rings, and stitching sturdy enough for your dog’s strength?

Best Harness for Dogs That Pull on Walks: FAQs

What type of harness is best for a dog that pulls?

For many dogs, a well-fitted, non-tightening front-clip harness is a good first choice, used with reward-based training. A 2025 research review found no single design suits every dog, so fit and comfort matter most.

Is a front-clip harness better than a back-clip harness for pulling?

Often, yes. A front clip gently turns a pulling dog back toward you. A back clip is easier to use but gives less steering control, so it often suits dogs that already walk calmly.

Do no-pull harnesses stop dogs from pulling completely?

No. A harness can make pulling easier to manage, but it doesn’t teach your dog to walk nicely. Loose-leash training is still needed, and VCA says most dogs need several months of practice.

How should a dog harness fit?

Snug but comfortable. It shouldn’t rub behind the front legs, press on the throat, or restrict the shoulders, and your dog shouldn’t be able to back out. Follow the manufacturer’s sizing and fit instructions.

Can a harness hurt a dog’s shoulders?

It can if it’s poorly designed or fitted. VCA warns that some designs rest over the shoulder joints and can restrict movement. Choose a harness that leaves the shoulders free, and watch how your dog moves.

Is a harness better than a collar for a strong puller?

Often, yes. A harness spreads pressure across the chest instead of the neck. VCA says a collar isn’t the right choice for dogs that pull very hard, and research shows collars can put high pressure on the neck.

How can I teach my dog to walk without pulling?

Start in a quiet area, reward your dog whenever the leash is loose, and stop or change direction calmly when it pulls. Add distractions gradually and never jerk the leash or use pain.

What should I do if my dog keeps escaping from the harness?

Recheck the fit and measurements, tighten the straps as the maker directs, and test whether the harness slides over the head when you step back. A properly fitted step-in style may help. Ask a trainer if escapes continue.

Final Verdict: Best Harness for Dogs That Pull on Walks

The best harness for dogs that pull on walks is a comfortable, well-fitted, non-tightening harness, usually with a front clip, that leaves the shoulders free and doesn’t rub. Pair it with patient, reward-based loose-leash training, recheck the fit often, and ask your vet or a professional trainer for help if pulling is severe or linked to fear.

Your next steps

  1. Measure your dog’s neck base and chest today, then compare them with the size chart of any harness you’re considering.
  2. Pick out other walking essentials in our guide to functional dog accessories.
  3. Browse more training and care guides in our dog care section.

Share your dog’s walking wins with our community on Facebook.

About the author

Written and reviewed by the Pets Store Home Editorial Team: pet owners and animal lovers who check every guide against trusted US veterinary and animal-welfare sources. This article is general information, not a substitute for professional veterinary advice. Always talk to your veterinarian about your own pet’s health.

How we checked this guide: We used two VCA Animal Hospitals guides, the American Kennel Club’s harness guide, and the 2025 peer-reviewed review by Cavalli and Protopopova in Animals. This guide doesn’t test or rank specific products. We review this article every 12 months, or sooner if guidance changes.

Last reviewed: October 2026

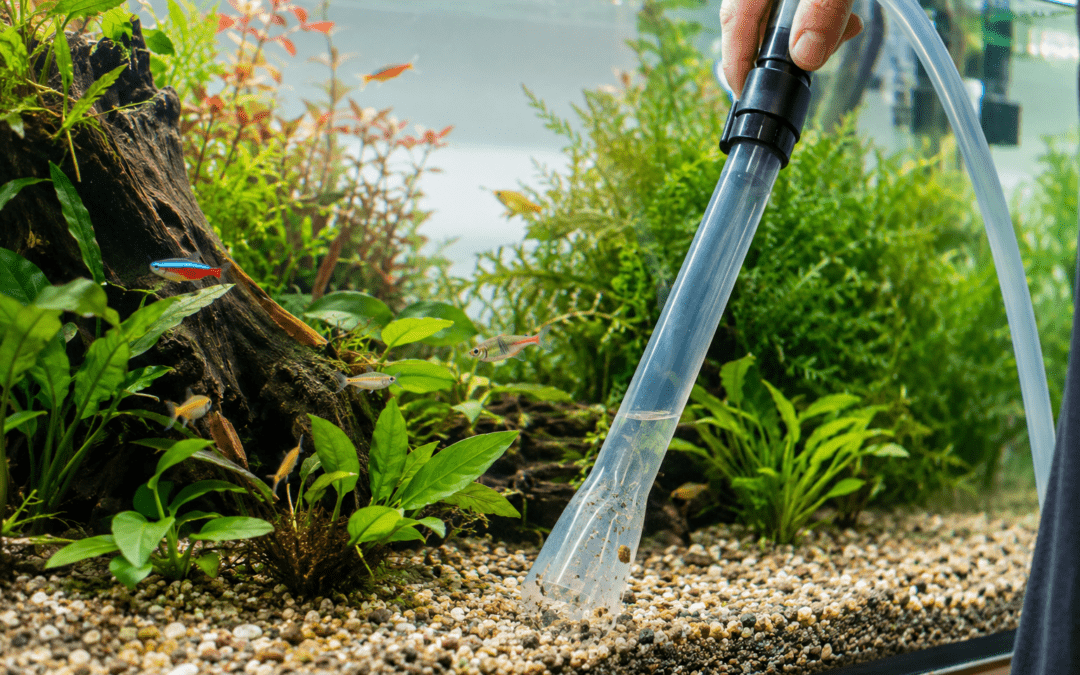
how to clean a fish tank without killing fish

how to clean a fish tank without killing fish

Quick Answer: Fish usually get hurt by cleaning not because the tank was dirty, but because the cleaning disturbed the bacteria that process fish waste, or because untreated or mismatched-temperature water shocked them. The safe approach: change water in moderation rather than all at once, use a dechlorinator matched to your water supply, clean filter media gently in removed tank water, match new water’s temperature, and let water test results tell you when your routine needs to change.

Quick Decision Box

  • Ammonia or nitrite reading detected → investigate immediately and take corrective action based on the reading (see the emergency table below).
  • Parameters stable and tank visibly fine → stick to your regular routine maintenance; there’s no benefit to cleaning more than that.
  • Fish showing distress (gasping, erratic swimming) → test the water right away and increase surface agitation/aeration.
  • Adding tap water → condition it for what your water utility actually treats with.
  • Cleaning filter media → rinse gently in removed tank water to preserve the biological colony living on it.

How to Clean a Fish Tank Without Killing Fish

Ten different care guides will give you ten different water-change percentages, from 10% to 75%. That disagreement isn’t really about safety — it’s that most guides skip the mechanism behind fish deaths after cleaning and default to a memorized number instead. This guide starts with that mechanism — where the bacteria that process fish waste actually live, and what genuinely disturbs them — then builds a safe process, an emergency response plan, and a “what not to do” checklist around it.

Key Takeaways

  • Cleaning problems usually trace back to disturbed biofiltration capacity or chemical/temperature shock — not simply “not cleaning enough.”
  • The bacteria that process ammonia live mainly on surfaces — filter media, substrate, decor — not dissolved in the water itself, which changes what actually puts them at risk.
  • Use a regular maintenance routine as your baseline, and let water-test results tell you when that routine needs to change.
  • Not every water utility disinfects the same way, and not every dechlorinator is formulated for the same disinfectant — check what you’re actually treating for.
  • Copper from old plumbing is a real risk, especially for invertebrates, but there’s no single guaranteed fix — it depends on your specific water source.

The Mechanism: Where Fish Waste Actually Goes

Fish release ammonia directly through their gills into the surrounding water. According to the Merck Veterinary Manual, unionized ammonia is toxic at very low concentrations — a level around 0.05 mg/L is enough to cause measurable gill damage, and concentrations near 2 mg/L are lethal to many fish outright.

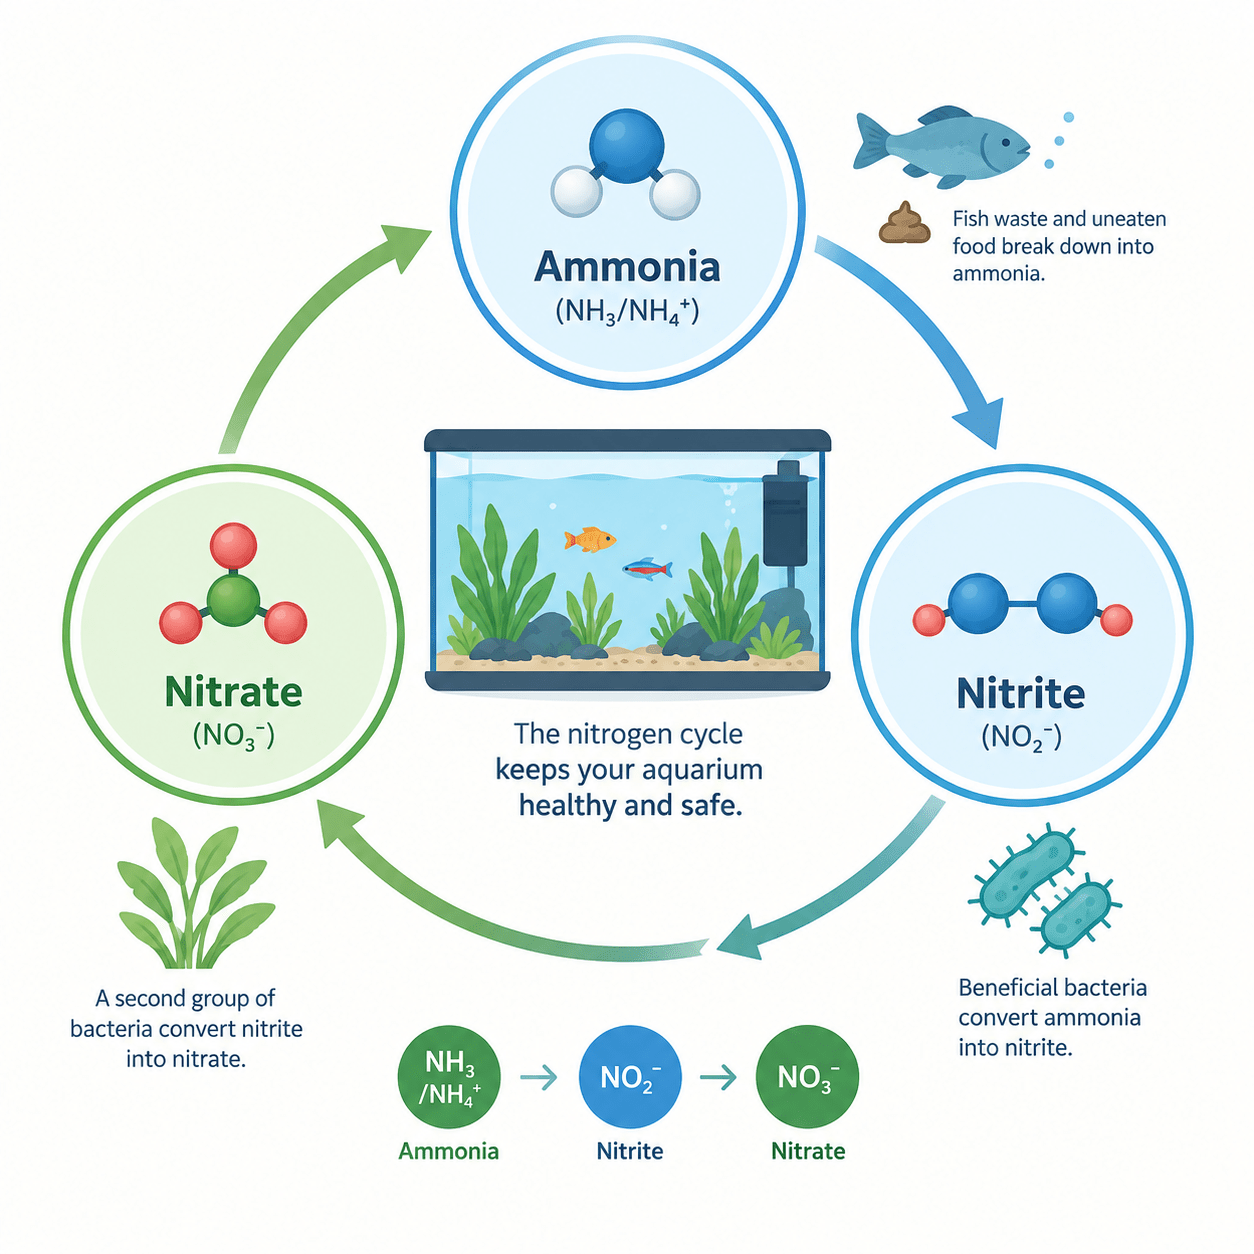
In an established aquarium, that ammonia doesn’t just accumulate — a chain of naturally occurring bacteria processes it: fish waste → ammonia → nitrite (via one group of bacteria) → nitrate (via a second group) → removed through routine water changes or uptake by live plants. This is the nitrogen cycle, and it’s the actual reason “beneficial bacteria” matters.

Here’s the detail most cleaning guides get wrong: those bacteria colonize surfaces — filter media and substrate especially — they aren’t suspended in the water column itself. That distinction matters because it means the water you remove during a routine change isn’t where most of the bacterial colony lives.

What actually threatens that colony is disturbing or damaging the surfaces they live on: rinsing filter media under hot tap water, replacing all your filter media at once, or using antimicrobial chemicals near the filter. The Merck Veterinary Manual notes that a biofilter takes roughly six to eight weeks to become fully established, and that a damaged filter’s bacterial population needs a similar span to recover — which is why aggressive media cleaning, not water changes on their own, is the more direct route to an ammonia or nitrite spike.

A very large or complete water change carries its own, different risks — mainly losing the water’s existing chemical stability and buffering capacity, and a bigger jump in temperature or pH if the replacement water isn’t closely matched. Those are real concerns worth avoiding, but they’re a distinct issue from “wiping out the bacteria,” which is mostly a filter-media and substrate-disturbance problem.

why did my fish die after water change

Routine Maintenance vs. an Ammonia/Nitrite Emergency

These are two different situations, and treating them the same way is where a lot of cleaning advice goes wrong.

Routine maintenance is what you do on a regular schedule when your tank is stable: a partial water change sized to your specific tank (more on the variables below), gentle substrate vacuuming, and occasional gentle rinsing of filter media in removed tank water.

An ammonia or nitrite emergency is a different situation with a different response. If a test shows a detectable ammonia or nitrite reading, that’s a signal to investigate immediately and take corrective action based on what the reading actually shows — not necessarily a fixed percentage, and not something to leave for your next scheduled cleaning day.

Per the Merck Veterinary Manual, a substantial water change (50% or more) is a reasonable emergency response once high ammonia is confirmed, provided the replacement water itself doesn’t introduce more ammonia or chloramine. The right size of an emergency response depends on how high the reading is and how your tank is set up, which is a good reason to have a plan (and, ideally, a vet or experienced aquatics source to consult) rather than a fixed number memorized in advance.

Use a Routine, But Let Testing Tell You When to Adjust It

A fixed cleaning calendar — weekly, biweekly, whatever a guide recommends — is a reasonable starting baseline. The mistake is treating that calendar as fixed regardless of what’s actually happening in the tank. The more reliable framing: use a regular maintenance routine as your baseline, and let water-test results tell you when that routine needs to change. Stable, low ammonia and nitrite readings mean your current routine is working.

A detectable ammonia or nitrite reading means it’s time to investigate and respond, regardless of where you are in the calendar. Rising nitrate between changes, with ammonia and nitrite both at zero, is what your next scheduled routine change is for.

How Much Water Should I Change? The Real Variables

There’s no single universal percentage that’s correct for every tank, which is why care guides disagree so much. What actually determines the right amount for routine maintenance includes: how mature and established the tank is, stocking level, how much you’re feeding, how heavily planted the tank is, filtration capacity, and your current ammonia, nitrite, and nitrate readings, along with the chemistry of your source water.

A lightly stocked, mature, well-planted tank with stable readings can typically get by with smaller, less frequent changes than a heavily stocked or newly established one.

This is separate from the emergency response covered above, where the size of the change is driven by how high a confirmed ammonia or nitrite reading actually is, not by these routine-maintenance variables.

Chlorine vs. Chloramine: Check What Your Water Utility Actually Uses

Every care guide agrees you need a water conditioner before adding tap water, but not every water utility disinfects the same way, and that affects which conditioner is appropriate. According to the EPA, chloramines are formed when ammonia is added to chlorine during water treatment, specifically because the combination provides longer-lasting disinfection as water travels through pipes to consumers, compared to chlorine alone, which dissipates more quickly.

This is a difference in how the two are formed and how long they persist — it’s worth finding out which one your local utility uses and choosing a conditioner labeled for that specific disinfectant, rather than assuming any dechlorinator handles both equally.

Copper and Other Heavy Metals: A Risk Without One Guaranteed Fix

Standard dechlorinators are formulated to neutralize chlorine and chloramine — they aren’t designed to remove dissolved metals. The Merck Veterinary Manual lists copper concentrations above roughly 0.2 mg/L, particularly combined with low water alkalinity, as capable of causing sudden fish mortality, and copper is generally more dangerous to invertebrates like shrimp and snails than to many fish at comparable levels.

Old household plumbing with copper pipes or solder is a common source, but there isn’t one guaranteed fix that eliminates the risk. Running the tap briefly before filling a bucket may reduce copper picked up from standing water in the pipes, but it isn’t a verified or complete solution on its own. If you keep shrimp, snails, or other copper-sensitive invertebrates and have older plumbing, testing your tap water for copper and using a conditioner or additive specifically formulated to bind heavy metals is a more reliable approach than tap-flushing alone.

What Your Water Test Results Actually Mean

  • Ammonia — should not be detectable in a properly cycled, stable aquarium; any reading above zero is worth investigating.
  • Nitrite — same standard as ammonia: should not be detectable once a tank is established, and any reading calls for a look at what’s changed.
  • Nitrate — useful mainly as a trend indicator of accumulating nitrogen waste over time between water changes, rather than a single number with one universal “safe” threshold across every tank and species.
  • pH and temperature — sudden shifts in either can matter for fish even when ammonia and nitrite both read as acceptable, which is part of why matching temperature during water changes (covered in the checklist below) is worth doing carefully rather than approximately.

The Ultimate Safe-Cleaning Checklist

  1. Test the water before you start.
  2. Prepare and treat replacement water with an appropriate conditioner.
  3. Match the new water’s temperature to the tank’s.
  4. Unplug any equipment that shouldn’t run dry (heater, filter).
  5. Remove only the intended amount of water for today’s routine.
  6. Vacuum the substrate gradually, section by section.
  7. Clean glass and decorations without soap, detergent, or household chemicals.
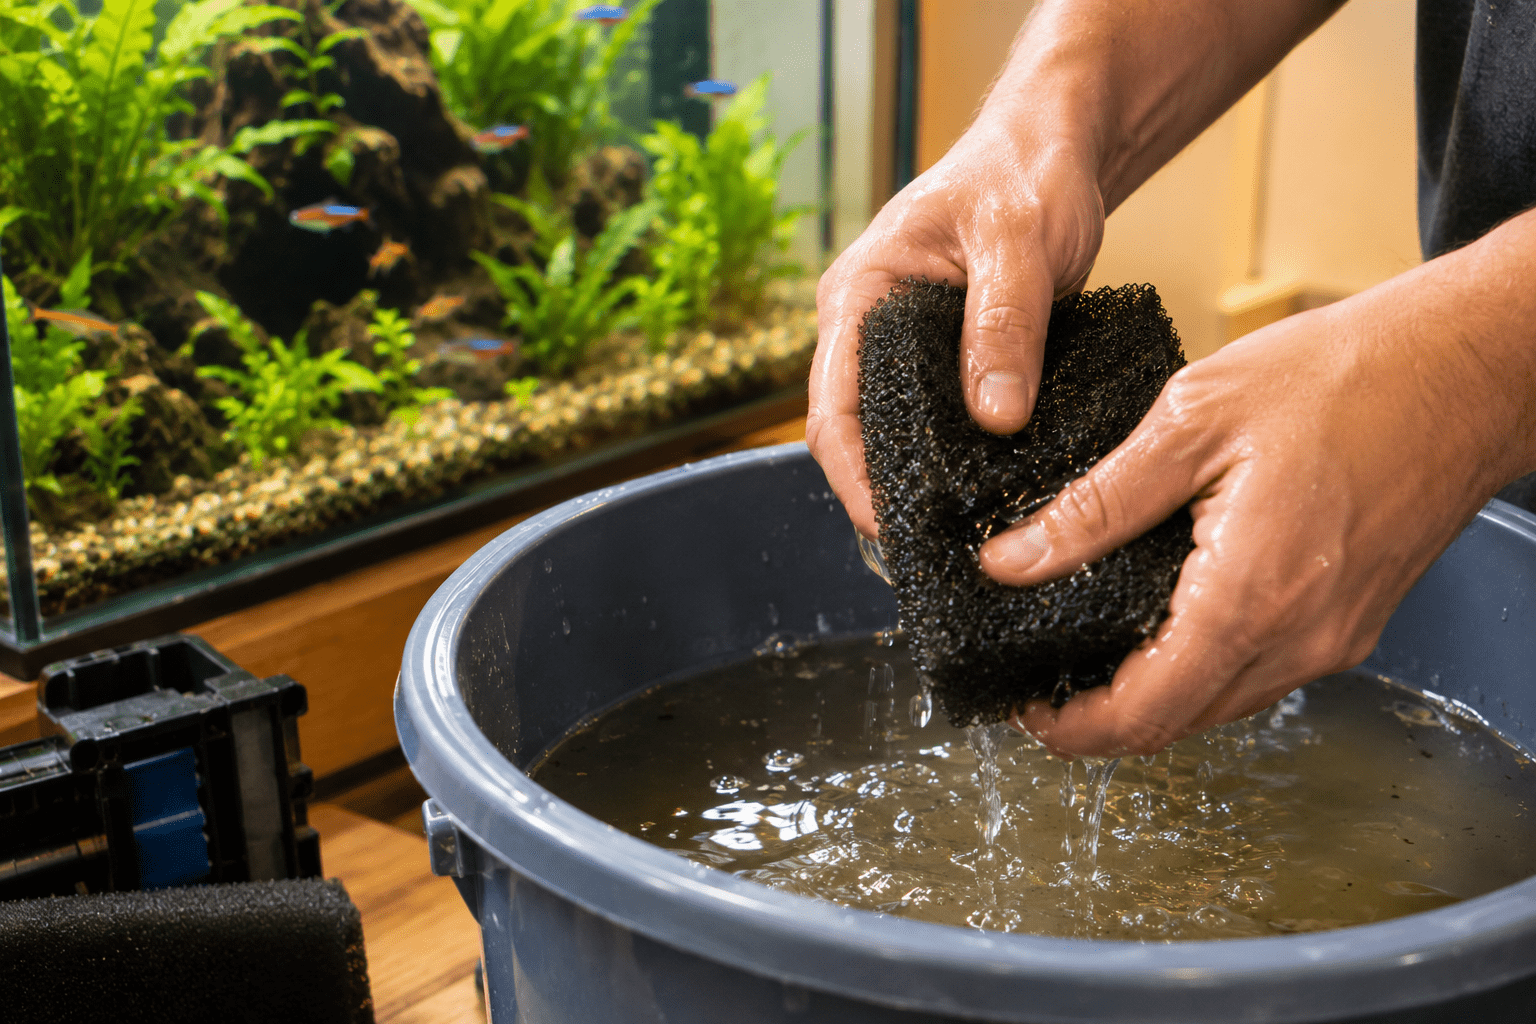
  8. Rinse reusable filter media gently in the removed aquarium water, not tap water.
  9. Refill slowly with the prepared, treated, temperature-matched water.
  10. Restart equipment and verify normal flow and heating.
  11. Observe your fish for a few minutes after restarting.
  12. Retest later if readings or fish behavior indicate a problem.

Emergency Troubleshooting

Problem

What to Do

Forgot conditioner

Treat the water according to your conditioner’s instructions as soon as you notice

Fish gasping at the surface

Increase aeration/surface agitation and test water immediately

Ammonia detected

Investigate the cause and respond with a corrective water-quality action sized to the reading

Nitrite detected

Same as above — investigate and respond based on the reading, not a fixed percentage

Temperature shock suspected

Stabilize temperature gradually rather than making another sudden change

Filter media rinsed under tap water

Monitor ammonia and nitrite closely over the following days

Full or near-full water change done

Monitor water chemistry closely and avoid heavy feeding for a few days

Not All Fish Tolerate Cleaning the Same Way

Community fish — most hardy, commonly kept species generally tolerate standard partial water changes reasonably well.

Sensitive or scaleless species — some fish are more prone to stress from abrupt chemistry or temperature shifts and benefit from more gradual changes than a generic routine assumes.

Shrimp and snails — invertebrates warrant particular attention to copper exposure and rapid parameter swings, given the sensitivity covered above; this doesn’t mean a single fixed percentage applies to all shrimp or snail species, since sensitivity varies, but it does mean applying a fish-tank routine unmodified to an invertebrate tank is worth reconsidering.

Never Do These During Routine Cleaning

❌ Use soap or detergent on glass, decorations, or equipment ❌ Replace all filter media at once ❌ Rinse biological filter media under untreated tap water ❌ Add untreated tap water directly to the tank ❌ Make a large, sudden temperature change during a water change ❌ Deep-clean every surface (substrate, decor, filter media, glass) in a single session ❌ Assume one fixed percentage applies to every aquarium ❌ Ignore a detectable ammonia or nitrite reading because it’s not your scheduled cleaning day

how much water to change in fish tank<br />

When You Should Not Clean More

If the tank looks visually clean and your water test results are stable, there’s no benefit to deep-cleaning simply because the calendar says it’s time. Over-cleaning — disturbing filter media and substrate more than necessary — is itself a route to the ammonia/nitrite risk covered earlier. A tank that’s testing well doesn’t need a more aggressive routine; it needs the same routine, at the same pace, until the readings say otherwise.

If You Already Made a Mistake

You did a full or near-full water change: Monitor ammonia and nitrite closely over the following days, since the tank’s chemical stability has been disrupted. Avoid heavy feeding during this window, and be ready to respond with a corrective water-quality action if readings climb.

You forgot the dechlorinator: Treat the water according to your conditioner’s instructions as soon as you notice, and test water quality once it’s had time to circulate.

Your fish are gasping or clearly distressed right after cleaning: Increase surface agitation or aeration right away, test ammonia and nitrite immediately, and respond with an appropriately sized corrective water change using properly treated, temperature-matched water if a problem is confirmed.

After You Clean: A Timeline for What to Watch

First few hours: Watch for gasping at the surface, erratic or darting swimming, hiding, or loss of color — per the Merck Veterinary Manual’s reference signs of illness in fish, these (along with lethargy and rapid or labored breathing) are worth taking seriously if they appear shortly after a cleaning.

Next 24-48 hours: Monitor ammonia and nitrite if you did a larger-than-routine change or suspect any disturbance to the filter, feed conservatively rather than heavily, and keep an eye on general behavior.

Following days: Return to your normal monitoring routine, and adjust your maintenance schedule only if test results actually indicate a change is needed — not simply because time has passed.

Common Mistakes Owners Make

Doing a full or near-full water change to “really” clean the tank, which disrupts chemical stability more than a partial change would. Rinsing filter media or decorations under a tap instead of in removed tank water. Adding new water without checking that its temperature is close to the tank’s. Cleaning more aggressively than test results call for, simply because of the calendar. And using soap, detergent, or general household cleaning products anywhere near the tank, its equipment, or decorations.

Practical Examples

A lightly stocked, well-planted, established tank with consistently stable test readings: a modest routine partial change on a regular schedule is likely sufficient, and there’s no benefit to cleaning more aggressively than the readings call for.

A newly set up tank showing detectable ammonia between scheduled changes: this points to an incompletely established biofilter rather than a cleaning-frequency problem, and calls for the emergency-response approach above rather than simply waiting for the next scheduled cleaning.

A tank with shrimp that previously held only fish: the owner’s old fish-only routine, including any copper-containing products used in the past, is worth re-evaluating against the more cautious approach the species-sensitivity section above describes.

FAQ

Why did my fish die after I cleaned the tank? 

The most common causes are a disturbance to the bacteria that process ammonia (often from aggressive filter-media cleaning), or a chemical or temperature shock from untreated or mismatched-temperature replacement water — investigate both if this happens.

How much water should I change at once? 

For routine maintenance, it depends on your tank’s maturity, stocking, feeding level, and current test readings rather than one universal number; a confirmed ammonia or nitrite emergency calls for a separate, larger corrective response as covered above.

Can I clean the filter and do a water change on the same day? 

Yes, but avoid rinsing all your filter media aggressively and doing a large water change at the same time — space out how much you disturb the biological colony and the water chemistry in a single session.

Do I need a water conditioner every time I add tap water? 

Yes, and the specific conditioner should match what your water utility actually treats with — chlorine or chloramine.

How do I know if my fish are stressed after cleaning? 

Watch for gasping at the surface, erratic or darting swimming, hiding, or loss of color in the hours following a cleaning, and test your water right away if you see any of these.

Is it safe to remove all the water and start over? 

Generally not recommended for routine maintenance — a full water change disrupts the tank’s chemical stability and risks a bigger temperature or pH swing than a partial change, on top of losing whatever buffering the established water was providing.

How often should I really clean my fish tank? 

Use a regular routine as your baseline, and let water test results tell you when that routine needs to change — a detectable ammonia or nitrite reading calls for investigation regardless of the calendar.

Can a 100% water change kill fish? 

It can contribute to fish loss, mainly through temperature/chemistry shock and the loss of the tank’s existing chemical stability, rather than through “losing the bacteria” specifically, since most of the bacterial colony lives on filter media and substrate rather than in the water itself.

Should I remove my fish while cleaning the tank? 

For most routine maintenance, no — removing fish adds its own handling stress, and standard cleaning steps (partial water change, gentle vacuuming, gentle media rinsing) are designed to be done with fish in the tank.

Can I clean the filter and change water together? 

Yes, but do it gently rather than aggressively on both fronts at once — a full media replacement combined with a large water change compounds disturbance to both the bacterial colony and the water chemistry in a single session.

Why are my fish gasping after a water change? 

This can indicate low dissolved oxygen, a temperature or chemistry mismatch in the new water, or an ammonia/nitrite issue — increase aeration and test the water immediately rather than waiting to see if it passes.

Written by the Pets Store Home Team — pet care writers and researchers who cross-check every medical or water-chemistry claim against the veterinary and regulatory sources cited inline and above, rather than other blogs. Fact-checked/reviewed by: Not yet reviewed by a named, credentialed aquatic professional — add one here before publishing if genuinely available. No credential is listed in the meantime, since we don’t fabricate reviewer names. Last reviewed: September 2026

Conclusion

The bacteria that keep a tank safe live mostly on filter media and substrate, not in the water itself — which is why aggressive media cleaning and abrupt temperature or chemistry changes are the real risks, more than “not cleaning enough.”

Use a steady routine as your baseline, let test results tell you when to deviate from it, match your dechlorinator to your actual water supply, and treat copper as a real but not fully solved risk if you keep invertebrates or have older plumbing. Get those pieces right, and “without killing your fish” stops being a worry and starts being the default outcome.

Can Dogs Eat Scrambled Eggs Every Day? Safe Vet Guide 2026

Can Dogs Eat Scrambled Eggs Every Day? Safe Vet Guide 2026

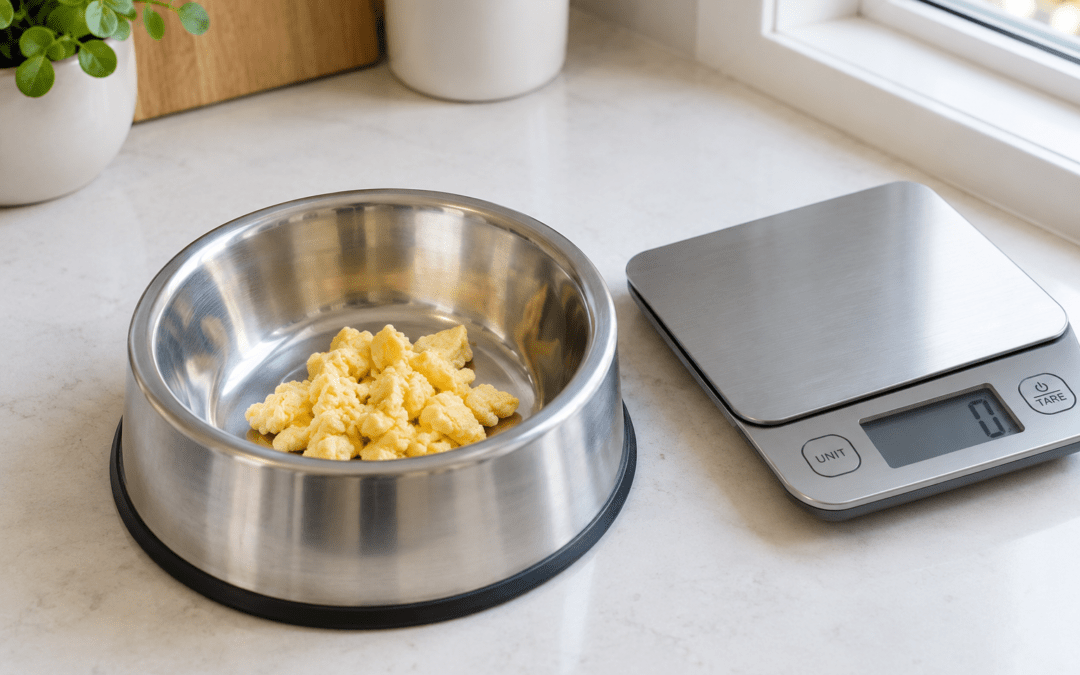
Can dogs eat scrambled eggs every day? Most healthy dogs can eat plain, fully cooked scrambled eggs, but feeding them every day isn’t automatically right for every dog. Eggs are best treated as an occasional treat or food topper, not a replacement for a complete and balanced diet. Whether daily eggs suit your dog depends on its size, age, activity level, calorie needs, and health, so ask your vet before making eggs a daily habit.

This guide explains how to cook scrambled eggs for dogs safely, how much egg a dog can eat, which dogs should skip or limit eggs, and the signs that eggs don’t agree with your dog.

Key takeaways

  • Always cook eggs fully and serve them plain: no butter, oil, salt, milk, or seasonings.
  • The AKC says eggs should be an occasional treat, not a daily staple, unless your vet recommends otherwise.
  • Treats and extras, eggs included, should stay around 10% or less of daily calories.
  • Dogs with pancreatitis, obesity, kidney or certain liver disease, or a prescription diet should check with a vet first.
  • Never feed raw eggs; they can carry Salmonella.

Are Scrambled Eggs Safe for Dogs?

Yes, when they’re cooked properly. The American Kennel Club says you should always cook eggs before giving them to a dog, and that scrambled and hard-boiled eggs are both fine if fully cooked and plain. PetMD’s veterinarian-written guide agrees that dogs can eat eggs when they’re fully cooked and served plain.

So, can dogs eat scrambled eggs as a regular treat? Many can, as long as the eggs are prepared without butter, oil, salt, or seasonings, and as long as your dog tolerates them. The bigger question is how often, which is covered next.

Can Dogs Eat Scrambled Eggs Every Day?

For most dogs, the safer answer to “can dogs eat scrambled eggs every day?” is “not without your vet’s input.” The AKC says eggs should be an occasional treat, not a daily staple, unless a veterinarian recommends it. It notes that eggs are calorie-dense, so too many can cause weight gain or throw off an otherwise complete diet.

Here’s why daily eggs need care:

  • Extra calories and fat: eggs add up fast, especially for small or less active dogs.
  • Diet balance: AAFCO explains that treats are not usually intended to be complete and balanced, and too many can upset an otherwise complete and balanced diet.
  • The 10% guideline: Hill’s suggests at least 90% of your dog’s nutrition should come from complete and balanced dog food, with treats making up the other 10% of daily calories. That’s a general guide, not proof that a set amount of egg suits every dog.

An occasional small portion may be fine for many healthy dogs. If you’re thinking about eggs every day, ask your vet to review your dog’s diet, body condition, and health, and to suggest an appropriate portion. Never replace your dog’s regular food with scrambled eggs.

Plate of plain scrambled eggs beside whole eggs in natural light
Can dogs eat scrambled eggs every day? Plain, fully cooked eggs are safe for most dogs in small, occasional portions. Photo: Luke Landon / Pexels.

Are Scrambled Eggs Good for Dogs? Benefits of Eggs

Are scrambled eggs good for dogs? In small amounts, they can be a nutritious extra. Veterinary sources describe these benefits:

  • High-quality protein: Hill’s lists high-quality protein among the nutrients in eggs.
  • Fats and vitamins: Hill’s notes eggs provide omega fatty acids and vitamins A, D, and E.
  • Minerals and B vitamins: the AKC lists iron, folate, riboflavin, selenium, vitamin A, and vitamin B12.
  • Variety: a spoonful of plain egg can make a tasty topper or training reward for dogs that tolerate it.

Keep expectations realistic. Eggs won’t cure diarrhea, treat illness, or transform your dog’s coat overnight, and they don’t replace veterinary care. If your dog eats a complete and balanced dog food, it already gets the nutrients it needs. AAFCO explains that “complete” means a food contains all required nutrients, and “balanced” means they’re in the correct ratios.

Risks of Feeding Too Many Eggs

Before you settle the question “can dogs eat scrambled eggs every day?” for your own dog, weigh the downsides:

  • Weight gain: the AKC warns that eggs are calorie-dense and too many can lead to weight gain.
  • Fat: Hill’s notes eggs are naturally high in fat, which can be a problem for dogs on low-fat plans. PetMD adds that yolks are higher in calories and fat than whites.
  • Digestive upset: Hill’s says too many eggs may cause vomiting or loose stool.
  • Allergies or sensitivities: the AKC and PetMD say egg allergies are uncommon, but some dogs react.
  • Nutritional imbalance: if eggs crowd out your dog’s regular food, its diet may no longer be balanced.
  • Pancreatitis risk in sensitive dogs: Hill’s warns that frying adds oils and fat that can cause GI upset or trigger pancreatitis in sensitive dogs.

How to Cook Eggs for Dogs Safely

Whatever you decide about “can dogs eat scrambled eggs every day?”, preparation matters. How to cook eggs for dogs is simple: keep them plain and cook them all the way through. Follow these steps:

  1. Cook fully. No raw or runny parts.
  2. Skip the extras. PetMD and the AKC advise against butter, oil, salt, and seasonings. Hill’s recommends avoiding frying.
  3. No onion or garlic. Hill’s warns that onion and garlic, often found in omelets, are toxic to dogs.
  4. Leave out milk and cheese. They aren’t needed, and the AKC notes many dogs are lactose intolerant, so dairy can upset their stomachs.
  5. Cool before serving. Let the eggs reach a safe, lukewarm temperature.
  6. Cut to size. Offer small pieces suited to your dog’s size.
Safer for dogs Avoid
Plain scrambled egg cooked without butter or oil Eggs scrambled in butter or oil
Plain hard-boiled egg, fully peeled Fried eggs
Fully cooked, cooled, bite-size pieces Raw or runny eggs
Egg with nothing added Salt, pepper, cheese, milk, onion, garlic, or leftover omelets

Why raw eggs aren’t recommended

Hill’s says any eggs fed to your dog should be cooked, not raw. Raw eggs can carry Salmonella, which can sicken dogs and people in your household. Raw egg whites also contain avidin, which can block biotin absorption. Cooking kills bacteria and deactivates avidin, so fully cooked eggs are the safer choice.

Pet Care Tip: Scramble a separate, plain portion for your dog before you add butter, cheese, or seasoning to the family’s eggs. If you serve hard-boiled egg instead, Hill’s advises peeling it completely, since sharp shell pieces can irritate the digestive tract.

How Much Scrambled Egg Can a Dog Eat?

How much egg can a dog eat? It depends on its daily calorie needs and everything else it eats. That’s also the real answer to “can dogs eat scrambled eggs every day?” for your dog. Use these steps to think it through:

  1. Know your dog’s daily calorie target. Your vet can set one. WSAVA’s nutrition guidelines encourage vets to assess body condition at every visit and tailor a nutrition plan to each pet.
  2. Count every extra. Treats, toppers, chews, and table scraps all share the roughly 10% treat allowance.
  3. Start small. If your dog has never had eggs, offer a small bite and wait a day or two.
  4. Watch for problems. Stop if you notice vomiting, diarrhea, itching, or other concerning signs.
  5. Ask your vet if your dog has a medical condition or eats a prescription diet.

As a general starting point for healthy dogs, PetMD’s vet-written guide suggests eggs as a treat about once or twice a week, scaled to size:

Dog’s weight PetMD’s suggested treat portion
2–10 lbs 1/4 egg, 1–2 times per week
11–20 lbs 1/2 egg, 1–2 times per week
21–50 lbs 1 egg, 1–2 times per week
51–90 lbs 1 1/2 eggs, 1–2 times per week
91+ lbs 2 eggs, 1–2 times per week

Source: PetMD (written by Hector Joy, DVM; reviewed by Sandra C. Mitchell, DVM, DABVP). General guidance for healthy dogs only, not a veterinary prescription. Your vet may recommend less, or none, for your dog.

Our guide to how much home-cooked food to feed a dog explains how daily calorie needs are worked out.

Can Puppies or Senior Dogs Eat Scrambled Eggs?

Puppies: the AKC says puppies can have small amounts of cooked egg, with even more limited portions than adults. Hill’s notes the occasional bit may be OK, but eggs shouldn’t be a main part of a puppy’s meals unless they’re part of a complete and balanced puppy food. Growing puppies need carefully balanced nutrition, so check with your vet first.

Senior dogs: older dogs may need fewer calories and may have health conditions that affect what they can eat. Hill’s advises avoiding eggs for dogs with kidney failure or certain liver disease, since extra protein may worsen these conditions. Ask your vet whether eggs fit your senior dog’s diet.

Which Dogs Should Avoid or Limit Eggs?

For some dogs, the question isn’t “can dogs eat eggs daily?” or “can dogs eat scrambled eggs every day?” but whether they should have eggs at all. Check with your vet before offering eggs if your dog:

  • Has had pancreatitis: PetMD notes egg yolks are higher in fat, and dogs with a pancreatitis history may face flare-ups. It suggests egg whites only, or no eggs, for these dogs.
  • Is overweight or on a low-fat diet: extra calories and fat can work against weight loss. See our guide to helping your dog lose weight.
  • Has kidney failure or certain liver disease: Hill’s advises avoiding eggs. Our guide to low-protein dog food for kidney disease covers diet for these dogs.
  • Has a known egg allergy or food sensitivity: Hill’s advises not feeding eggs to dogs with an egg allergy.
  • Eats a prescription or therapeutic diet: extras can interfere with a carefully balanced plan.
  • Has digestive disease or a sensitive stomach: Hill’s recommends checking with your vet for dogs with GI issues.

Signs Your Dog May Not Tolerate Eggs

Introduce eggs gradually and watch your dog afterward. The AKC lists these signs of a possible reaction:

  • Vomiting or diarrhea
  • Itching or hives
  • Swelling
  • Coughing or difficulty breathing

PetMD adds that chronic ear infections and itchy, inflamed skin can be signs of a food allergy. Stop offering eggs and call your vet if you notice persistent vomiting, diarrhea, itching, hives, or other concerning symptoms. Only your vet can tell whether these signs point to an allergy or something else.

Get urgent care

If your dog’s face swells or it has trouble breathing after eating eggs, contact your vet or a 24/7 emergency veterinary hospital right away. These can be signs of a severe allergic reaction.

Can Dogs Eat Eggs Every Day? A Quick Checklist

  1. Has my vet confirmed my dog’s ideal weight and daily calories?
  2. Do eggs, plus other treats, stay within about 10% of those calories?
  3. Is my dog free of pancreatitis, kidney or liver disease, and egg allergies?
  4. Is my dog’s regular food still complete and balanced, and still the main part of its diet?
  5. Has my dog eaten eggs before without vomiting, diarrhea, or itching?

If you can’t answer yes to all five, stick to occasional small portions and talk to your vet.

Example Scenario (illustrative)

Kevin in Georgia wonders, “Can dogs eat scrambled eggs every day?” after his 30-lb mixed-breed dog begs at breakfast. At the next checkup, his vet confirms the dog is a healthy weight and suggests about half an egg, scrambled plain, a couple of times a week as a topper. Kevin trims the dog’s biscuits on egg days and keeps its regular food as the main meal.

Can Dogs Eat Scrambled Eggs Every Day? FAQs

Can dogs eat scrambled eggs every day?

Not every dog should. Plain, fully cooked scrambled eggs are safe for most healthy dogs, but the AKC says eggs should be an occasional treat, not a daily staple, unless your vet recommends them. Ask your vet before feeding eggs daily.

Are scrambled eggs safe for dogs?

Yes, if they’re fully cooked and plain, with no butter, oil, salt, seasonings, onion, or garlic. Serve small, cooled pieces and watch for any digestive upset.

Can I cook scrambled eggs with butter for my dog?

It’s best not to. PetMD and the AKC advise against cooking eggs for dogs in butter or oil. Added fat can upset your dog’s stomach and is a concern for dogs prone to pancreatitis.

Can dogs eat scrambled eggs with milk?

Skip the milk. It isn’t needed, and the AKC notes many dogs are lactose intolerant, so milk can cause diarrhea, vomiting, or loose stools. Keep eggs plain and fully cooked.

Are raw eggs safe for dogs?

No. Raw eggs can carry Salmonella, which can make dogs and people sick, and raw egg whites can interfere with biotin absorption. Always cook eggs fully before feeding them.

How much scrambled egg can I give my dog?

It depends on your dog’s size, calorie needs, and health. PetMD suggests about 1/4 egg for dogs under 10 lbs up to 2 eggs for dogs over 90 lbs, once or twice a week. Keep all treats within about 10% of daily calories.

Can puppies eat scrambled eggs?

Puppies can have small amounts of plain, fully cooked egg, with smaller portions than adults. Eggs shouldn’t replace a complete and balanced puppy food, so ask your vet first.

Can scrambled eggs upset a dog’s stomach?

Yes, especially if your dog eats too much, isn’t used to eggs, or the eggs were cooked with butter, oil, or milk. Hill’s notes too many eggs may cause vomiting or loose stool.

Should dogs with pancreatitis eat eggs?

Check with your vet first. PetMD notes yolks are higher in fat, and suggests egg whites only, or skipping eggs, for dogs with a history of pancreatitis or on low-fat diets.

Final Verdict: Can Dogs Eat Scrambled Eggs Every Day?

Can dogs eat scrambled eggs every day? Some healthy dogs may, with their vet’s approval and a carefully sized portion, but for most dogs plain, fully cooked eggs work best as an occasional treat or topper. Keep extras within about 10% of daily calories, never feed raw eggs, and keep a complete and balanced dog food as the main meal.

Your next steps

  1. Ask your vet for your dog’s daily calorie target at your next visit.
  2. Check which other human foods are safe in our guide on whether onion can hurt your dog.
  3. Browse more food safety guides in our Pet Food Center.

Does your dog love eggs? Tell us on Facebook.

About the author

Written and reviewed by the Pets Store Home Editorial Team: pet owners and animal lovers who check every guide against trusted US veterinary and animal-welfare sources. This article is general information, not a substitute for professional veterinary advice. Always talk to your veterinarian about your own pet’s health.

How we checked this guide: We used the American Kennel Club, PetMD (written by Hector Joy, DVM, and reviewed by Sandra C. Mitchell, DVM, DABVP), Hill’s Pet Nutrition, AAFCO, and WSAVA’s Global Nutrition Guidelines. We review this article every 12 months, or sooner if guidance changes.

Last reviewed: October 2026

signs a bearded dragon is stressed

signs a bearded dragon is stressed

Quick Answer: A stressed bearded dragon usually shows a darkened or fully black beard, glass surfing (pacing and clawing at the enclosure walls), reduced appetite, dulled color, and reduced activity. Most of these signs are mild and resolve once the cause — usually temperature, enclosure size, handling, or a new environment — is corrected within a few days. Signs that don’t improve within 3-5 days, or that come with weight loss, discharge, or labored breathing, need a reptile-experienced veterinarian rather than home troubleshooting.

Signs a Bearded Dragon Is Stressed

Most guides to bearded dragon stress hand you a list of symptoms and stop there. The harder — and more useful — question is what to do with that list: which signs are genuinely urgent, which ones are just a lizard adjusting to a Tuesday, and how you tell true stress apart from brumation or a normal shed, both of which mimic it closely. This guide organizes stress signs by how urgently they matter, maps them to the part of the body they show up in, and separates them from the two conditions owners most often confuse them with.

Key Takeaways

  • Stress signs exist on a spectrum — a darkened beard on day one in a new home is different from a black beard that persists for two weeks, and treating every sign as an emergency (or dismissing every sign as nothing) both lead to worse outcomes.
  • Stress marks and beard darkening are not always emotional distress; according to VCA Animal Hospitals, they can also reflect temperature regulation, shedding, or normal social signaling.
  • Reduced appetite and lethargy are the two symptoms most often confused between stress, brumation (seasonal dormancy), and genuine illness — and the difference matters for how you respond.
  • Life stage changes the picture: juveniles pace and explore more than adults as a normal part of development, and gravid females show nesting-related restlessness that isn’t stress in the usual sense.
  • Persistent appetite loss, labored or open-mouth breathing, discharge, or weight loss are not stress signs to manage at home — they call for a reptile veterinarian.

Why Bearded Dragons Show Stress Signs at All

A bearded dragon can’t tell you something is wrong, so its body does the talking instead. Visible signs like beard darkening, color changes, and pacing are outward signals of an internal stress response — the same general category of physiological reaction (elevated heart rate, altered hormone levels, changes in immune function) that most vertebrates experience under threat or discomfort.

In reptiles specifically, environmental stress is also linked to disease risk. The Merck Veterinary Manual notes that environmental stress is a contributing factor in septicemia (a serious bloodstream bacterial infection) and other illness in captive reptiles, alongside trauma and parasites. That’s the practical reason stress signs are worth taking seriously rather than waiting out indefinitely — chronic, unresolved stress doesn’t just look unpleasant, it can raise the risk of the animal getting sick.

The Stress Severity Scale: From Normal Adjustment to Emergency

Not every sign on this page means the same thing. A useful way to sort them is by how long they last and what else comes with them.

Mild / normal adjustment — Expected during a home change, a cage rearrange, or the first few days after purchase. Includes brief glass surfing, a temporarily darker beard, or a day of reduced appetite. Often settles within 24-72 hours as the dragon adjusts, though timing varies by individual.

Moderate / needs a fix, not a vet — A sign that persists for several days and points to something correctable: a black beard that doesn’t lift after a week, appetite loss lasting several days without illness signs, or repeated daily glass surfing. This tier calls for troubleshooting temperature, lighting, enclosure size, or handling frequency — covered later in this guide.

Severe / contact a vet — Weight loss, lethargy that doesn’t improve with correct husbandry, or any sign from the next section’s “illness” list can point to genuine illness rather than ordinary stress, and are worth a veterinary evaluation rather than more at-home troubleshooting. VCA Animal Hospitals is direct on this point: any behavioral or physical change from a bearded dragon’s normal baseline is cause for concern and warrants veterinary evaluation,

since several serious diseases (including atadenovirus infection and metabolic bone disease) can present initially with the same appetite loss and lethargy as ordinary stress. A few signs are more urgent than “contact a vet soon” — labored or open-mouth breathing, nasal or mouth discharge, seizures, or a gravid female straining without laying should be treated as same-day emergencies, not something to monitor for a few more days.

Stress Signs by Body Region

Rather than one long list, it helps to know where on the dragon’s body to look.

Beard: Puffing (a normal display, not necessarily distress) and darkening to gray or black are the most recognizable signs. A dark or black beard can signal stress, temperature regulation, or — in males especially — a normal territorial or breeding-season display, so context (does it happen only around other dragons, or constantly and alone?) matters more than the color change by itself.

Body and skin: Overall color dulling, and “stress marks” — darker striped or blotchy patterns most visible on the chin and belly, usually most noticeable in the morning. These marks can appear from cooler-than-ideal temperatures or an unfamiliar environment without reflecting deep emotional distress, so they’re a prompt to check husbandry rather than an alarm on their own.

Posture and limbs: Flattening the body against the substrate (“pancaking”) to absorb more heat or appear less visible, and arm waving — a slow, deliberate lifting and lowering of one front leg. VCA Animal Hospitals notes arm waving is generally read as a submission signal toward a dominant animal or reflection, not exclusively a stress behavior.

Movement: Glass surfing — repeatedly pushing against and pacing along the enclosure walls — and, less commonly, clawing or head-pressing at the glass. Reduced movement and lethargy are the opposite-direction version of the same problem: a normally active dragon that goes quiet.

Eyes and mouth: Open-mouth “gaping” for thermoregulation is normal in a healthy, active dragon. Open-mouth breathing that looks labored, combined with discharge from the eyes, nose, or mouth, is not a stress sign — per the Merck Veterinary Manual, these are hallmark signs of respiratory infection and need same-week veterinary attention.

Appetite and behavior: Refusing food, hiding more than usual, and increased defensiveness or biting when previously calm.

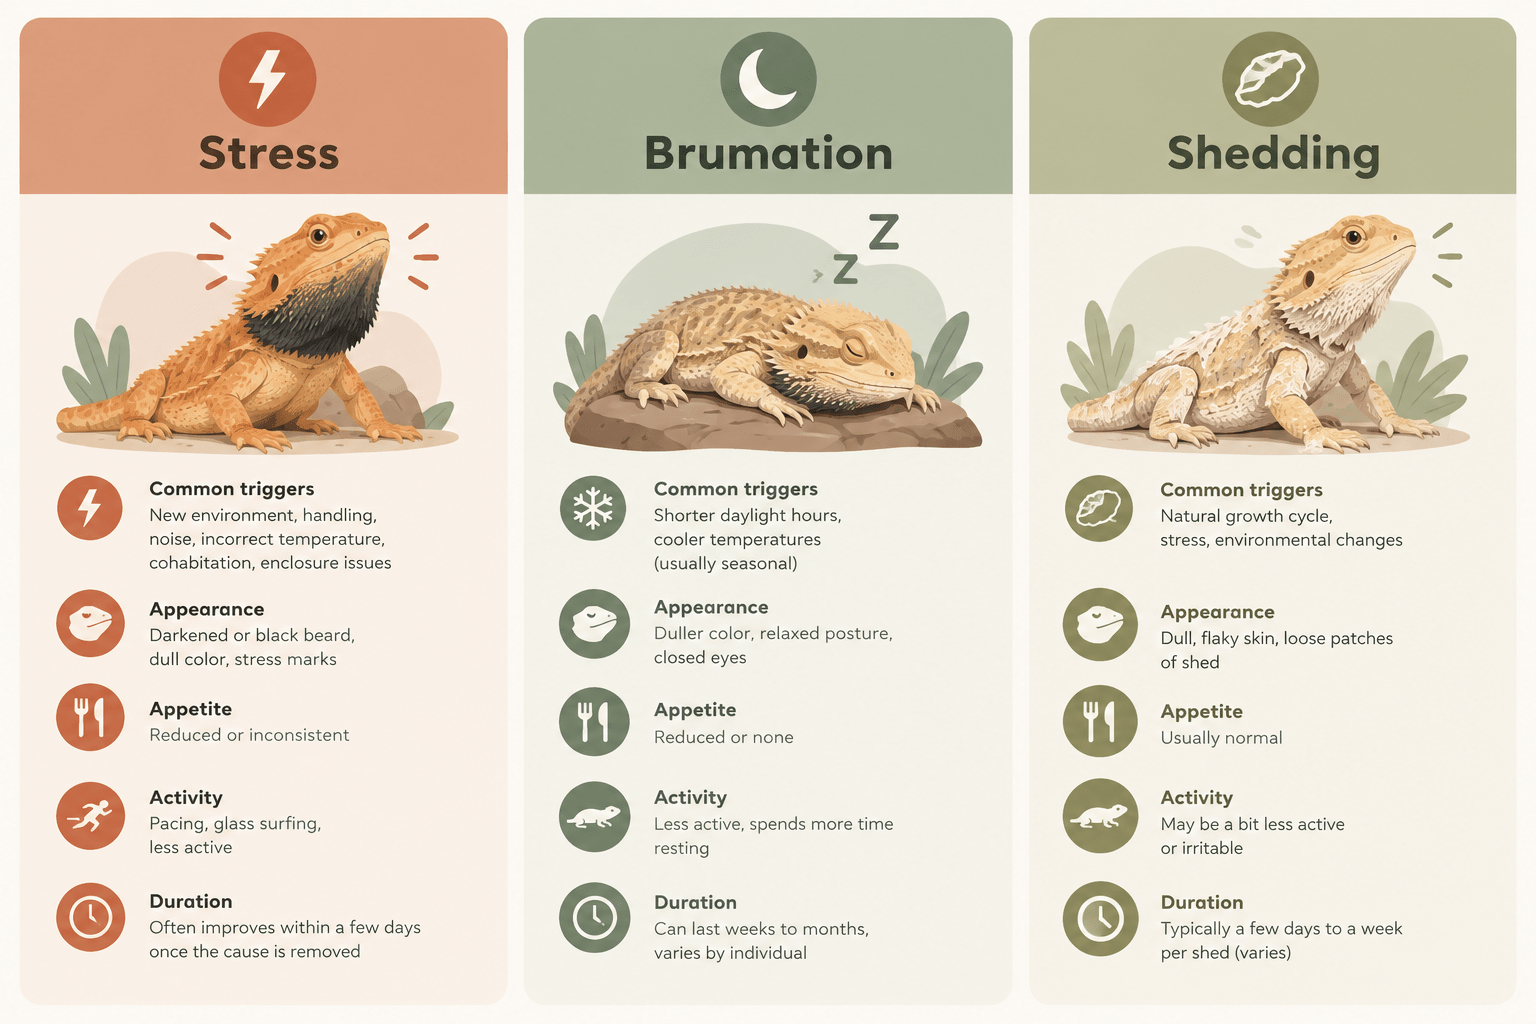
Is It Stress, Brumation, or Shedding? The Confusion Most Owners Run Into

Three very different conditions — stress, brumation, and shedding — can all produce the same surface picture: reduced appetite, lower activity, and darker coloring. Telling them apart changes what you should actually do.

| Category | Stress | Brumation | Shedding |\n| — | — | — | — |\n| Typical trigger | New environment, handling, cohabitation, incorrect husbandry | Cooler temperatures, shorter daylight, usually seasonal | Natural growth/skin cycle |\n| Appetite | Reduced, tied to the trigger | Reduced or absent | Mildly reduced, brief |\n| Activity | Glass surfing/pacing, or lethargy | Sluggish, may still move and drink occasionally |

Roughly normal to slightly reduced |\n| Color | Darkened beard or stress marks | Darker overall coloring | Dulled, patchy just before the shed |\n| Typical duration | Improves once the trigger is fixed | Weeks to a few months | Days |\n| Worth a vet check when… | Signs persist despite husbandry fixes | Happens outside a cool, seasonal context, or continues beyond a couple of weeks | Doesn’t resolve once the shed completes |\n

Brumation is a bearded dragon’s natural seasonal slowdown, not true hibernation — VCA Animal Hospitals notes dragons may still move around occasionally and seek water during it. It’s typically triggered by cooler ambient temperatures and shorter daylight, most often in adults over a year old, and can last anywhere from a couple of weeks to a few months (see our bearded dragon brumation guide for a fuller seasonal timeline).

Ambient temperature is a helpful clue here, not a strict diagnostic rule: VCA Animal Hospitals notes that natural brumation is closely tied to genuinely cool conditions, so a dragon that goes off food and gets sluggish while its enclosure and room stay at a normal, comfortably warm temperature is less likely to be brumating. Temperature alone doesn’t confirm or rule out illness, though — any appetite loss that’s prolonged or doesn’t fit the seasonal pattern is worth discussing with a reptile veterinarian regardless of room temperature.

Shedding causes a temporary dulling of skin color and sometimes mild irritability or reduced appetite in the day or two before old skin lifts, but it doesn’t typically cause the sustained black-beard or glass-surfing pattern seen with stress, and it resolves as soon as the shed completes.

Stress, by contrast, is usually tied to an identifiable trigger — a recent move, a new enclosure-mate, incorrect temperatures, overhandling — and tends to improve once that trigger is addressed, rather than resolving on a seasonal or shedding timeline.

If appetite loss and lethargy last beyond what fits any of these patterns, or show up alongside weight loss, respiratory signs, or discharge, treat it as a possible illness rather than any of the above.

bearded dragon stress signs

What Actually Causes Bearded Dragon Stress

Enclosure and environment: Undersized housing is a common and correctable cause — general veterinary husbandry guidance recommends an enclosure at least three times the dragon’s total body length, with two hiding spots (one warm, one cool) and a defined basking area (see our full bearded dragon enclosure size and setup guide for exact dimensions and setup).

Incorrect temperature gradients and inadequate UVB lighting are close behind; a dragon that can’t reach its preferred basking range or properly regulate day/night cycles is under chronic low-grade stress even without an obvious trigger.

Handling: Both too much handling and handling done incorrectly (grabbing rather than scooping, handling right after feeding, or handling a dragon that’s actively trying to retreat) can push a normally docile dragon into defensive behavior.

Social and territorial factors: Seeing its own reflection, or the presence of another dragon, can trigger territorial beard-darkening and aggression, since bearded dragons are naturally solitary-leaning animals outside of breeding.

Life-stage and hormonal factors: Breeding-season behavior in males and nesting-related restlessness in gravid females (covered next) are hormonally driven and distinct from ordinary environmental stress.

Illness and pain: Underlying disease — respiratory infection, parasites, or metabolic bone disease — produces stress-like signs as a symptom rather than a cause, which is exactly why signs that don’t resolve with husbandry fixes need veterinary evaluation rather than more troubleshooting at home.

Age Matters: Juveniles, Adults, and Gravid Females

A one-size-fits-all reading of stress signs misses real differences by life stage.

Juveniles are naturally more active and exploratory than adults — some pacing and investigating of enclosure boundaries is a normal part of a young dragon’s development rather than a reliable stress signal on its own. Juveniles also need more frequent calcium supplementation and faster-growing bodies mean husbandry mistakes show up faster, so persistent stress signs in a young dragon are worth correcting quickly.

Adults have a more stable behavioral baseline, which actually makes deviations more meaningful — a normally calm adult dragon that suddenly starts glass surfing or refusing food is a clearer signal than the same behavior in a juvenile.

Gravid (egg-carrying) females commonly show increased digging, restlessness, and reduced appetite in the days before laying eggs, which can look like stress or even illness to an owner unfamiliar with the pattern. This is a normal reproductive behavior tied to nest-site seeking, not a welfare problem by itself — though a female showing prolonged straining without successfully laying eggs (a condition called egg binding, or dystocia) does need prompt veterinary care.

Multi-Dragon Households: Cohabitation Stress

Veterinary guidance on housing multiple bearded dragons together is genuinely mixed. VCA Animal Hospitals notes that dragons can share a cage if space is sufficient and they get along, with the caveat that only one adult male should ever be present since adult males will fight.

The Merck Veterinary Manual takes a more cautious general position on reptile husbandry broadly, advising that ideally only a single species — and by extension, often a single individual — be kept per enclosure to minimize competition and stress. In practice, most cohabitation problems show up as one dragon consistently dominating the basking spot or food, tail-nipping, or one animal visibly losing condition compared to the other.

If you notice these signs, separate the dragons into individual enclosures rather than waiting to see if it resolves. Monitor each dragon’s appetite, weight, and basking behavior independently afterward — the subordinate animal often improves in activity and appetite once housed alone, which can help confirm that cohabitation was a factor. Recovery time varies by individual, though, and any dragon that doesn’t noticeably improve after separation should still be evaluated by a vet rather than assumed to just need more time.

Transport and Vet-Visit Stress

Car travel and unfamiliar environments are a common but under-discussed stress trigger. A secure, appropriately sized carrier with substrate the dragon is used to, a stable temperature (a towel-wrapped heat pack in cold weather, never direct sunlight through a car window in warm weather), and a short, direct trip all reduce the load.

Some glass surfing, darkened coloring, or reduced appetite in the 24-48 hours after a car trip or a vet visit is common and typically resolves on its own; it’s the same “new environment” stress response covered earlier, just condensed into a shorter window. If appetite hasn’t returned and activity hasn’t normalized within two to three days of returning home, treat it the same as any other persistent stress sign.

bearded dragon black beard stress

How to Calm a Stressed Bearded Dragon

Start with the environment, since incorrect temperature, humidity, or lighting is the most common underlying cause. Verify basking and cool-zone temperatures with an actual thermometer rather than judging by feel, confirm the UVB bulb is within the manufacturer’s recommended distance from the basking spot and hasn’t exceeded its replacement window, and check that the enclosure meets the minimum size and hide-spot guidance covered earlier. If a reflection or a cage-mate is the likely trigger, add a background to the glass or separate the dragons.

Reduce handling to short, calm sessions during a stress episode rather than skipping it entirely — brief, gentle interaction can help some dragons acclimate, while lengthy or forceful handling of an already-stressed animal usually backfires (our bearded dragon supliments tips for beginners guide covers proper technique). Offer food as usual rather than trying to entice with unusual treats (see our bearded dragon diet and feeding guide for feeding ratios by age), and make sure fresh water is available daily, since dehydration can compound stress-related appetite loss.

Tracking Whether It’s Working

Rather than relying on a general impression that your dragon “seems better,” track a few concrete markers day to day: how quickly it returns to basking after a disturbance, whether daily food offered is being eaten (and how much), and how often glass surfing happens per day. A simple daily log for a week is enough to show a real trend — steadily shortening recovery times and returning appetite are good signs that your fix is working, while flat or worsening numbers after several days of correct husbandry are a signal to involve a vet rather than keep adjusting on your own.

When to Contact an Exotic Veterinarian

How quickly to act depends on which signs you’re seeing, per Merck Veterinary Manual and VCA Animal Hospitals guidance on reptile illness.

Same-day emergency — don’t wait:

  • Open-mouth breathing that looks labored, wheezing, or nasal/mouth discharge or bubbles
  • Seizures or loss of muscle control
  • A gravid female straining to lay eggs without success
  • Sudden, significant weight loss

Contact a vet soon (within a few days):

  • Appetite loss that persists after temperature, lighting, and enclosure size are confirmed correct
  • Lethargy that doesn’t improve once husbandry is corrected
  • Swelling, unusual skin spots, or incomplete shedding with skin discoloration
  • Any sudden behavior change in a previously stable adult dragon

Common Mistakes Owners Make

Assuming every stress mark or darkened beard means serious emotional distress, when it’s often a normal temperature-regulation or social response that resolves on its own. Confusing brumation with illness (or the reverse) by not checking ambient temperature first. Increasing handling to “comfort” a stressed dragon, which frequently prolongs the stress response instead of shortening it. Waiting weeks on a cohabitation problem hoping the dragons “work it out,” rather than separating early. And treating appetite loss as automatically minor, when it’s one of the symptoms most likely to also indicate genuine illness.

Practical Examples

A newly purchased juvenile paces and glass-surfs for its first three days home, with a beard that darkens on and off. Temperatures check out correctly and the behavior fades by day four — normal adjustment, no action needed beyond patience.

An adult dragon that has eaten well for two years suddenly refuses food for over a week in mid-winter, with the room running around 65°F. Given VCA’s brumation guidance, this pattern (cool ambient temperature plus seasonal timing) points toward brumation rather than stress or illness, though a baseline vet check is still reasonable for an older dragon before assuming it.

Two adult dragons housed together for a month; one has stopped basking and lost visible body condition while the other looks fine. This is a cohabitation-stress pattern, not a shared-cause issue — separate immediately and monitor the subordinate dragon’s recovery.

FAQ

What does a black beard mean on a bearded dragon? 

It can indicate stress, but also temperature regulation, shedding, or a normal territorial/breeding display in males — context (does it happen constantly, or around triggers like other dragons) matters more than the color alone.

Are stress marks permanent? 

No. According to veterinary sources, they’re typically temporary and fade once the underlying temperature or environmental factor is corrected.

How long does it take a bearded dragon to adjust to a new home? 

It varies by individual, but many dragons show reduced stress signs within a few days to about a week when husbandry (temperature, UVB, enclosure size) is correct from the start. Some take longer, and signs that persist beyond two weeks are worth discussing with a vet.

Can stress make a bearded dragon sick? 

Indirectly, yes — the Merck Veterinary Manual notes environmental stress is a contributing factor in serious infections like septicemia in reptiles, which is why prolonged, unresolved stress shouldn’t be ignored.

Is glass surfing always a bad sign? 

Brief glass surfing during a home change or enclosure rearrange is common and usually temporary. Persistent daily glass surfing after the dragon has had time to settle points to an ongoing issue — usually enclosure size, temperature, or a reflection — that needs addressing.

How do I know if it’s brumation and not stress or illness? 

Ambient temperature is a useful clue, not a hard rule. Per VCA Animal Hospitals, natural brumation is closely tied to cooler conditions, so it’s less common in a home kept at a normal, comfortably warm temperature. But temperature alone can’t confirm or rule out illness — if your dragon is lethargic and off food, it’s worth a vet check regardless of room temperature, especially if it continues beyond a week or two.

Should I handle my bearded dragon more or less if it seems stressed? 

Less, and more gently — short, calm sessions rather than none at all, avoiding lengthy or forceful handling until the underlying cause is resolved.

Can two bearded dragons live together without stress? 

It’s possible with enough space and no more than one adult male, but veterinary opinion on cohabitation is mixed, and most owners see fewer stress-related problems housing dragons individually.

Written by the Pets Store Home Team — pet care writers and researchers who base exotic-pet guides on veterinary and academic sources rather than other blogs; every medical or husbandry claim above is cross-checked against a cited source (Merck Veterinary Manual, VCA Animal Hospitals, or a university veterinary teaching hospital) rather than stated from general knowledge. Last reviewed: September 2026


Conclusion

Most bearded dragon stress signs aren’t emergencies — they’re information. A darkened beard on day one in a new enclosure and a black beard that persists for two weeks are not the same event, even though they look identical in a photo. Sort what you’re seeing by how long it’s lasted and what else comes with it, rule out brumation and shedding before assuming stress, and reach for a reptile veterinarian only when signs are severe or simply won’t resolve with correct husbandry. That framework — not a longer list of symptoms — is what actually tells you what to do next.

Could Diet Be Part of the Problem?

Stress in bearded dragons isn’t always about enclosure setup or handling — diet imbalances can contribute too, particularly a diet too heavy in sugary treats and too light on proper greens. Our guide to what fruits bearded dragons can eat explains how to keep treats in proportion so they support rather than undermine your dragon’s overall health.

Diet Trouble Can Look Like Stress — Rule It Out First

Before assuming a stressed dragon is purely a behavioral or environmental issue, it’s worth double-checking the diet. Our guide on what fruits bearded dragons can safely eat covers feeding ratios and common mistakes that can leave a dragon looking off even when the enclosure setup is fine.

Dog DNA Test Kits: Accuracy, Cost, and What the Results Actually Mean

Dog DNA Test Kits: Accuracy, Cost, and What the Results Actually Mean

Written by the Pets Store Home Team — pet care writers and researchers focused on practical, well-sourced buying guides for prospective pet owners.

Quick Answer: A dog DNA test kit uses a cheek swab to identify your dog’s breed mix and, with more comprehensive kits, screen for genetic health risks. Top-tier tests from established labs are highly accurate for breed identification, though most companies’ own accuracy claims land around 90% and results for rare or poorly documented breeds are less precise. Expect to pay $70-130 for a basic breed ID test or $160-300+ for a kit that also includes health screening, with results back in 2-6 weeks.

Key Takeaways

  • Dog DNA tests work by comparing your dog’s genetic markers against a reference database of known breeds; the size and quality of that database directly affects accuracy.
  • Top-tier kits claim 98-99%+ accuracy for well-documented breeds, but most companies’ own figures land closer to 90% overall, meaning roughly one in ten results can be off.
  • Basic breed-ID-only kits run $70-130; kits that add health screening for genetic conditions typically cost $160-300+.
  • A clean health screening result doesn’t guarantee your dog will never develop a condition — these tests catch known genetic mutations, not every possible risk.
  • Swab technique matters: a 30-60 second cheek swab (60 seconds recommended) with no recent food, water, or toy-sharing with other dogs gives the most reliable sample.

Why Trust This Guide

This guide draws on veterinary-reviewed comparisons of leading dog DNA testing companies, manufacturer accuracy and database-size claims, and current 2026 pricing data across the category. Where a company’s own marketing claims outpace independently verifiable accuracy, we’ve noted the gap rather than repeating the claim uncritically.

How Dog DNA Tests Actually Work

A dog DNA test starts with a cheek swab: you gently rub a cotton swab against the inside of your dog’s cheek pouch and under the tongue for 30 to 60 seconds, then seal it in a tube and mail it to the company’s lab. Sixty seconds is the generally recommended swab time, since the most common reason a test comes back inconclusive is low DNA concentration in the sample, and a longer, more thorough swab reduces that risk substantially.

Once the lab receives the sample, it extracts your dog’s DNA and runs a process called genotyping, scanning for specific genetic markers and chromosomal patterns that correspond to known breeds and, in more comprehensive kits, known disease-linked mutations. Lab analysis and results typically take two to six weeks depending on the company, current lab volume, and how comprehensive the specific test is.

Breed Identification: How Accurate Is It Really?

Breed identification accuracy depends heavily on two things: how large and well-curated the company’s breed reference database is, and how well-documented your dog’s actual breed ancestry happens to be. The two most established names in the category, Wisdom Panel and Embark, claim more than 98% and 99% accuracy respectively for well-documented breeds, with Embark comparing over 200,000 biomarkers against a database of more than 350 breeds, and Wisdom Panel’s premium test screening against more than 430 breeds, the largest reference database currently available to consumers.

That said, it’s worth reading company-wide accuracy claims carefully: many companies in the category report accuracy closer to 90% overall, which still means roughly one in ten results contains an error. Results also tend to be noticeably less precise for rare, regional, or historically under-documented breeds (our guide to rare dog breeds covers several of these harder-to-identify types), sometimes displayed as a percentage range across several possible breeds rather than a single confident match.

The takeaway isn’t that these tests are unreliable, it’s that “accurate” isn’t a single fixed number across the whole category, and a bigger, better-documented reference database generally means a more trustworthy result.

Health Screening: What It Can and Can’t Tell You

Beyond breed identification, many of the more comprehensive kits also screen for genetic health markers, sometimes covering 200 or more known conditions, along with connecting you to genetic relatives of your dog in the company’s database. This can be genuinely useful for flagging inherited conditions common to certain breeds before symptoms appear, giving you and your vet a head start on monitoring or preventive care.

The important caveat is that a health screening result is not a diagnosis or a guarantee. Carrying a specific gene mutation doesn’t mean a dog will definitely develop the associated condition, and a clean result doesn’t mean a dog is free of all possible genetic risk, only that the specific, known mutations the test screens for weren’t detected.

These tests are a genetics snapshot based on current scientific knowledge, not a complete picture of your dog’s future health, and results should be discussed with a veterinarian rather than acted on alone, alongside the rest of your dog’s regular preventive care, including staying current on core vaccines and wellness checkups.

how does a dog dna test work

Embark vs. Wisdom Panel: How the Two Leaders Compare

Embark and Wisdom Panel are the two most established names in consumer dog DNA testing, and each has a genuine edge in a different area. Embark generally offers the larger health-screening panel and a bigger breed database, and it’s notably the only major company that also tests for dingo, coyote, wolf, and village dog ancestry, a detail that matters if you have a dog with an unusual or ambiguous background. Embark’s breed-ancestry accuracy claims run around 99%.

Wisdom Panel counters with a simpler swab process, breed-mix detail down to 1% of ancestry, turnaround in roughly two to three weeks, access to expert follow-up advice when a health concern is flagged, and it’s generally positioned as the more budget-friendly option of the two for owners who want solid breed and health information without paying for every add-on feature.

Neither company is a clear universal winner; the right choice depends on whether you value the largest possible database and wild-canine ancestry detection (Embark) or a faster, more budget-conscious test with strong core accuracy (Wisdom Panel).

Privacy: What Happens to Your Dog’s Genetic Data

Because these tests involve sending a biological sample to a private company and creating a permanent genetic profile, it’s worth reading the privacy policy before you buy rather than after. Key questions worth answering for any company you’re considering: does the company sell or share genetic data with third parties such as insurers or breeders, can you request deletion of your dog’s data and sample after testing, is the data used for aggregate research and can you opt out of that use, and how is the sample itself disposed of or stored after processing.

Policies vary meaningfully between companies and change over time, so checking the current policy directly on the company’s site is more reliable than relying on older reviews or marketing pages.

What a Dog DNA Test Costs

Pricing in this category splits fairly cleanly by what the test actually screens for. A standard breed-identification-only kit typically runs $70 to $130. Kits that add health screening, genetic trait testing (things like coat color genetics or expected adult weight), and more detailed ancestry reporting generally run $160 to $200, with some of the most comprehensive kits pushing past $300.

There’s no ongoing subscription requirement for a one-time test, though some companies offer optional add-on services like periodic relative-matching updates as your dog’s genetic relatives also get tested.

How to Get a Reliable Sample

Sample quality is the single biggest factor an owner actually controls in getting a usable result. Swab your dog’s inner cheek and under the tongue for a full 60 seconds using firm, steady pressure, avoid testing right after your dog has eaten, had water, or shared food, toys, or bowls with another dog (residual saliva from another animal can contaminate the sample), and follow the kit’s specific storage and mailing instructions exactly, since samples that sit too long before reaching the lab can degrade. A rushed 10-second swab is the most common owner-side mistake, and it’s an easy one to avoid.

When a DNA Test Is Actually Worth It

A dog DNA test tends to deliver the most genuine value in a few specific situations: satisfying real curiosity about a mixed-breed rescue’s ancestry, getting ahead of breed-linked health risks before they become symptomatic, informing training and exercise expectations based on likely working-breed traits, and in some cases supporting a veterinarian’s diagnostic reasoning when a dog presents with symptoms that map to a known breed-linked condition.

It’s a lower-value purchase for owners of a purebred dog with documented papers, where the ancestry answer is already known, though even purebred owners sometimes use health-screening kits purely for the genetic disease-risk information.

how accurate are dog dna tests

Common Mistakes Owners Make With DNA Test Results

A surprising number of the disappointments owners report with DNA tests come from how the results are interpreted rather than from the test itself. Treating a percentage-range breed match as a precise, guaranteed answer is one common mistake, when in reality lower-confidence matches are genuinely uncertain and should be read as an estimate.

Making major training, diet, or exercise decisions based solely on a breed guess, rather than on your actual dog’s observed size, temperament, and energy level, is another: breed tendencies are statistical patterns, not guarantees about an individual dog. And treating a clean health-screening result as a clean bill of health rather than as “no known mutations detected for the conditions we currently test for” can lead owners to skip health monitoring they’d otherwise do, which isn’t the intended use of the test.

Choosing a Kit: What Actually Matters

When comparing kits, prioritize the size and quality of the breed reference database over marketing claims about “highest accuracy,” since a larger, more rigorously validated database is the actual mechanism behind a more trustworthy result.

Check whether the company’s lab holds recognized accreditation (some leading labs carry accreditation such as ISO 17025 certification through recognized accrediting bodies), look at how many health conditions a screening panel actually covers if that matters to you, and factor in turnaround time if you want results before a specific event like a vet visit. Reading independent, vet-reviewed comparisons rather than relying solely on a company’s own site is worth the extra ten minutes before you buy.

Bottom Line

Dog DNA test kits have become genuinely useful tools for satisfying curiosity about a mixed-breed dog’s ancestry and for surfacing breed-linked genetic health risks early, with top-tier kits from established labs delivering high accuracy for well-documented breeds.

The realistic picture is more nuanced than the marketing: accuracy varies meaningfully between companies and drops for rare breeds, a clean health result isn’t a guarantee of future health, and sample technique genuinely affects whether you get a usable result at all. Choose a kit based on database size and lab accreditation rather than accuracy claims alone, swab carefully, and treat the results as one useful data point to discuss with your vet rather than a final verdict.

FAQ: Dog DNA Test Kits

How accurate are dog DNA tests?
Top-tier kits claim 98-99%+ accuracy for well-documented breeds, but many companies report closer to 90% overall accuracy, and results for rare or regional breeds are typically less precise.

How much does a dog DNA test cost?
Basic breed-identification-only kits run about $70-130. Kits that add health screening and detailed ancestry reporting typically cost $160-300 or more.

How long does it take to get results?
Most companies return results within two to six weeks of receiving your dog’s sample, depending on the lab and how comprehensive the test is.

Can a dog DNA test diagnose a health condition?
No. It can flag known genetic mutations linked to certain conditions, but carrying a mutation doesn’t guarantee the condition will develop, and a clean result doesn’t rule out every possible health risk. Always discuss results with a veterinarian.

What’s the most common reason a dog DNA test fails?
Low DNA concentration in the sample, usually from too short a swab. A full 60-second cheek swab significantly reduces the chance of an inconclusive result.

Is a DNA test worth it for a purebred dog with papers?
Less so for ancestry, since that’s already documented, but some purebred owners still use health-screening kits purely for genetic disease-risk information.

Which is better, Embark or Wisdom Panel?
Embark generally offers a larger breed and health database plus wild-canine ancestry detection; Wisdom Panel offers a simpler process, faster turnaround, and a more budget-friendly price. Neither is universally better — it depends on what you value most.

What happens to my dog’s DNA data after testing?
This varies by company. Check the current privacy policy for whether data is shared with third parties, used in aggregate research, and whether you can request deletion of the sample and profile.

how to stop a puppy from biting furniture

how to stop a puppy from biting furniture

How to Stop a Puppy From Biting Furniture

Furniture chewing isn’t really one problem — it’s teething, boredom, separation anxiety, or dental pain, all wearing the same disguise. The fix that works for a 4-month-old puppy losing baby teeth is not the fix that works for a bored adolescent, and neither of those is the fix for a dog with separation anxiety. Most advice treats furniture chewing as a single issue with one universal answer (more toys, a bitter spray), which is why so many owners try “everything” and still don’t see results.

This guide gives you the real, age-specific teething timeline from AKC, a straightforward way to tell teething apart from boredom or anxiety using ASPCA’s own diagnostic distinction, and the parts most guides skip entirely — crate management done properly, furniture-specific protection, and when chewing behavior actually needs a vet rather than another toy.

Quick Answer: Redirect, don’t punish — the moment you catch your puppy chewing furniture, calmly remove them from it and offer an appropriate chew item instead. Manage unsupervised time with a crate or gated area during the peak teething window (roughly 12–24 weeks, per AKC’s timeline). If the chewing happens only when your puppy is left alone, per ASPCA’s guidance that’s a sign of separation anxiety rather than ordinary teething or boredom, and needs a different approach.

Key Takeaways

  • Furniture chewing has distinct causes — teething, boredom, separation anxiety, dental pain, and occasionally pica — and each needs a different fix, not one universal tactic.
  • AKC’s teething timeline is specific: baby teeth finish coming in by 5–6 weeks, shedding and adult-teeth eruption run roughly 12–16 weeks onward, and all 42 adult teeth are typically in by 6 months.
  • ASPCA’s key diagnostic distinction: chewing that happens only when your dog is alone points to separation anxiety; chewing that happens whether you’re home or not is ordinary developmental chewing or boredom.
  • Deterrent sprays work best as one tool among several, not a standalone fix — ASPCA recommends daily application for 2–4 weeks alongside redirection and management.
  • Chewing non-food items specifically (not wood or toys) can signal pica, which AKC notes may have a nutritional or medical cause and warrants a vet visit.

In this guide: Why puppies actually chew furniture · The real teething timeline · Teething vs. boredom vs. anxiety vs. pain · Redirect instead of punish · Matching toys to stage and breed · Crate and space management · Furniture-specific protection · Exercise and enrichment · When to see a vet or trainer · Comparison table · Checklists · FAQ

Why Puppies Actually Chew Furniture

There are several distinct drivers behind furniture chewing, and treating them as one problem is the most common reason fixes don’t stick:

  • Teething discomfort — the dominant cause in puppies under 6–7 months, as baby teeth loosen and adult teeth push through.
  • Boredom or excess energy — chewing that happens regardless of whether you’re home, often in dogs past the peak teething window.
  • Separation anxiety — chewing (and often other signs like whining, pacing, or accidents) that occurs specifically when the dog is left alone, per ASPCA.
  • Dental or oral pain — a newer or sudden chewing habit in an adult dog can signal a dental problem rather than a behavioral one.
  • Pica — AKC defines this as repeated consumption of non-food items, which can have medical roots including nutritional deficiency, anemia, or parasites, alongside behavioral causes like boredom or compulsive disorder.

The Real Teething Timeline, Stage by Stage

Most advice says “puppies teethe for a few months” without specifics. AKC’s actual timeline is more useful for planning:

  • Weeks 2–4: Baby teeth begin emerging (your puppy is still with its mother/breeder at this stage).
  • Weeks 5–6: All baby teeth — around 28 of them — have typically come in, and breeders begin weaning onto soft food.
  • Weeks 12–16: This usually overlaps with when a puppy comes home with a new owner. Baby teeth start shedding and adult teeth emerge — this is generally the heaviest chewing window, and you may find small, rice-sized teeth around the house.
  • 6 months and older: All baby teeth should have fallen out and the full set of roughly 42 adult teeth should be in. If any baby teeth remain past this point, a vet may need to remove them.

Pet Care Tip: The 12–16 week window is when chew-toy needs change fastest — a toy your puppy happily gnawed at 10 weeks may be too soft to matter by 15 weeks as adult teeth come in with more force.

puppy chewing furniture teething

Is It Teething, Boredom, Anxiety, or Pain?

ASPCA’s guidance offers a genuinely useful diagnostic shortcut: does the chewing happen only when your dog is alone, or does it happen whether you’re home or not?

  • Happens whether you’re home or away, and your puppy is under ~7 months: almost certainly ordinary developmental chewing — teething or general puppy exploration.
  • Happens whether you’re home or away, in an older puppy or adult dog: more likely boredom or insufficient exercise/mental stimulation.
  • Happens specifically, or most intensely, when your dog is left alone, often alongside whining, pacing, drooling, or accidents: ASPCA identifies this pattern as characteristic of separation anxiety, not ordinary chewing.
  • Sudden new chewing habit in an adult dog, especially paired with bad breath, drooling, or favoring one side of the mouth: possible dental pain — see a vet before assuming it’s behavioral.
  • Chewing/eating non-food items specifically (fabric, plastic, drywall, dirt) rather than wood or toys: AKC flags this pattern as possible pica, which can have a medical cause and merits veterinary evaluation.

Redirect, Don’t Punish

Punishing furniture chewing after the fact doesn’t work, because your puppy can’t connect a delayed correction to something they did minutes ago — they just learn that you’re unpredictable. ASPCA’s recommended approach is simpler and more effective: say a calm interrupt word, remove your puppy from the item, and immediately hand them something they CAN chew, praising them once they take it.

Pet Care Tip: The swap has to be immediate — if there’s a gap between removing the furniture item and offering the toy, you lose the association your puppy needs to make.

Matching Chew Toys to Stage — and to Your Puppy’s Breed

Early teething (12–16 weeks) calls for softer rubber or rope toys that don’t hurt sore gums; as adult teeth finish coming in past 4–5 months, firmer rubber or frozen options hold up better to a stronger bite. Breed also matters more than most guides acknowledge: dogs bred for retrieving, high drive, or working roles (Labradors, terriers, herding breeds) are often more mouth-driven by temperament and typically need more frequent toy rotation and tougher, more engaging chew options — not just “a toy,” but enough variety to hold their interest.

A quick safety note: size toys to avoid choking risk, supervise anything like rawhide, and don’t assume a “durable” label on packaging matches your specific puppy’s chewing strength.

Crate and Space Management

This is the single most effective piece of furniture protection during peak teething, and it’s underused compared to deterrent sprays. ASPCA specifically recommends confining a dog to a small, safe space — a crate or puppy-proofed area — for periods when you can’t supervise, with appropriate chew toys provided inside. This isn’t punishment; it’s removing the opportunity for furniture damage during the exact window (roughly 12–24 weeks) when the urge is strongest and judgment is weakest.

Furniture-Specific Protection

Generic “keep them away from furniture” advice misses that different materials need different handling:

  • Wood legs and corners: furniture leg guards, or a cloth wrap lightly treated with a chewing deterrent.
  • Fabric/upholstery: washable throws or slipcovers over the arms and cushions most within reach during the peak chewing window.
  • Leather: test any bitter-tasting deterrent on a hidden patch first, since some formulations can stain or discolor leather.

ASPCA notes deterrent sprays work best applied daily for about 2–4 weeks alongside redirection and management — not as a standalone fix on their own.

Exercise and Mental Stimulation

Physical exercise addresses boredom-driven chewing by burning excess energy; puzzle feeders, short training sessions, and new experiences address the mental side specifically, which plain physical tiredness doesn’t always cover. ASPCA lists both physical exercise and mental stimulation (training, social visits) as core parts of managing destructive chewing.

When to See a Vet or Trainer

A general expectation: the chewing urge should noticeably decline as your puppy’s adult teeth finish coming in, around 6 months per AKC’s timeline. Reasonable reasons to get professional input sooner:

  • Destructive chewing hasn’t improved despite consistent redirection and management over several weeks.
  • Chewing happens specifically when your dog is left alone, alongside other stress signs — a trainer experienced with separation anxiety can help.
  • Chewing targets non-food items like fabric, plastic, or dirt — AKC recommends a full veterinary workup (physical exam, bloodwork, sometimes imaging) to rule out nutritional deficiency, anemia, parasites, or pain before treating it as purely behavioral.
  • Any baby teeth appear to still be present past 6 months — these sometimes need veterinary removal.

Practical Examples

A 4-month-old chewing table legs while you’re home: squarely in AKC’s 12–16 week peak-teething window — the fix is toy redirection plus crate management, not a behavioral intervention.

A puppy that only destroys furniture when left alone: matches ASPCA’s separation-anxiety pattern rather than ordinary teething, and calls for a different approach — often with a trainer’s input — rather than more chew toys.

An adult dog suddenly chewing furniture with noticeably bad breath: a pattern worth taking to a vet first, since AKC and general veterinary guidance both flag sudden behavior changes with physical symptoms as a possible medical issue rather than a training gap.

Common Mistakes

  1. Punishing after the fact instead of redirecting in the moment, which doesn’t teach anything and can damage trust.
  2. Relying on deterrent spray alone without also managing access — ASPCA frames spray as one tool among several, not a fix by itself.
  3. Assuming it’s “just teething” past 7–8 months, when AKC’s timeline suggests the urge should already be declining by then.
  4. Leaving a puppy loose and unsupervised during the 12–24 week peak window instead of using a crate or gated space.
  5. Ignoring a pattern where chewing only happens when alone, missing an early separation-anxiety signal.

Editor’s Insights

  • The toy that worked at 10 weeks may not hold up by 15 weeks — plan to size up as adult teeth come in, not just when the old toy falls apart.
  • A crate used for management isn’t a punishment tool — per ASPCA, it’s a standard, recommended part of preventing destructive chewing.
  • If your puppy is going after non-wood, non-toy objects specifically, that’s worth mentioning to your vet by name (not just “chewing a lot”) — AKC notes this pattern can point toward pica with an underlying medical cause.
why does my puppy chew furniture

Decision Framework: Which Fix Matches Your Puppy’s Chewing?

  1. Under ~7 months, chewing whether you’re home or away → teething protocol (toys matched to stage + crate management).
  2. Older puppy/adult, chewing whether you’re home or away, seems restless → exercise and enrichment focus.
  3. Chewing only or mostly when left alone, with other stress signs → possible separation anxiety — consider a trainer.
  4. Sudden onset in an adult dog, or targeting non-toy/non-wood objects → vet visit first, before assuming it’s behavioral.

Teething Stage Reference Table

Stage

Approximate age

What’s happening

Best toy type

Early

2–6 weeks

Baby teeth emerging and finishing (~28 total)

N/A — still with breeder

Peak

12–16 weeks

Baby teeth shedding, adult teeth emerging — heaviest chewing urge

Soft rubber, rope, frozen options for sore gums

Late

4–6 months

Adult teeth continuing to come in, bite force increasing

Firmer rubber, more durable chews

Settled

6 months+

All ~42 adult teeth typically in; urge declining

Standard durable toys, rotation less critical

Puppy-Proofing Checklist

  • Crate or gated puppy-safe area set up for unsupervised periods
  • Furniture leg guards on exposed wood legs/corners
  • Washable throws or slipcovers on vulnerable upholstery
  • Chewing deterrent tested on a hidden patch before full application
  • Toy rotation stocked for current teething stage

“Is This Normal?” Checklist

  • Puppy is under 7 months (teething is a reasonable default explanation)
  • Chewing happens whether you’re home or away (points away from separation anxiety)
  • Target items are wood/toys, not fabric, plastic, or dirt specifically (points away from pica)
  • No bad breath, drooling, or sudden onset in an adult dog (points away from dental pain)

If any of these don’t check out, that’s a reasonable moment to involve a vet or trainer rather than continuing with toys and sprays alone.

FAQ

At what age do puppies stop chewing furniture? 

Per AKC’s timeline, the heaviest chewing urge runs roughly 12–16 weeks as adult teeth emerge, and it should noticeably decline once all adult teeth are in, around 6 months — though individual puppies vary.

How can I tell if it’s teething or separation anxiety? 

ASPCA’s distinction is whether chewing happens regardless of your presence (teething/boredom) or specifically when your dog is left alone (separation anxiety), often alongside whining, pacing, or accidents.

Do bitter sprays actually work? 

They’re one useful tool, not a standalone fix — ASPCA recommends daily application for 2–4 weeks combined with redirection and management, not spray alone.

Is crate training necessary to stop furniture chewing? 

It’s one of the most effective tools during peak teething — ASPCA recommends confining a dog to a safe space with appropriate toys during unsupervised time, rather than leaving them loose near furniture.

Can diet affect a puppy’s chewing behavior? 

Chewing wood and toys is normal development, but chewing non-food items specifically (pica) can have a nutritional or medical cause according to AKC, and is worth a vet visit if you notice this pattern.

Are some breeds worse chewers than others? 

Breeds bred for retrieving, working, or herding roles tend to be more mouth-driven and often need more frequent toy rotation and tougher options to stay satisfied.

What if my adult dog suddenly starts chewing furniture? 

A new chewing habit in an adult dog, especially with bad breath or drooling, is worth a vet visit to rule out dental pain before assuming it’s behavioral.

Is it safe to give my puppy frozen chew toys? 

Frozen rubber or rope toys are commonly used to soothe sore gums during peak teething — just supervise use and size the toy appropriately to avoid choking risk.

Individual puppies vary in teething pace and temperament; treat the timeline and diagnostic patterns above as general guidance, not a substitute for a vet or certified trainer’s assessment of your specific dog.

Written and reviewed by the Pets Store Home editorial team. This article is for general information only and is not a substitute for veterinary or professional training advice. If chewing is sudden, targets non-toy objects, or occurs alongside other stress signs, consult a vet or certified trainer. Last reviewed: September 2026.

Conclusion

Furniture chewing responds to the right diagnosis, not the most toys. A puppy in AKC’s 12–16 week teething peak needs redirection and crate management; a dog that only chews when left alone, per ASPCA’s guidance, needs a different plan entirely; and a sudden change in an adult dog’s chewing habits deserves a vet visit before anything else. Match your approach to which of these is actually happening, and give the fix a few consistent weeks — most puppies show real improvement well before their adult teeth are fully in at 6 months.